Einhell TE-CD 18/2 Li (Model 4513830)
Einhell TE-CD 18/2 Li Cordless Drill Power X-Change Kit User Manual
Model: TE-CD 18/2 Li (4513830)
1. Introduzione
This manual provides essential information for the safe and effective operation, maintenance, and troubleshooting of your Einhell TE-CD 18/2 Li Cordless Drill Power X-Change Kit. Please read this manual thoroughly before using the product and keep it for future reference.
The Einhell TE-CD 18/2 Li is a powerful, robust, and versatile cordless drill designed for demanding screwing and drilling tasks in various materials. It is part of the Einhell Power X-Change family, ensuring compatibility with other Power X-Change batteries and chargers.

Image 1.1: Einhell TE-CD 18/2 Li Cordless Drill Kit components.
2. Informazioni di sicurezza
Always observe the following safety precautions to prevent electric shock, injury, and fire:
- Portate equipaggiamenti di prutezzione individuale (DPI) adatti cum'è occhiali di sicurezza, prutezione acustica è guanti.
- Assicuratevi chì l'area di travagliu hè ben illuminata è libera da ostaculi.
- Mantene i zitelli è i passanti luntanu mentre operanu l'utillita.
- Ùn operate micca l'utensili elettrichi in atmosfere splusive, cum'è in presenza di liquidi inflammabili, gasi o polveri.
- Scollegate sempre a batteria prima di fà qualsiasi aghjustamentu, cambià accessori o almacenà l'utensile.
- Use only Einhell Power X-Change batteries and chargers with this tool.
- Ùn espone micca l'arnese o a batteria à a pioggia o à e cundizioni umide.
- Evite l'iniziu accidentale. Assicuratevi chì l'interruttore hè in a pusizione off prima di inserisce a batteria.
3. Cuntenutu di u pacchettu
The Einhell TE-CD 18/2 Li Cordless Drill Power X-Change Kit typically includes the following items:
- 1 x Einhell TE-CD 18/2 Li Cordless Drill-Driver
- 2 x 1.5 Ah Power X-Change Lithium-Ion Batteries
- 1 x Power X-Change Fast Charger
- 1 x ganciu per cintura
- 1 x Plastic Carrying Case
Please check that all items are present and undamaged upon unpacking. If any items are missing or damaged, contact your retailer.
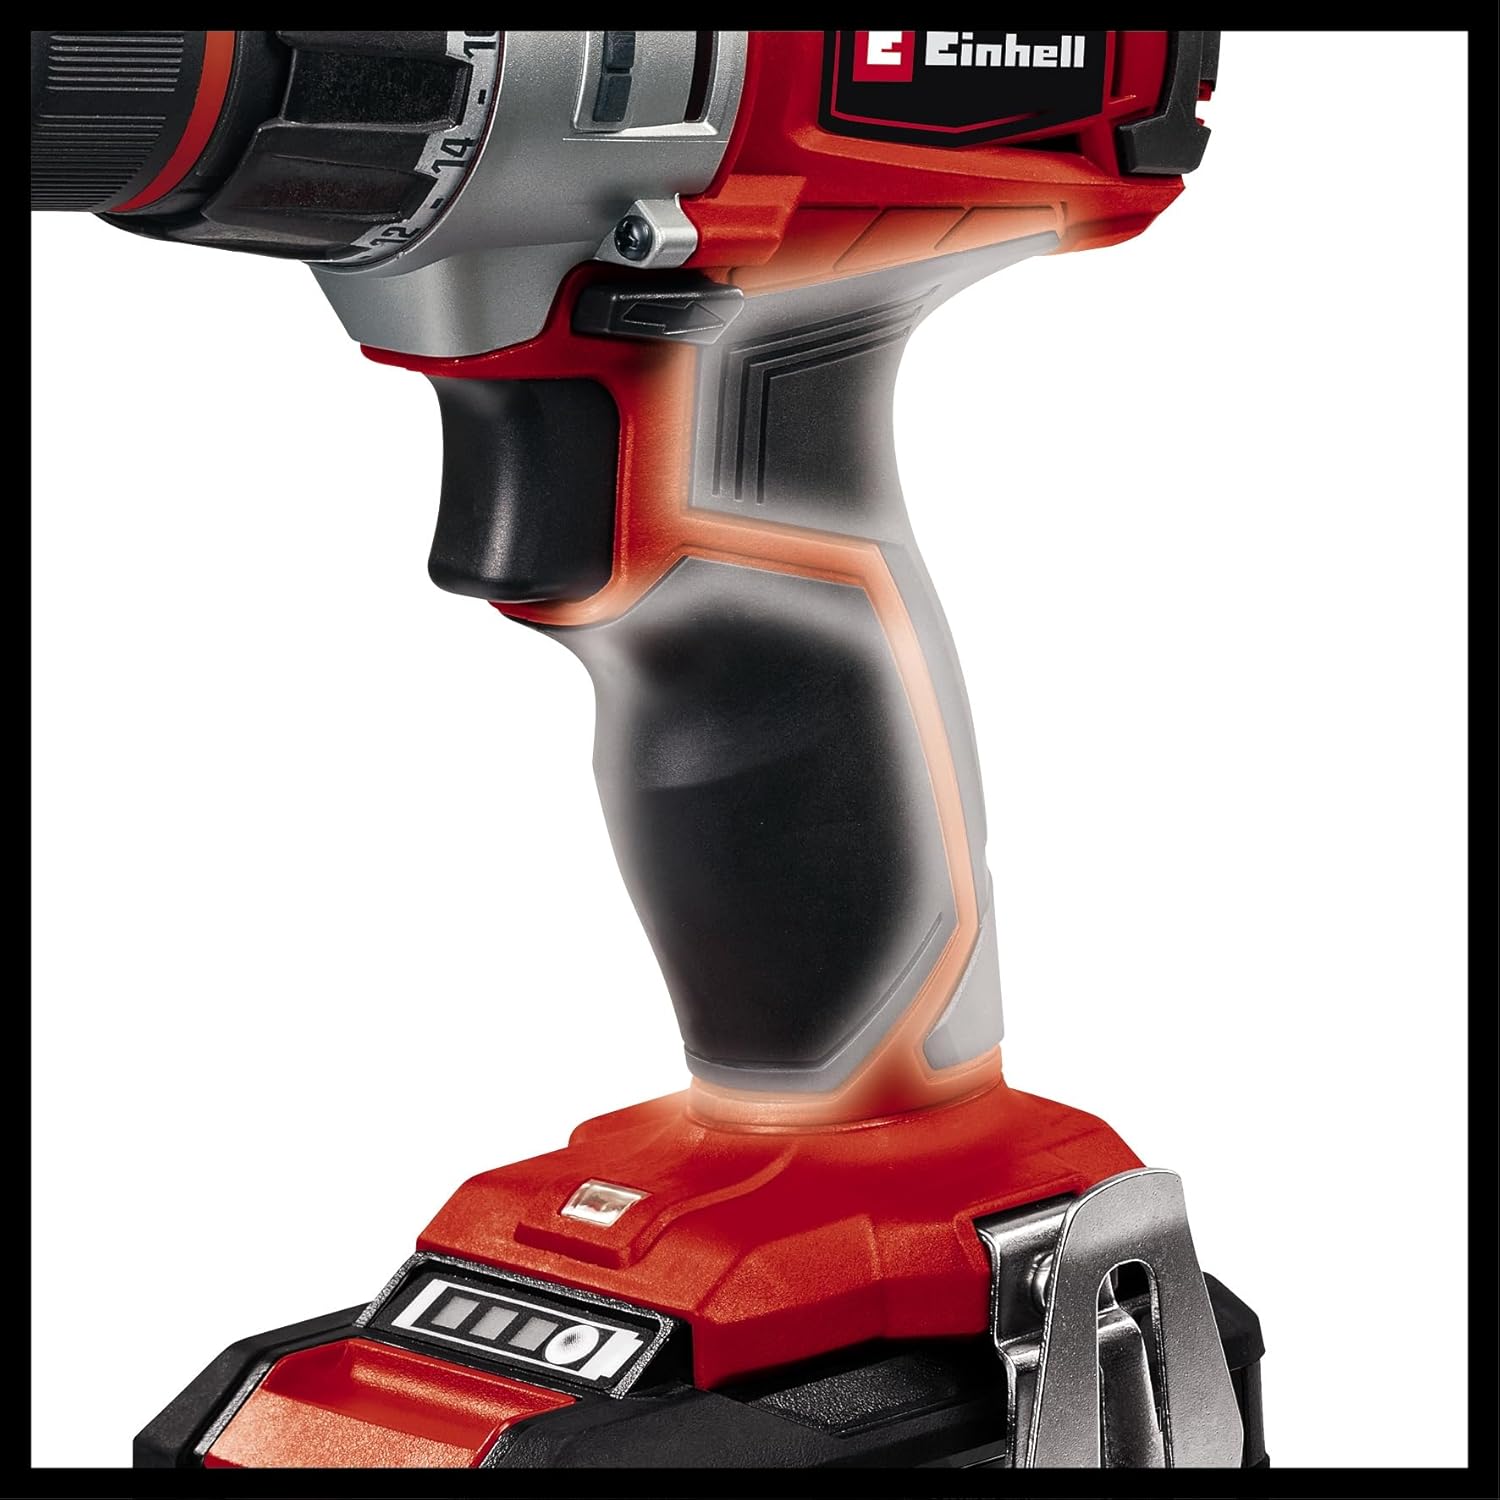
Image 3.1: All components included in the kit.
4. Setup
4.1 Caricà a Batteria
Before first use, fully charge the battery pack. The charger is designed for Einhell Power X-Change batteries only.
- Inserite a batteria in u caricatore. Assicuratevi chì si sente un clic in u so postu.
- Plug the charger into a suitable power outlet (120V AC, 60Hz).
- The charging indicator light on the charger will show the charging status. Refer to the charger's specific manual for detailed light indications.
- Una volta cumpletamente carica, scollegate u caricatore da a presa di corrente è cacciate a batteria.
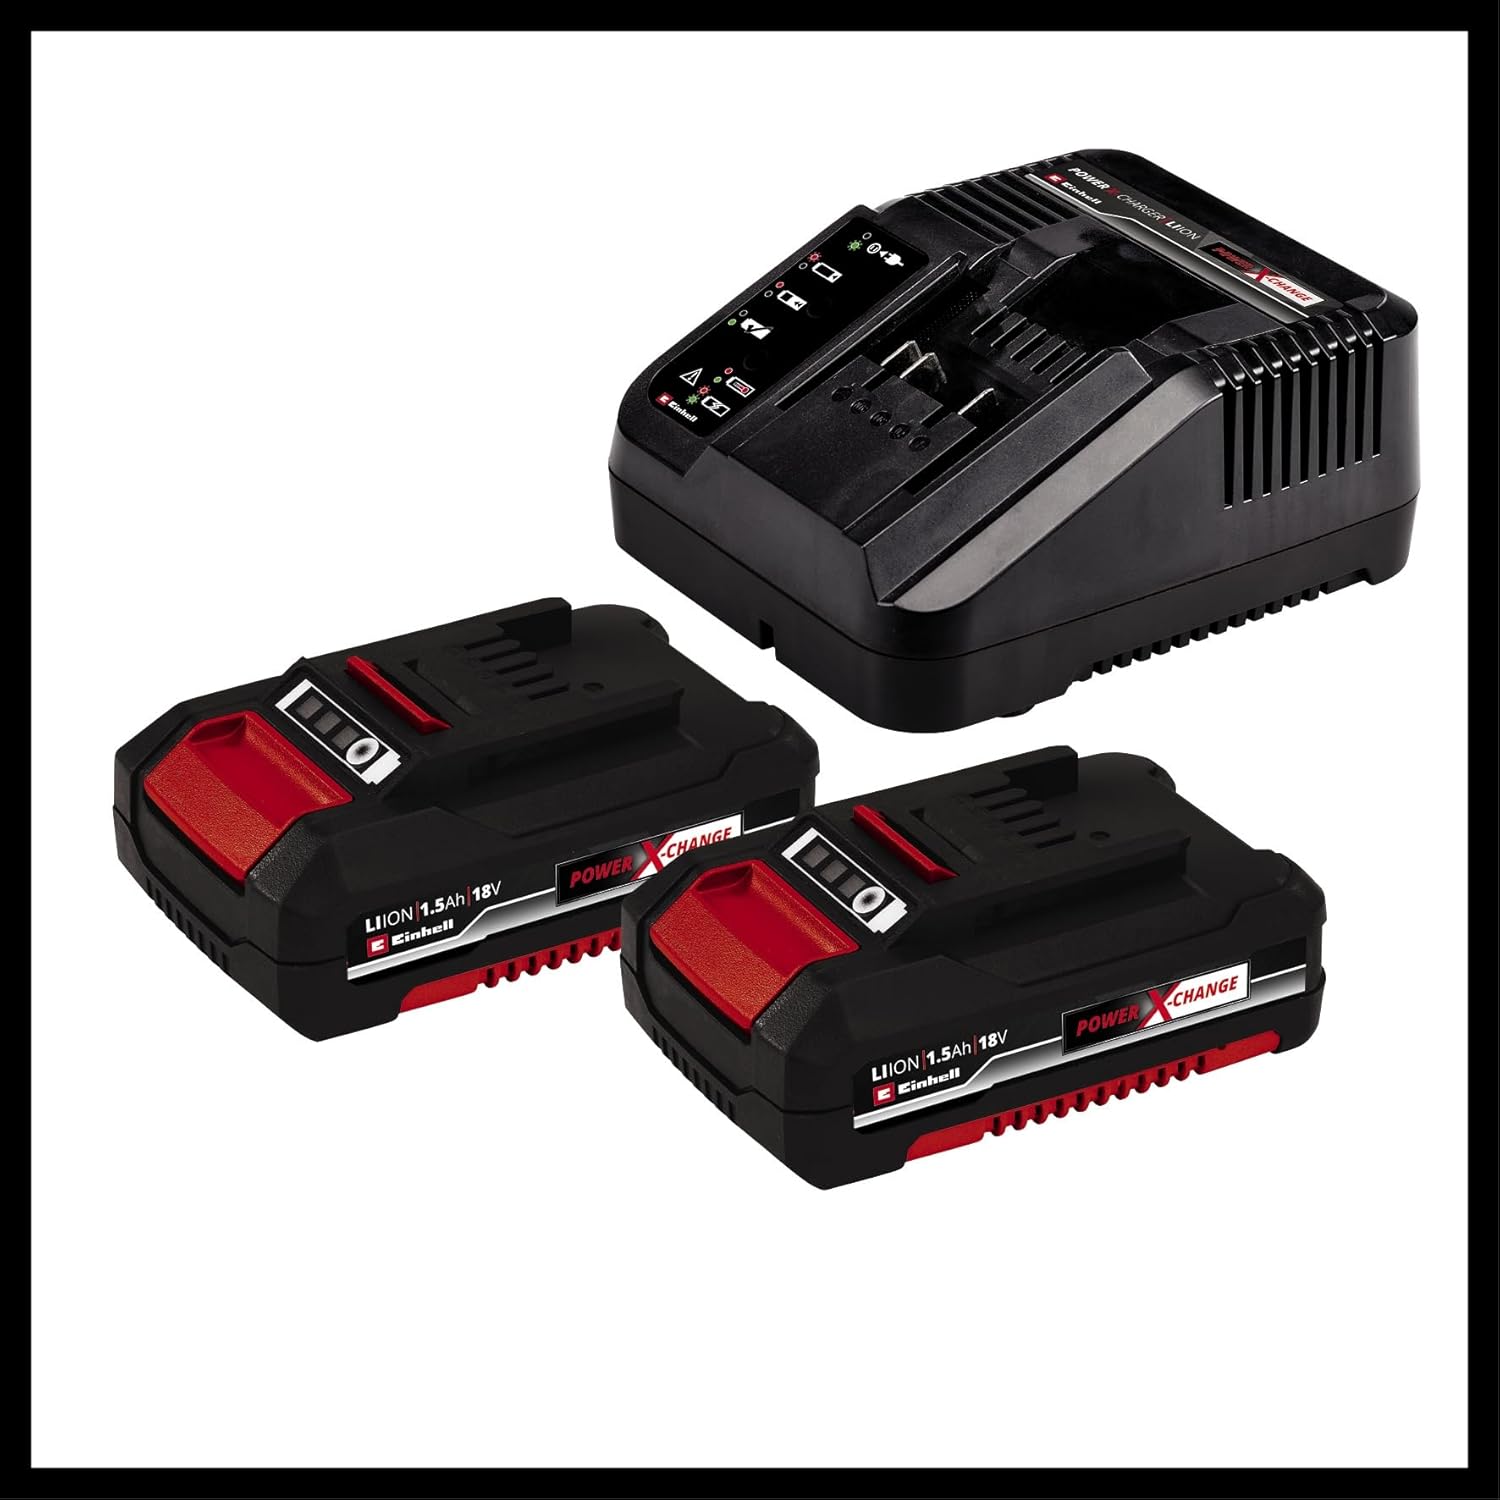
Image 4.1: Einhell Power X-Change batteries and charger.
4.2 Installazione di u Pack Batterie
Per installà a batteria:
- Allineate u pacchettu di batterie cù u portu di batteria in fondu à u manicu di u trapanu.
- Fate scorrere u pacchettu di batterie in u portu finu à chì si sente un clic in modu sicuru in u so postu.
To remove the battery pack, press the release button(s) on the sides of the battery and slide it out.
4.3 Attaching/Changing Drill Bits
The drill features a quick-change chuck for easy bit changes.
- Assicuratevi chì u trapanu sia spento è chì a batteria sia rimossa per sicurezza.
- Girate u mandrinu in sensu antiorariu per apre e ganasce.
- Inserite cumpletamente a punta di u trapano o a punta di u cacciavite in u mandrinu.
- Girate u mandrinu in sensu orariu per stringhje bè e ganasce intornu à a punta. Stringhje bè à manu.
5. Upirari lu Drill
5.1 Accensione / spegnimentu
The drill is activated by pressing the trigger switch. The speed is variable depending on how far the trigger is pressed.
- To start: Press the trigger switch.
- To stop: Release the trigger switch. The quick-stop function will rapidly halt the chuck rotation.

Image 5.1: Proper use of the cordless drill.
5.2 Rotazione avanti/indietro
A slide switch located above the trigger controls the direction of rotation:
- Slide left for forward rotation (for drilling and tightening screws).
- Slide right for reverse rotation (for loosening screws).
- Center position locks the trigger for safety during transport or bit changes.
5.3 Speed Settings (2-Speed Gearbox)
The drill features a 2-speed gearbox for optimal performance in different applications:
- Gear 1 (Low Speed, High Torque): Ideal for heavy-duty screwing and drilling large holes in tough materials.
- Gear 2 (High Speed, Lower Torque): Suitable for fast drilling in wood, plastic, and light metals, and for smaller screws.
To change gears, slide the gear selector switch on top of the drill. Ensure the drill is stopped before changing gears to prevent damage.

Image 5.2: Key features: High Power, Drill/Screw, 2 Gears.
5.4 Ajustamentu di a coppia (impostazione di a frizione)
The torque adjustment ring allows you to set the desired torque for screwing applications. This prevents over-tightening screws and damaging the workpiece or screw head.
- Rotate the torque adjustment ring to select a setting from 1 to 21. Lower numbers provide less torque, higher numbers provide more.
- U simbulu di perforazione setting bypasses the clutch for maximum torque, suitable for drilling.
- Start with a lower torque setting and increase it as needed until the screw is driven flush without stripping.
5.5 Luce di travagliu LED
The integrated LED work light illuminates the work area when the trigger is pressed, improving visibility in dimly lit spaces.

Image 5.3: LED work light and battery charge indicator.
5.6 Ergonomic Design and Belt Clip
The drill features an ergonomic soft grip handle for comfortable and secure handling during extended use. A convenient belt clip allows for easy carrying and quick access while working.
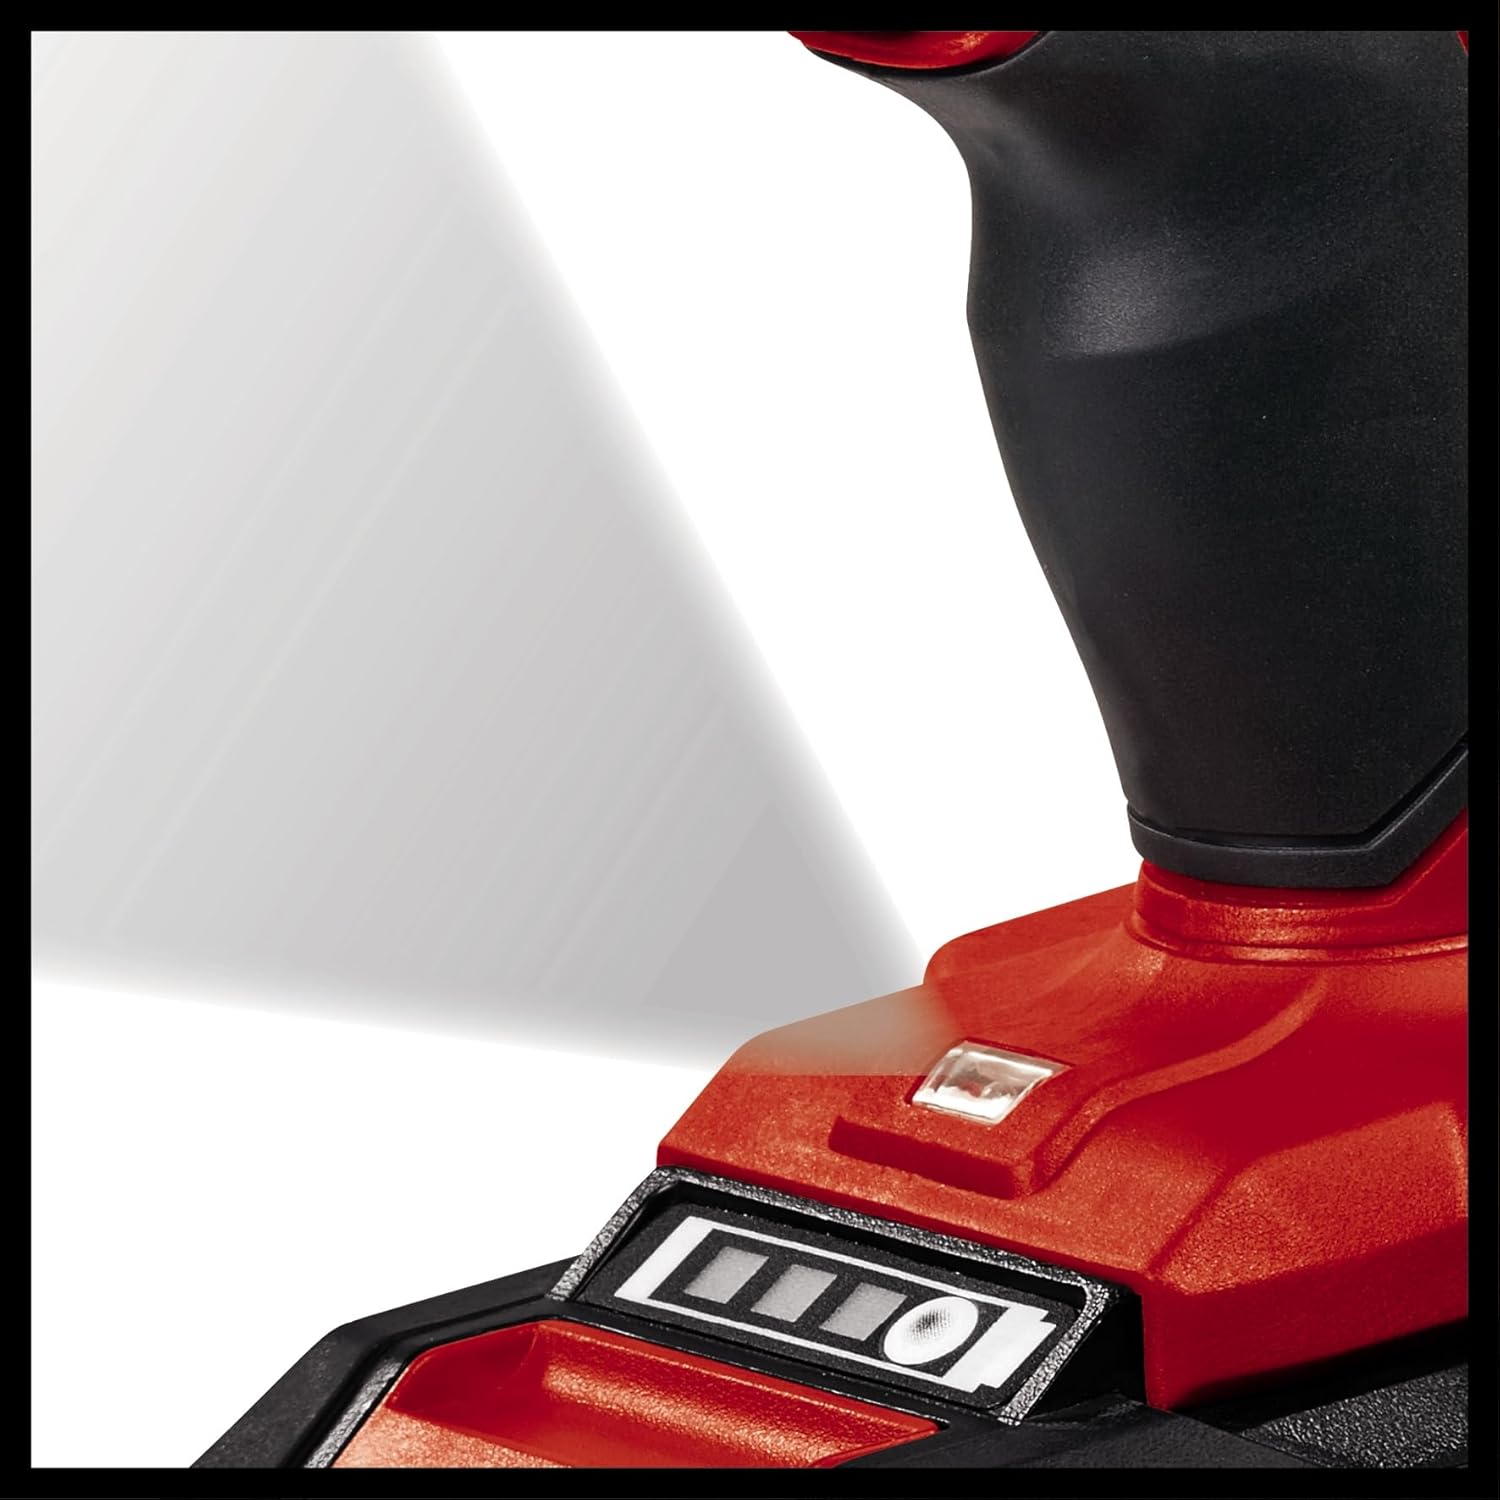
Image 5.4: Ergonomic soft grip handle for comfortable use.
6. Mantenimentu
Una manutenzione regulare assicura a longevità è e prestazioni ottimali di u vostru trapano.
- Pulizia: Keep the ventilation openings clean and free from dust. Use a soft, damp pannu per asciugà l'arnese. Ùn aduprate micca prudutti chimichi aggressivi o detergenti abrasivi.
- Conservazione: Store the drill, batteries, and charger in a dry, cool place, away from direct sunlight and moisture. Use the provided carrying case for protection.
- Cura di a batteria: Store batteries at room temperature and partially charged (around 50%) if storing for extended periods. Do not store fully discharged batteries.
- Ispezione: Periodically inspect the chuck, power cord (of the charger), and housing for any signs of damage. Do not use the tool if any part is damaged.
7. Risoluzione di prublemi
| Prublemu | Causa Possibile | Soluzione |
|---|---|---|
| U trapanu ùn principia micca. | Batteria micca inserita currettamente o scarica. Bloccu di u grillettu attivatu. | Ensure battery is fully inserted and charged. Disengage the forward/reverse switch from the center (locked) position. |
| Putenza o velocità ridutta. | Battery low. Overload. | Recharge battery. Reduce pressure on the tool or use a lower gear setting. |
| U mandrinu ùn tene micca bè a punta. | Mandrinu micca strettu abbastanza. U gambu di a punta hè sporcu o dannighjatu. | Stringhje bè u mandrinu. Pulite o rimpiazzate a punta. |
| Surriscaldamentu. | Usu intensu cuntinuu. Ventilazione bluccata. | Lasciate chì l'arnese si rinfreschi. Eliminate ogni ostruzione da l'aperture di ventilazione. |
8. Specificazioni
| Feature | Specificazione |
|---|---|
| Mudellu | TE-CD 18/2 Li (4513830) |
| Voltage | 18 V |
| Tipu di batterie | Lithium-Ion (Power X-Change) |
| Capacità batterie | 1.5 Ah (x2 incluse) |
| Velocità à vuoto (marcia 1) | 0-350 RPM |
| Velocità à vuoto (marcia 2) | 0-1250 RPM |
| Max. Torque | 44 Nm |
| Impostazioni di coppia | 21 + Drill |
| Tipu Chuck | Chuck senza Chjave |
| Dimensioni di u produttu (L x W x H) | 12.99" x 3.94" x 13.11" (circa) |
| Pesu di l'articulu | 8.38 lbs (circa) |

Image 8.1: Internal gear mechanism for powerful performance.
9. Garanzia è Support
Einhell products are manufactured to high quality standards and are subject to strict quality controls. This product is covered by a manufacturer's warranty. Please refer to the warranty card included with your product for specific terms and conditions, including warranty period and coverage details.
For technical support, spare parts, or warranty claims, please contact Einhell customer service. Contact information can typically be found on the Einhell official websitu o nantu à a carta di garanzia.
You can also visit the official Einhell website for more information and product registration: www.einhell.com
Ask a question about this manual
Ask about setup, troubleshooting, compatibility, parts, safety, or missing instructions. Manuals+ will review the question and use this page’s manual context to help answer it.