1. Introduzione
Grazie per l'acquistuasing the Generic Stick Corded Vacuum Cleaner and Mop All in One. This appliance is designed to provide efficient cleaning for various hard floor surfaces by combining vacuuming and mopping functions. Please read this manual thoroughly before operating the device to ensure safe and correct usage, and retain it for future reference.
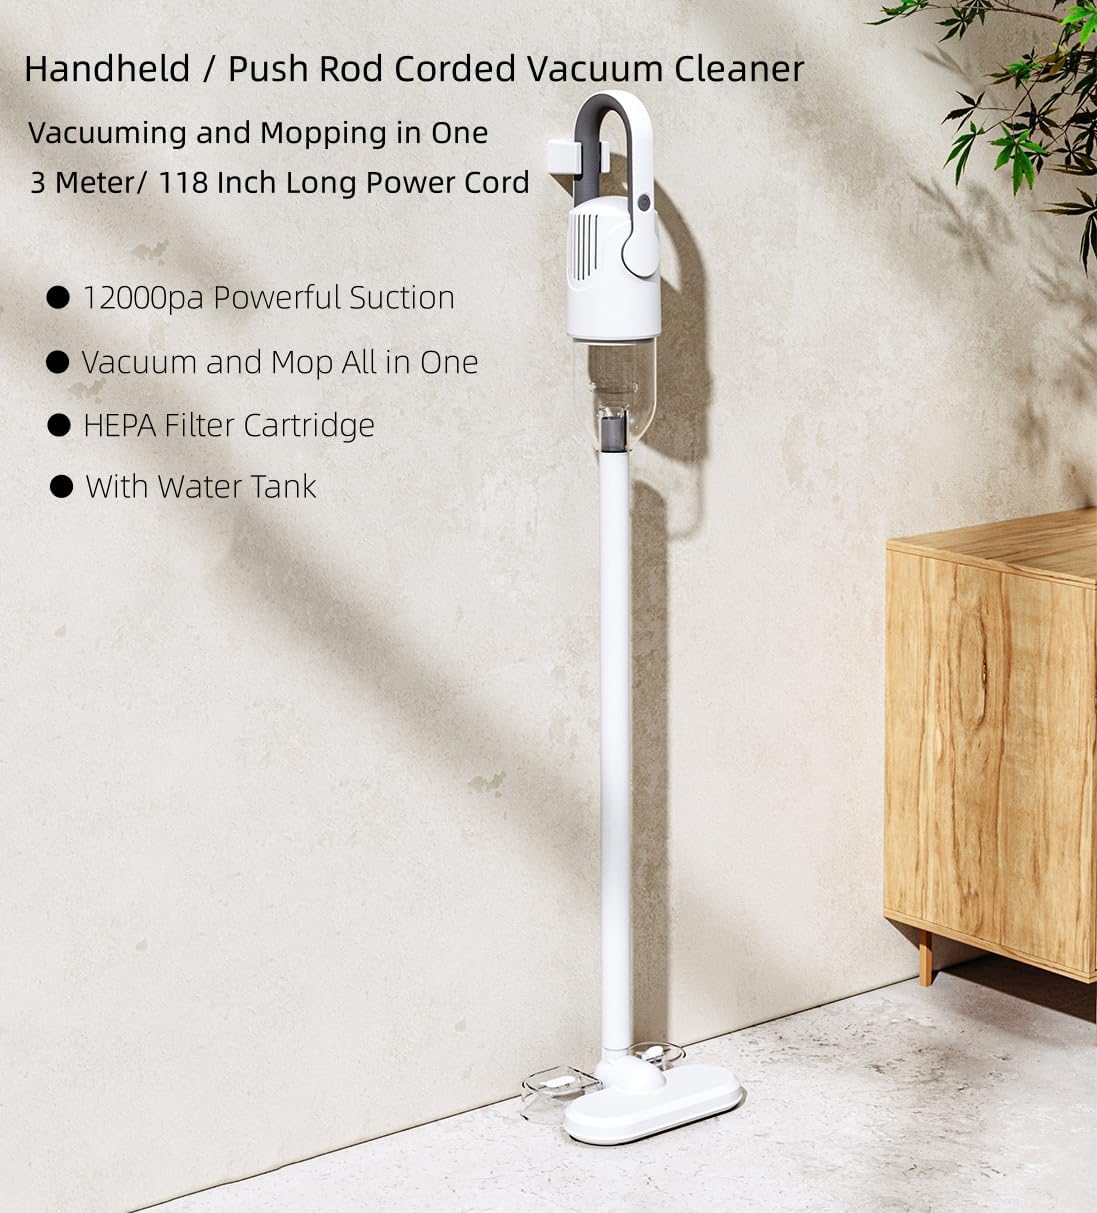
Image 1.1: The Generic Stick Corded Vacuum Cleaner and Mop All in One, showcasing its upright design and integrated features.
2. Istruzzioni di sicurità
Segui sempre e precauzioni di sicurezza basiche quandu aduprate apparecchi elettrichi per riduce u risicu d'incendiu, scossa elettrica o ferite.
- Leghjite tutte e struzzioni prima di l'usu.
- Do not use outdoors or on wet surfaces. This appliance is designed for indoor use on hard floors.
- Ùn lasciate micca aduprà l'apparechju cum'è ghjocu. Una attenzione stretta hè necessaria quandu hè aduprata da o vicinu à i zitelli.
- Aduprà solu cum'è descrittu in stu manuale. Aduprate solu l'attachementi cunsigliati da u fabricatore.
- Ùn aduprate micca cù un cordone o plug dannatu. Se l'apparechju ùn funziona micca cum'è duverebbe, hè statu cascatu, dannatu, lasciatu fora, o cascatu in acqua, rinvià à un centru di serviziu.
- Ùn tirate o portate cù u cordone, aduprate u cordone cum'è manicu, chjude una porta nantu à u cordone, o tirate u cordone intornu à bordi o anguli affilati. Ùn fate micca passà l'apparechju nantu à u cordone. Mantene u cordone luntanu da e superfici riscaldate.
- Ùn scollegate micca tirà u cordone. Per disinserisce, pigliate u plug, micca u cordone.
- Ùn manighjà micca u plug o l'apparechju cù e mani bagnate.
- Ùn mette micca ughjettu in aperture. Ùn aduprate micca cù qualsiasi apertura bluccata; Mantene senza polvera, pelucchi, capelli, è tuttu ciò chì pò riduce u flussu d'aria.
- Mantene i capelli, i vestiti sciolti, i dita è tutte e parti di u corpu luntanu da aperture è parti in muvimentu.
- Spegne tutti i cuntrolli prima di scollega.
- Aduprate cura extra durante a pulizia di e scale.
- Ùn aduprate micca per piglià liquidi infiammabili o combustibili, cum'è a benzina, o aduprate in spazii induve ponu esse prisenti.
- Ùn pigliate micca qualcosa chì brusgia o fuma, cum'è cigarettes, fiammiferi o cendri caldi.
- Ùn aduprate micca senza tazza di polvera è / o filtri in u locu.
- Always disconnect from electrical outlet before connecting or disconnecting hose, or any other accessories.
- Mantene l'apparechju in casa in un locu frescu è seccu.
3. Cuntenutu di u pacchettu
Carefully unpack your new vacuum cleaner and check that all items are present and in good condition. If any items are missing or damaged, please contact customer support.
- Host body (Main Unit)
- Floor brush (with integrated water tank)
- Long Flat suction nozzle
- Brush suction nozzle
- Water tank (for floor brush)
- Rag (mop pad)
- Manuale d'usu
4. Produttu Finituview
Familiarize yourself with the main components of your vacuum cleaner.

Image 4.1: Illustration of the main unit and included cleaning attachments.
Componenti principali:
- Unità principale: Contains the motor, dustbin, and handle.
- Bacchetta di Prolungazione: Connects the main unit to the floor brush or other attachments.
- Spazzola per pavimenti: The primary cleaning head for floors, featuring a water tank for mopping.
- Filtru HEPA: Located within the dustbin, captures fine dust and allergens.
- Cordone d'alimentazione: A 3-meter (118-inch) cord for continuous power.
Allegazioni:
- Long Flat Suction Nozzle: Ideal for reaching into narrow gaps, crevices, and corners.
- Brush Suction Nozzle: Suitable for cleaning delicate surfaces, upholstery, curtains, and removing pet hair.
5. Setup
5.1 Assemblea
- Connect the Extension Wand: Insert the extension wand firmly into the main unit until it clicks into place.
- Attaccate a spazzola per pavimenti: Connect the floor brush to the other end of the extension wand, ensuring it is securely fastened.
- Attach Water Tank and Rag (for mopping): If you intend to mop, attach the water tank to the floor brush and secure the mop rag to the bottom of the water tank.
5.2 Riempimentu di u Tank d'acqua
- Detach the water tank from the floor brush.
- Aprite u tappu di u cisterna d'acqua.
- Fill the tank with clean water. A small amount of floor cleaning solution or disinfectant can be added if desired (do not use corrosive liquids or excessive foam-producing detergents).
- Close the cap securely and reattach the water tank to the floor brush.
5.3 Cunnessione di putenza
Unwind the power cord and plug it into a standard electrical outlet. Ensure the cord is not tangled or obstructed during operation.
6. Operating Instructions
6.1 Accensione / spegnimentu
Press the power button located on the main unit handle to turn the vacuum cleaner on. Press it again to turn the appliance off.
6.2 Vacuuming
For dry vacuuming, simply turn on the appliance and move the floor brush over the desired surface. The powerful 12000Pa suction will effectively pick up dust, dirt, and debris.
6.3 Asciugà
If the water tank is filled and the mop rag is attached, the appliance will automatically dispense water to keep the mop pad wet as you clean. This allows for simultaneous vacuuming and mopping.

Image 6.1: Close-up of the floor brush with the integrated water tank, illustrating the wet mopping function.
6.4 Combined Vacuuming and Mopping
The design allows for both functions to occur simultaneously. As you vacuum, the mop pad will clean the floor, providing a one-step cleaning solution for hard surfaces.
6.5 Manuvra
The floor brush features a flexible joint allowing 180° left and right rotation and 90° front and rear rotation. This enables easy navigation around furniture and access to hard-to-reach areas. The slim design also allows cleaning under furniture.
6.6 Usendu l'allegati
To use the long flat suction nozzle or brush suction nozzle, detach the extension wand from the floor brush and connect the desired attachment directly to the main unit or the extension wand for handheld cleaning. This is ideal for cleaning sofas, car interiors, curtains, and high areas.
7. Mantenimentu
Una manutenzione regulare assicura prestazioni ottimali è allunga a durata di vita di u vostru aspiratore.
7.1 Svuotà u bidone di a spazzatura
- Assicuratevi chì l'apparechju hè scollegatu.
- Truvate u buttone di liberazione di u bidone di a polvera nantu à l'unità principale.
- Appughjà u buttone per staccà u bidone di a polvera.
- Svuota u cuntenutu in un contenedoru.
- Riattaccate bè u bidone di a polvera.
7.2 Pulizia di u filtru HEPA
The HEPA filter should be cleaned regularly to maintain suction power and air quality. It is washable and reusable.
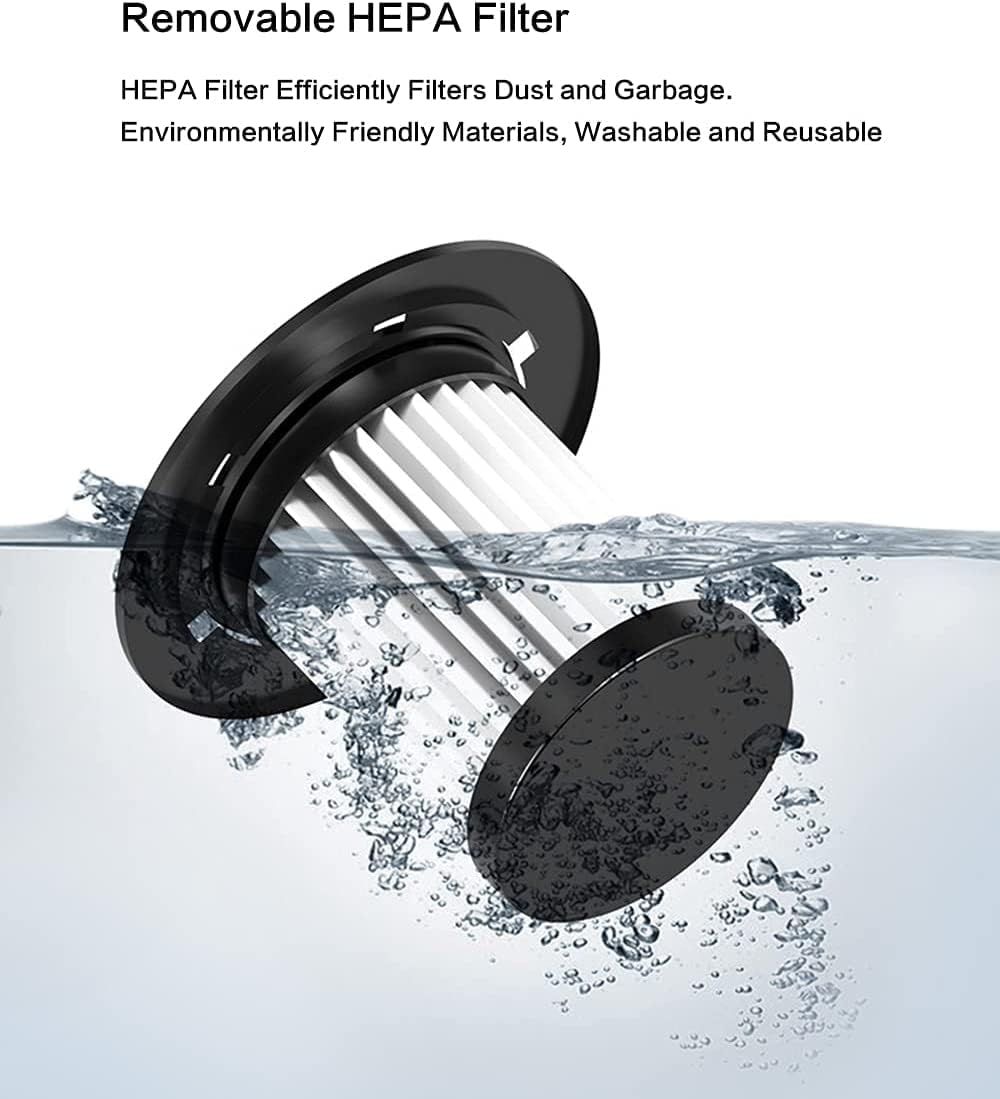
Image 7.1: The removable HEPA filter, shown being rinsed under water for cleaning.
- Staccate l'aspiratore.
- Eliminate u dustbin.
- Carefully remove the HEPA filter from the dustbin.
- Sciacquate u filtru sottu à l'acqua corrente finu à ch'ellu sia pulitu. Ùn aduprate micca detergenti.
- Lasciate asciugà cumpletamente u filtru à l'aria per almenu 24 ore prima di rimettelu. Ùn aduprate micca l'aspiratore cù un filtru bagnatu.
- Once dry, place the filter back into the dustbin and reattach the dustbin to the main unit.
7.3 Pulizia di u Serbatu d'Acqua è di u Pannu di a Moppa
- Svuotate l'acqua restante da u tank dopu ogni usu.
- Risciacquate u tank d'acqua cù acqua pulita.
- Remove the mop rag and wash it by hand or machine.
- Allow the water tank and mop rag to air dry completely before reassembly or storage.
7.4 Pulizia generale è almacenamentu
- Asciugate l'esternu di l'aspiratore cù un pannu dolce èamp tela. Ùn aduprate micca chimichi duri o detergenti abrasivi.
- Store the vacuum cleaner in a cool, dry place, away from direct sunlight and moisture.
8. Risoluzione di prublemi
Sè avete qualchì prublema cù u vostru aspiratore, riferitevi à a tavula seguente per i prublemi cumuni è e soluzioni.
| Prublemu | Causa Possibile | Soluzione |
|---|---|---|
| U vacuum ùn si accende | Not plugged in; Power outlet fault; Damaged power cord | Check power plug; Test outlet with another appliance; Contact customer support if cord is damaged |
| Bassu putere di aspirazione | Dustbin full; Filter clogged; Obstruction in nozzle/hose | Empty dustbin; Clean HEPA filter; Check for and remove any blockages |
| Water not dispensing for mopping | Water tank empty; Water tank not properly installed; Mop pad dry | Fill water tank; Ensure water tank is securely attached; Wet mop pad manually if needed |
| Rumore insolitu | Obstruction in brush roll or air duct; Loose parts | Check for and remove obstructions; Ensure all parts are securely assembled |
Sè u prublema persiste dopu avè pruvatu ste suluzioni, cuntattate l'assistenza clienti per più assistenza.
9. Specificazioni
Technical details for the Generic Stick Corded Vacuum Cleaner and Mop All in One.
- Nome di mudellu: Household Quiet Deep Clean Vacuum Cleaner and Mop in One
- Numero di mudellu: AN-20241229-421
- Marca: Generic
- Fonte di energia: Corded Electric
- Wattage: 600 watts
- Putenza di aspirazione: 12000 Pa
- Longueur du cordon : 3 metri (118 inches)
- Tipu di filtru: HEPA Filter (Washable and Reusable)
- Capacità dustbin: 600 millilitri
- Livellu di rumore: 65 Decibel
- Dimensioni di u pruduttu: 7"L x 4.3"L x 47.2"A (17.8 cm L x 10.9 cm L x 119.9 cm A)
- Pesu di l'articulu: 2.65 liri (1.2 kg)
- Funzioni speciali: Lightweight, Stick Vacuum Handheld Corded, Stick Vacuum with Water Tank, Wet/Dry Functionality
- Raccomandazione di superficia: Hard Floor (Marble, Ceramic Tile, Wood Floor)
- Culore: Biancu

Image 9.1: Illustration of the high-speed main motor and air duct design, contributing to strong suction and performance.
10. Garanzia è Support
This product is covered by a manufacturer's warranty against defects in materials and workmanship. Please refer to the warranty card included in your package for specific terms and conditions, including the warranty period and coverage details.
For technical support, troubleshooting assistance, or to inquire about replacement parts, please contact the retailer or manufacturer's customer service. Keep your purchase receipt and model number (AN-20241229-421) readily available when contacting support.


