1. Impurtante Information Safety
Please read all safety instructions carefully before using your Clover MCI-900 Mini Iron. Failure to follow these instructions may result in electric shock, fire, or serious personal injury.
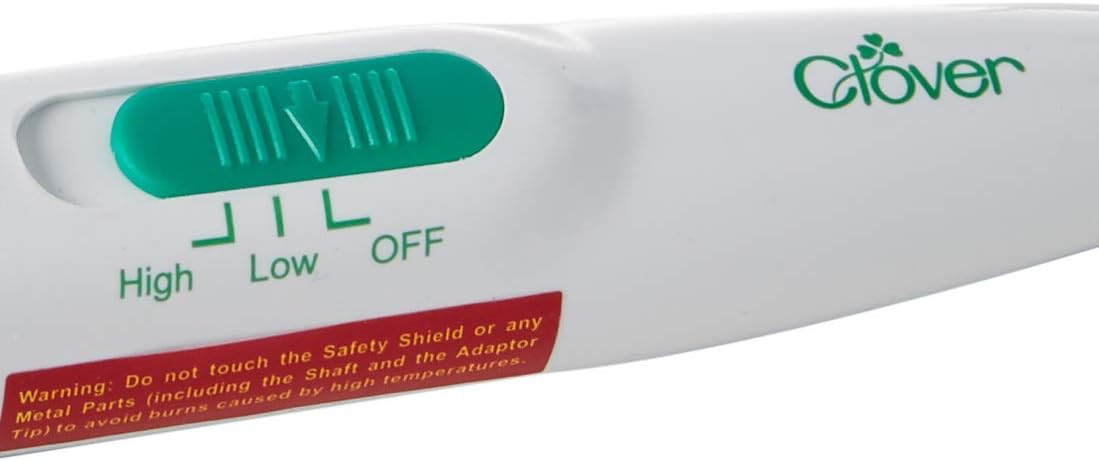
- ATTENZIONE: Do not touch the Safety Shield or any Metal Parts (including the Shaft and the Adaptor Tip) to avoid burns caused by high temperatures. The iron heats up quickly and reaches very high temperatures.
- Always place the iron on its included stand when not in use or when cooling down to prevent damage to surfaces and reduce burn risk.
- Mantene fora di a portata di i zitelli è di l'animali.
- Ùn immerse micca u ferru in acqua o altri liquidi.
- Do not operate the iron with a damaged cord or plug. If the iron is not working as it should, has been dropped, damaged, left outdoors, or dropped into water, return it to a service center.
- Aduprate u ferru solu per u so scopu previstu cum'è descrittu in questu manuale.
- Unplug the iron from the electrical outlet when filling with water, cleaning, or when not in use.
2. Produttu Finituview
The Clover MCI-900 Mini Iron is a lightweight, easy-to-control tool designed for detailed craft work. Its mini-shaped head is ideal for tight spots, quick bias techniques, applique, quilting, pressing seams, and paper crafts.
Funzioni chjave:
- Mini-shaped head for precision work.
- Lightweight design (7.5 ounces) for comfortable handling.
- Temperature control switch on the handle (High/Low/Off).
- On/Off switch on the cord.
- Includes a stand with rubber sole feet and a metal holder for safe resting.
- Easy-glide sole plate.
Cumpunenti:
- Mini Iron unit with attached power cord.
- Protective stand.


3. Setup
- Unpack the Clover MCI-900 Mini Iron and its protective stand from the packaging.
- Place the protective stand on a stable, heat-resistant surface.
- Ensure the iron's temperature control switch is in the "OFF" position.
- Plug the iron's power cord into a standard 120V electrical outlet.
4. Operating Instructions
- Power On: Locate the On/Off switch on the power cord and slide it to the "ON" position. The indicator light on the handle will illuminate.
- Selezziunà a temperatura: Use the temperature control switch on the handle to select your desired heat setting: "Low" for delicate fabrics like polyester (approx. 140°F) or "High" for cotton and other heat-resistant materials (approx. 220°F).
- Tempu di Riscaldamentu: Allow a few minutes for the iron to reach the selected temperature. The indicator light will remain on during heating.
- stiratura: Carefully apply the mini iron to the fabric or craft material. Its small size is perfect for pressing seams, applique, and other detailed work where a larger iron would be cumbersome.
- Resting the Iron: When not actively ironing, always place the hot iron securely on its protective stand to prevent accidental burns or damage to your work surface.
- Spegnimentu: After use, slide the On/Off switch on the power cord to the "OFF" position. Unplug the iron from the outlet and allow it to cool completely on its stand before storing.
Cunsigliu utile:
For very intricate work, consider using the Clover Mini Iron II Adapter Set (sold separately) which offers various specialized tips for different crafting needs.
Video di Dimustrazione:
Video 1: This video demonstrates the Clover Mini Iron II and its various tips, showcasing its versatility for different craft applications.
Video 2: Un utilizatore riview highlighting the effectiveness of the Clover MCI-900 Mini Iron for intricate craft work and its high heat capabilities.
5. Mantenimentu
- Pulizia: Ensure the iron is unplugged and completely cool before cleaning. Wipe the sole plate with a soft, damp cloth. Do not use abrasive cleaners or scouring pads, as these can damage the sole plate.
- Conservazione: Store the cooled iron on its protective stand in a dry, safe place, away from moisture and extreme temperatures.
6. Risoluzione di prublemi
- U ferru ùn riscalda micca: Ensure the power cord is securely plugged into a working electrical outlet and the On/Off switch on the cord is in the "ON" position. Check the temperature control switch on the handle is set to "Low" or "High."
- Inconsistent heating: It is normal for the iron to take a few minutes to reach its full temperature. The indicator light shows that the iron is powered on, not necessarily that it has reached maximum heat. Allow sufficient time for preheating.
- Fabric melting/burning: Ensure the correct temperature setting is selected for your fabric type. "Low" is recommended for delicate materials like polyester, while "High" is for cotton. Always test on a scrap piece of fabric first.
7. Specificazioni
| Feature | Specificazione |
|---|---|
| Marca | Clover |
| Numero di mudellu | MCI-900 |
| Funzione speciale | Ligeru |
| Culore | Biancu |
| Dimensioni di u produttu | 14"L x 4.15"L |
| Pesu di l'articulu | 7.5 once |
| Wattage | 20 watts |
| Materiale di basa | Gomma |
| Cumpunenti inclusi | Ferru |
8. Garanzia è Support
The Clover MCI-900 Mini Iron comes with a replacement warranty. For specific details regarding warranty coverage, claims, or product support, please contact Clover customer service directly. Keep your purchase receipt as proof of purchase.


