1. Introduzione
This manual provides comprehensive instructions for the safe and effective use of the PeakTech True RMS P 3131 Clamp Meter with Multimeter. This device is designed for measuring AC/DC currents without circuit interruption, as well as AC/DC voltage and resistance, with continuity testing capabilities. It features a 3 3/4 digit LCD display with True RMS measurement for accurate readings.
Leghjite attentamente stu manuale prima di fà funziunà l'apparecchiu è cunservatelu per riferimenti futuri.
2. Informazioni di sicurezza
WARNING: Improper use of this meter can cause damage, shock, injury, or death. Always follow all safety precautions.
- Sempre aderite à i codici di sicurità lucali è naziunali.
- Do not use the meter if it appears damaged or if the insulation on test leads is compromised.
- Assicuratevi chì u misuratore sia impostu nantu à a funzione è a gamma curretta prima di fà e misurazioni.
- Evitate u cuntattu cù i circuiti attivi. Aduprate l'equipaggiu di prutezzione individuale (PPE) adattatu.
- The device is rated for CAT II 600V. Do not exceed these limits.
- Rimpiazzate e batterie subitu quandu appare l'indicatore di batteria scarica.
- Do not operate the meter in explosive atmospheres.
3. Produttu Finituview è cumpunenti
The PeakTech P 3131 is a robust and reliable clamp meter. Familiarize yourself with its main components:

Figura 1: Fronte view of the PeakTech P 3131 Clamp Meter, showing the clamp jaw, function selector, LCD display, and input terminals.
- Clamp Mascella: Per a misurazione di corrente AC/DC senza cuntattu.
- Manopola di selezzione di funzioni: To select measurement modes (A~, A=, V~, V=, Ω/Continuity, OFF).
- Display LCD: Mostra letture di misurazione, unità è indicatori.
- Bottoni: AC/DC, ZERO, H/MAX (Data Hold/Max Hold).
- Terminali di input: COM (common) and VΩ (voltage/resistance) for test leads.
- Guardia di manu: Provides protection against accidental contact.
4. Setup
4.1 Installazione di batterie
The PeakTech P 3131 requires two 1.5V AAA batteries (included). To install or replace batteries:
- Assicuratevi chì u dispusitivu hè spenta.
- Truvate u coperchiu di u compartimentu di a batteria nant'à u spinu di u misuratore.
- Aduprate un cacciavite per apre u compartimentu.
- Insert the two AAA batteries, observing correct polarity (+ and -).
- Sustituite a tappa di u compartmentu di a bateria è assicuratelu cù a vite.
When the low battery indicator appears on the display, replace the batteries immediately to ensure accurate measurements.
4.2 Cunnessione di i cavi di prova
Per voltage, resistance, and continuity measurements, connect the supplied test leads:
- Inserite u filu di prova neru in u COM (common) input terminal.
- Inserite u filu di prova rossu in u VΩ terminale di input.

Figure 2: PeakTech P 3131 Clamp Meter shown with its carrying case, test leads, batteries, and user manual.
5. Operating Instructions
5.1 Power On/Off
Rotate the function selector dial from the "OFF" position to any desired measurement function to power on the meter. To power off, rotate the dial back to "OFF". The meter features an automatic power-off function (can be deactivated) to conserve battery life.
5.2 Misurazione di a corrente AC/DC (Clamp)
Per misurà a corrente senza rompe u circuitu:
- Girate u selettore di funzione à u A~ (Corrente AC) o A= Posizione (Currente CC).
- Press u AC/DC button if you need to switch between AC and DC current modes (if the dial position combines them).
- Press u ZERU button to zero the display before measuring DC current, especially for small currents, to compensate for residual magnetism.
- Aprite u clamp mandibula appughjendu u grillettu.
- Enclose only unu conductor with the clamp mandibula. Assicuratevi chì a mandibula sia cumpletamente chjusa.
- Leghjite u valore attuale nantu à u display LCD.
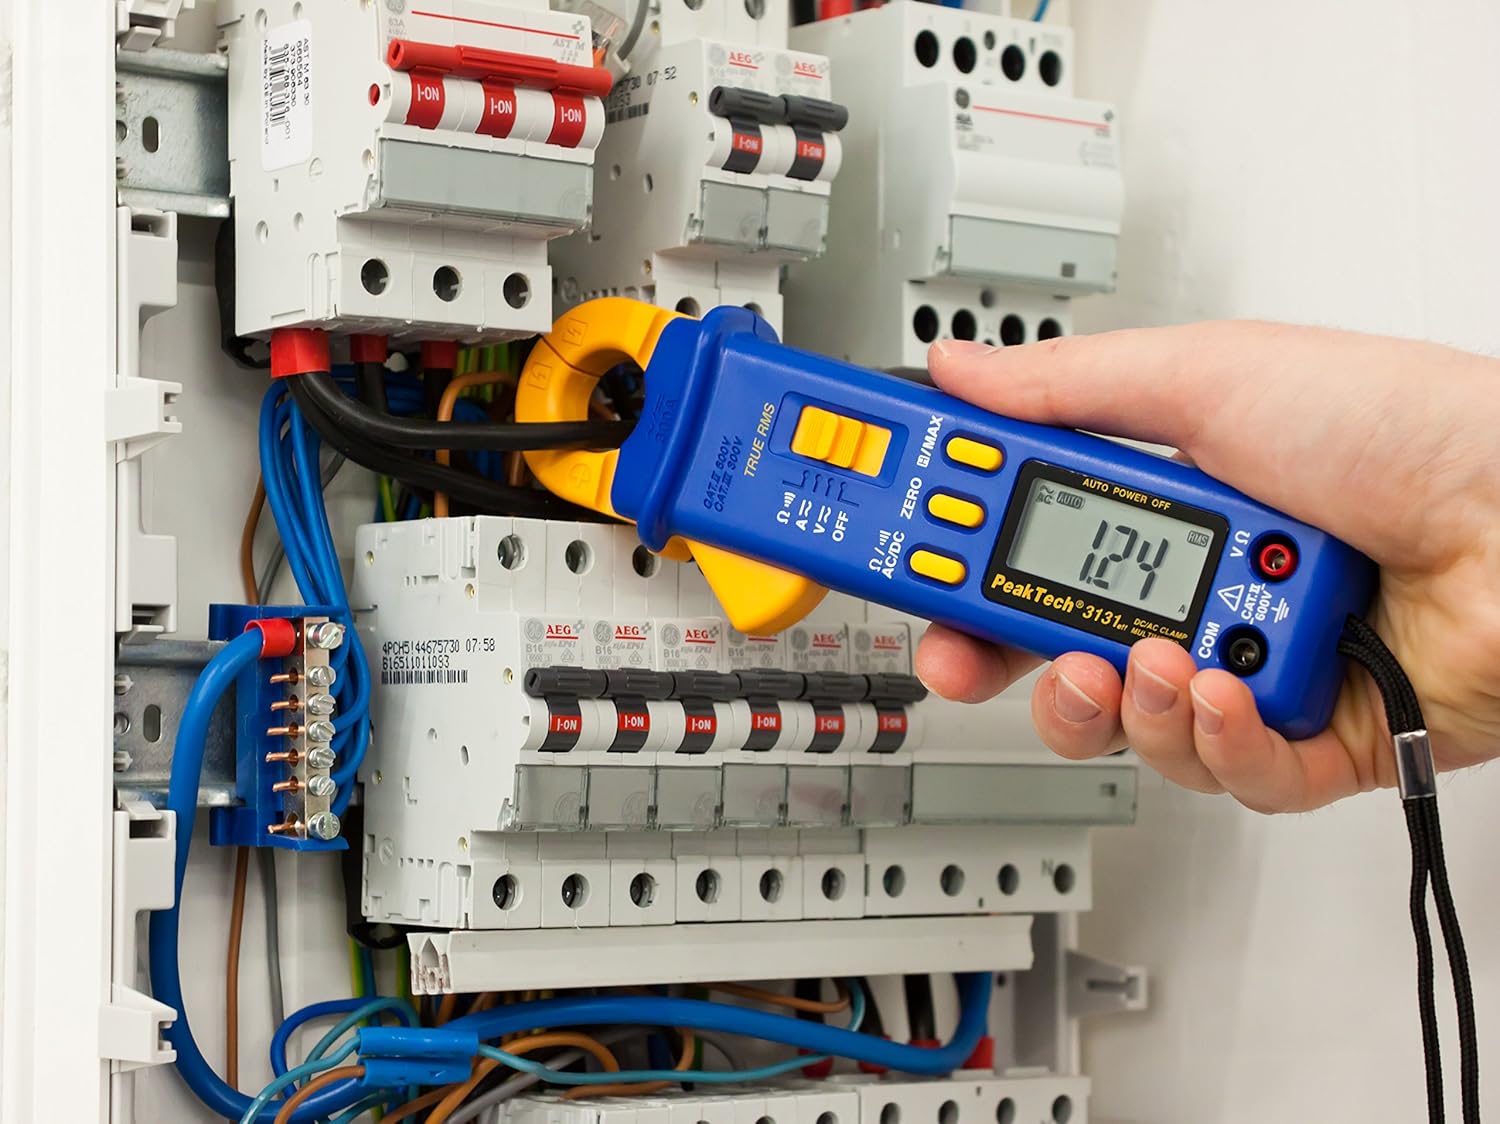
Figure 3: The PeakTech P 3131 Clamp Meter in use, measuring current on a single conductor within an electrical panel.
5.3 AC/DC Voltage misurazione
Per misura voltage:
- Cunnette i cavi di prova cum'è descrittu in a Sezione 4.2.
- Girate u selettore di funzione à u V~ (Volume ACtage) o V= (DC Voltage) posizione.
- Cunnette i puntali di prova in parallelu à u circuitu o cumpunente chì vulete misurà.
- Leghjite u voltage valore nantu à u display LCD.
5.4 Misurazione di Resistenza è Continuità
To measure resistance or check for continuity:
- Cunnette i cavi di prova cum'è descrittu in a Sezione 4.2.
- Girate u selettore di funzione à u Ω/))) (Resistance/Continuity) position.
- For resistance: Connect the test probes across the component. Ensure the circuit is de-energized.
- For continuity: Touch the test probes to the two points you want to check. A continuous beep indicates a low-resistance path (continuity).
- Leghjite u valore di resistenza nant'à u display LCD.
5.5 Funzioni Speciali
- True RMS: The meter measures True Root Mean Square values for AC voltage and current, providing accurate readings for non-sinusoidal waveforms.
- Ritenzione di dati (H): Press u H/MAX Pulsà brevemente u buttone per bluccà a lettura attuale nantu à u display. Appughjà torna per liberà.
- Maximum Value Hold (MAX): Appughjà è tene premutu H/MAX button to capture and display the maximum measured value. Press again to exit.
- Funzione ZERO: Used to zero the display for DC current measurements to eliminate offset errors.
- Gamma automatica: The meter automatically selects the appropriate measurement range.
- Spegnimentu automaticu: The meter automatically turns off after a period of inactivity to save battery. This feature can typically be disabled by holding a specific button during power-on (refer to the device's on-screen indicators or a more detailed manual if available).
6. Mantenimentu
6.1 Pulizia
Pulite a carcassa di u misuratore cù a publicitàamp pannu è un detergente dolce. Ùn aduprate micca abrasivi o solventi. Assicuratevi chì u misuratore sia cumpletamente asciuttu prima di l'usu.
6.2 Sustituzione di batterie
Refer to Section 4.1 for instructions on battery replacement. Always use two fresh 1.5V AAA batteries. Remove batteries if the meter is not used for an extended period to prevent leakage.
6.3 Storage
Store the meter in a cool, dry place, away from direct sunlight and extreme temperatures. Use the provided carrying case for protection.
7. Risoluzione di prublemi
| Prublemu | Causa Possibile | Soluzione |
|---|---|---|
| U misuratore ùn s'accende micca. | Batterie morte o installate in modu incorrectu. | Verificate a polarità di a batteria; rimpiazzate e batterie. |
| "OL" o "OVER" hè visualizatu. | A misurazione supera l'intervallu selezziunatu o a capacità massima di u metru. | Select a higher range (if manual ranging) or ensure measurement is within meter's limits. |
| Inaccurate DC current reading. | Magnetismu residuale in clamp mascella. | Press u ZERU button before measurement. |
| Nisun bip di cuntinuità. | Circuitu apertu o alta resistenza. | Check connections; ensure circuit is complete. |
If problems persist, contact PeakTech customer support or a qualified service technician.
8. Specifiche tecniche
| Parametru | Specificazione |
|---|---|
| Mostra | 3 3/4 digit LCD, max. 3999 counts |
| DC Voltage (DCV) | 0.1 mV to 600 V (Accuracy: 0.5% + 2 digits) |
| AC Voltage (ACV) | 1 mV to 600 V (Accuracy: 1.5% + 5 digits) |
| Corrente DC (DCA) | 10 mA to 300 A (Accuracy: 1% + 2 digits) |
| Corrente AC (ACA) | 10 mA to 300 A (Accuracy: 1% + 3 digits) |
| Resistenza (Ω) | 0.1 Ω to 40 MΩ (Accuracy: 0.9% + 2 digits) |
| Test di continuità | Funzione buzzer |
| True RMS | Yes, for AC measurements |
| Apertura di mandibula | 22 mm max. conductor diameter |
| Valutazione di sicurezza | EN 61010-1, CAT II 600 V |
| Alimentazione elettrica | 2 batterie AAA da 1.5 V |
| Dimensioni (L x W x H) | 192 x 66 x 27 mm (circa 7.56 x 2.6 x 1.06 inch) |
| Pesu | 205 g (circa 0.45 libbre) |
9. Garanzia è Support
PeakTech products are manufactured under strict quality control. This product is covered by a standard manufacturer's warranty against defects in materials and workmanship. Please refer to the warranty card included with your product or visit the official PeakTech websitu per i termini è e cundizioni di garanzia dettagliate.
For technical support, service, or calibration inquiries, please contact your local PeakTech distributor or the PeakTech customer service department. Contact information can typically be found on the PeakTech websitu o in l'imballu di u produttu.