1. Impurtante Information Safety
Please read all instructions carefully before installing or using this Eiko Halogen A19 bulb. Failure to follow these instructions may result in electric shock, fire, or other hazards.
- Rischiu di scossa elettrica: Always turn off power to the fixture at the circuit breaker or fuse box before installation, removal, or inspection.
- Rischiu di ustioni: Halogen bulbs operate at high temperatures. Do not touch the bulb while it is operating or immediately after it has been turned off. Allow the bulb to cool completely before handling.
- Eliminazione propria: Smaltite e lampadine usate secondu e regulazioni lucali.
- Solu l'usu di l'internu: This bulb is designed for indoor use in appropriate fixtures.
- Do Not Exceed Wattage: Ensure the fixture's maximum wattage rating is not exceeded. This bulb is 43W.
- Maneggiate cù cura: Avoid touching the glass portion of the bulb with bare hands, as oils can reduce bulb life. Use a clean cloth or gloves if necessary.
2. Setup è Installazione
Follow these steps to safely install your Eiko Halogen A19 bulb:
- Spegne l'alimentazione: Locate the light fixture's power switch and turn it to the "OFF" position. For added safety, turn off the power at the main circuit breaker or fuse box.
- Permette u raffreddamentu: If replacing an existing bulb, ensure it has cooled down completely before touching it.
- Elimina l'antica lampadina: Carefully unscrew the old bulb counter-clockwise from the socket.
- Ispettà l'apparecchiatura: Verificate u portalampada di l'apparecchiu di luce per eventuali danni o detriti. Assicuratevi ch'ellu sia pulitu è asciuttu.
- Installa una nova lampadina: Gently screw the Eiko Halogen A19 bulb clockwise into the socket until it is snug. Do not overtighten.
- Ripristina l'energia: Turn the power back on at the circuit breaker or fuse box, then turn on the light switch.
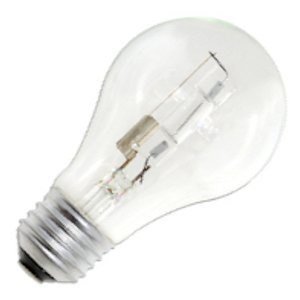
Image 1: Eiko Halogen A19 43W Clear 120V Bulb. This image shows the clear glass bulb with a standard screw-in base, typical of an A19 shape.
3. Operating Instructions
The Eiko Halogen A19 bulb operates like a standard incandescent bulb. Once installed, simply use the light fixture's switch to turn the bulb on or off.
- Instant On: A lampadina furnisce una luminosità piena istantanea dopu l'attivazione.
- Qualità di luce: This halogen bulb produces a brighter, whiter light compared to traditional incandescent bulbs, enhancing visibility and color rendition.
- Dimora: If used in a dimmable fixture with a compatible dimmer switch, this bulb can be dimmed. Ensure your dimmer is rated for halogen or incandescent loads.
4. Mantenimentu
Minimal maintenance is required for your Eiko Halogen A19 bulb. However, following these guidelines can help ensure optimal performance and longevity:
- Pulizia: If the bulb becomes dusty, ensure the power is off and the bulb is cool. Gently wipe the glass with a clean, dry, lint-free cloth. Do not use liquid cleaners.
- Sustituzione: Halogen bulbs, like all light sources, will dim over time and eventually burn out. For consistent light output, consider replacing bulbs when a noticeable decrease in brightness occurs. It is often recommended to replace bulbs in multi-bulb fixtures at the same time for uniform light.
- Trattamentu: When replacing, avoid touching the new bulb's glass with bare hands. Oils from your skin can create hot spots and reduce bulb life. Use a clean cloth or gloves.
5. Risoluzione di prublemi
If your Eiko Halogen A19 bulb is not functioning as expected, refer to the following common issues and solutions:
| Prublemu | Causa Possibile | Soluzione |
|---|---|---|
| A lampadina ùn si accende. |
|
|
| Lampadina lampeggia. |
|
|
| U bulbe si brusgia rapidamente. |
|
|
6. Specifications Product
Detailed specifications for the Eiko Halogen A19 43W Clear 120V bulb:
- Marca: Eiko
- Numero di mudellu: 43A/CL/H-120V
- Tipu di luce: Halogen
- Wattage: 43 Watt
- Dimensione di a forma di bulbe: A19
- Voltage: 120 Volts
- Temperature di culore: 2900 Kelvin
- Finitura: Chjara
- Materiale: Tungsten (filament)
- Dimensioni di u pruduttu: Circa 1 x 1 x 2.7 inch
- Pesu di l'articulu: Circa 3.2 ounces
- Usi specifichi: General purpose lighting, lamps
7. Garanzia è Support
7.1. Garanzia limitata
Eiko products are manufactured to high-quality standards. This product is covered by a limited warranty against defects in materials and workmanship under normal use. The specific duration and terms of the warranty may vary. Please retain your proof of purchase for warranty claims.
7.2. Assistenza Clienti
For technical assistance, warranty inquiries, or further information regarding your Eiko Halogen A19 bulb, please contact Eiko customer support. Refer to the official Eiko websitu o imballaggio di u pruduttu per l'infurmazioni di cuntattu più recenti.


