1. Introduzione
This manual provides essential instructions for the safe installation, operation, and maintenance of your KING KB2407-1-B2-ECO ECO2S 7500W Garage Heater. Please read this manual thoroughly before installation and use, and retain it for future reference. Proper installation and adherence to these instructions are crucial for optimal performance and safety.
2. Impurtante Information Safety
ATTENZIONE: Risicu d'incendiu, scossa elettrica o ferite per e persone.
- Leghjite tutte l'istruzzioni prima di stallà o aduprà stu calefactor.
- Stu riscaldatore hè caldu quandu hè in usu. Per evità brusgiature, ùn lasciate micca chì a pelle nuda tocchi e superfici calde. Mantene i materiali combustibili, cum'è mobili, cuscini, biancheria da letto, carta, vestiti è tende, à almenu 3 piedi (0.9 m) da a parte anteriore di u riscaldatore è teneli luntanu da i lati è da u fondu.
- Hè necessaria una prudenza estrema quandu qualsiasi riscaldatore hè utilizatu da o vicinu à i zitelli o invalidi è ogni volta chì u riscaldatore hè lasciatu in funzione è senza sorveglianza.
- Ùn aduprate micca alcun riscaldatore cù un cordone o una spina dannighjata o dopu chì u riscaldatore ùn funziona micca bè, hè statu lasciatu cascà o hè statu dannighjatu in qualchì modu. Scartate u riscaldatore o rinviatelu à un centru di assistenza autorizatu per esse esaminatu è/o riparatu.
- Ùn aduprate micca fora.
- Stu riscaldatore ùn hè micca pensatu per l'usu in bagni, spazii di lavanderia è lochi interni simili. Ùn mai situà u riscaldatore induve pò cascà in una vasca o un altru cuntainer d'acqua.
- Ùn mette micca u cordone sottu à a moquette. Ùn copre micca u cordone cù tappeti, corridori o rivestimenti simili. Disposà u cordone luntanu da a zona di trafficu è induve ùn sarà micca inciampatu.
- Per scollegare u riscaldatore, spegne i cuntrolli, poi sguassate u plug da a presa.
- Ùn inserite micca o permette chì oggetti stranieri entrenu in alcuna apertura di ventilazione o di scarico perchè questu pò causà scossa elettrica o incendi, o dannu u riscaldatore.
- Per prevene un eventuale focu, ùn bluccà micca l'ingaghjamentu di l'aria o l'exhaust in ogni modu. Ùn aduprate micca nantu à superfici molli, cum'è un lettu, induve l'apertura pò esse bluccata.
- Un riscaldatore hà parti calde è arcuate o scintillanti in l'internu. Ùn aduprate micca in spazii induve benzina, pittura, o vapori o liquidi inflammabili sò usati o almacenati.
- Aduprate stu riscaldatore solu cum'è descrittu in stu manuale. Ogni altru usu micca cunsigliatu da u fabricatore pò causà incendi, scossa elettrica, o ferite à e persone.
- Cunnette sempre i riscaldatori direttamente in una presa di muru/receptacle. Ùn aduprate mai cù un cordone di estensione o un rubinetto di alimentazione spostabile (presa / striscia di alimentazione).
- This heater is for 240V applications only.
3. Cuntenutu di u pacchettu
Verify that all components are present and undamaged. If any items are missing or damaged, contact your retailer.
- KING KB2407-1-B2-ECO ECO2S Garage Heater (7500W / 240V)
- Universal Wall/Ceiling Mounting Bracket
- Control remoto
- Manuale d'uso (stu documentu)

Image 3.1: The KING KB2407-1-B2-ECO ECO2S Garage Heater, showing the main unit, the universal mounting bracket, and the remote control.
4. Setup è Installazione
L'installazione deve esse effettuata da un elettricista qualificatu in cunfurmità cù tutti i codici elettrici lucali è naziunali.
4.1 Situazione di muntatura
- Select a location where the heater is protected from water spray, dripping water, and excessive dust.
- Ensure adequate clearance from combustible materials (minimum 3 feet from front, sides, and rear).
- Mount the heater securely to a structural member (stud, joist) capable of supporting its weight (approximately 33.5 lbs).
- The universal bracket allows for wall or ceiling mounting.
4.2 Muntatura di u Riscaldatore
- Attach the universal mounting bracket to a sturdy wall stud or ceiling joist using appropriate fasteners (not included). Ensure the bracket is level and securely fastened.
- Lift the heater and align the hanging hooks on top of the heater with the slots on the mounting bracket.
- Slide the heater onto the bracket until it is securely seated.
- Adjust the heater's angle as desired and secure it using the provided hardware to prevent accidental movement.
4.3 Cablaggio Elettricu
DANGER: Disconnect power at the main service panel before attempting any wiring to prevent electric shock.
- This heater requires a dedicated 240V circuit.
- The heater is rated for 7500W, drawing approximately 31.25 Amps. A circuit breaker and wiring sized appropriately for this load are required (e.g., 40 Amp breaker with 8-gauge wire, consult local codes).
- Access the internal wiring compartment by removing the appropriate cover plate on the heater.
- Connect the 240V supply wires to the heater's terminals as indicated in the wiring diagram inside the heater's compartment. Ensure proper grounding.
- Secure all wiring connections and replace the cover plate.

Image 4.1: Posteriore view of the heater, illustrating the fan and location of electrical warning labels. Ensure all wiring is done by a qualified professional.
5. Operazione
Once properly installed and powered, the heater can be operated using its integrated control panel or the remote control.
5.1 Panel Control Overview

Image 5.1: Front view of the heater, highlighting the digital display and control buttons for direct operation.
The control panel features a digital display and several buttons:
- Display Digitale: Shows current temperature, set temperature, and mode indicators.
- Pulsante POWER: Accende/spegne u riscaldatore.
- Pulsante MODE: Cycles through heating modes (ECO, HIGH, FAN ONLY).
- Frecce SU/GIÙ: Ajusta a temperatura impostata.
- Pulsante TIMER: Attiva o aghjusta a funzione di u timer.
5.2 Cuntrollu à distanza
U telecomandu inclusu furnisce un accessu convenientu à tutte e funzioni di u riscaldatore da una distanza.
- Ensure batteries are correctly installed in the remote control.
- Point the remote control towards the heater's control panel for optimal signal reception.
- Buttons on the remote mirror the functions of the control panel (Power, Mode, Up/Down Temperature, Timer).
5.3 Modi di funziunamentu
- Modu ECO: The heater automatically selects the lowest wattage needed to maintain the set temperature, optimizing energy consumption.
- HIGH Heat Mode: The heater operates at full wattage (7500W) to quickly reach and maintain the set temperature.
- FAN ONLY Mode: The fan operates without engaging the heating elements, providing air circulation.
5.4 Impostazione di a temperatura
- Press the POWER button to turn the heater on.
- Use the UP or DOWN arrow buttons to set your desired temperature. The display will show the set temperature, then revert to the ambient temperature.
- U riscaldatore si accenderà è si spegnerà automaticamente per mantene a temperatura impostata.
5.5 Funzione Timer
The timer allows you to set a duration for the heater to operate before automatically turning off.
- With the heater on, press the TIMER button.
- Use the UP or DOWN arrow buttons to set the desired operating time (e.g., 1-12 hours).
- The heater will operate for the set duration and then power off.
6. Mantenimentu
WARNING: Always disconnect power to the heater at the main service panel before performing any maintenance or cleaning.
- Pulizia: Pulite periodicamente l'esternu di u riscaldatore cù un pannu dolce èamp tela. Ùn aduprate micca detergenti abrasivi o solventi.
- Rimozione di polvere: Use a vacuum cleaner with a brush attachment to remove dust from the grilles and internal components. Ensure the fan blades are free of obstructions.
- Ispezione: Regularly inspect the power cord and plug for any signs of damage. If damage is found, discontinue use and contact a qualified electrician for repair.
- No lubrication is required for the motor.
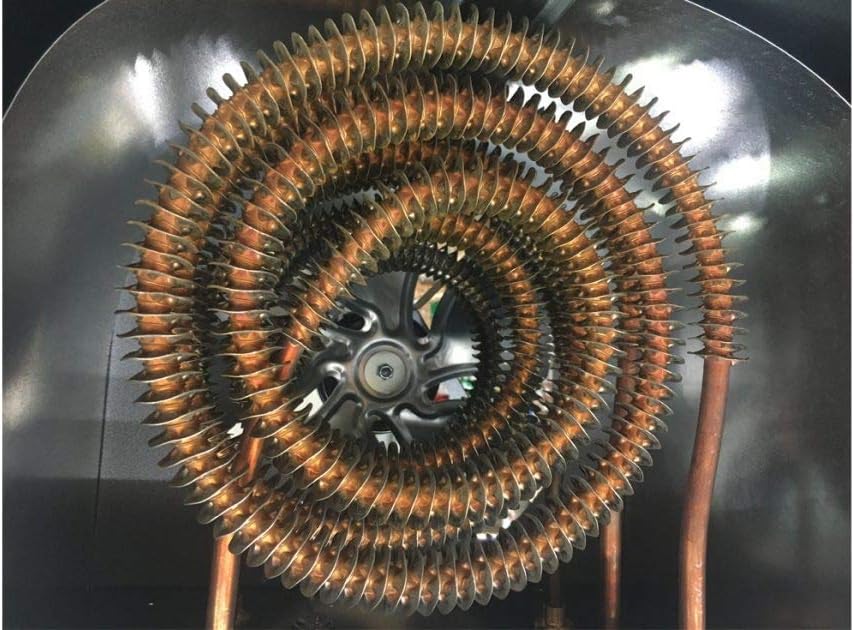
Image 6.1: Close-up of the spiral steel heating elements. Regular cleaning helps maintain efficiency and prolong heater life.
7. Risoluzione di prublemi
If your heater is not operating correctly, consult the following table before contacting customer support.
| Prublemu | Causa Possibile | Soluzione |
|---|---|---|
| U riscaldatore ùn si accende. | Nisuna alimentazione elettrica. Circuit breaker hà scattatu. A prutezzione di surriscaldamentu attivata. | Ensure heater is properly wired and connected to 240V supply. Verificate è resettate u circuit breaker. Turn off heater, allow to cool for 30 minutes, then restart. Clear any obstructions. |
| U riscaldatore ùn produce micca abbastanza calore. | Modu incorrectu sceltu. Pone a temperatura troppu bassa. A dimensione di a stanza supera a capacità di riscaldamentu. | Ensure HIGH or ECO mode is selected, not FAN ONLY. Aumente a temperatura stabilita. Verify the heater's coverage area (700 sq ft for 7500W) is appropriate for your space. |
| U ventilatore funziona ma ùn riscalda micca. | FAN ONLY mode selected. Heating elements malfunction. | Switch to ECO or HIGH heat mode. If problem persists, contact a qualified technician. |
| U cuntrollu remoto ùn funziona micca. | Batterie morte. Ostruzione trà u telecomandu è u riscaldatore. | Sustituisce e batterie di telecomando. Ensure a clear line of sight to the heater's control panel. |

Image 7.1: Heating coverage chart for various KING garage heater wattages. The 7500W model covers up to 750 sq ft.
8. Specificazioni
| Feature | Detail |
|---|---|
| Mudellu | KB2407-1-B2-ECO |
| Marca | RE |
| Wattage | 7500 Watt |
| Voltage | 240 Volts |
| Ampera | 31.25 Amps |
| Copertura di riscaldamentu | Up to 700 ft² (based on 8 ft ceiling height and FHA standard insulation values) |
| Funzioni spiciali | Remote Control, Built-In Fan Delay, Summer Fan Only & Timer Modes, ECO2S Electronic Thermostat |
| Tipu di muntatura | Universal Wall/Ceiling Bracket |
| Dimensioni di u produttu | 13.5 x 15 x 16.5 inch |
| Pesu di l'articulu | 33.5 liri |
| UPC | 093319220405 |
9. Garanzia è Support
For warranty information or technical support, please refer to the warranty card included with your product or visit the manufacturer's official websitu. Conservate a vostra ricevuta d'acquistu cum'è prova d'acquistu per e richieste di garanzia.
Manufacturer: King Electric
For further assistance, contact King Electric customer service.


