1. Impurtante Information Safety
Please read all instructions and safety warnings carefully before using the DOMAS TENS EMS Unit. Failure to follow these instructions may result in injury or device malfunction.
- Keep the device dry and away from water. Do not use while bathing or near water sources.
- Consult a healthcare professional before use, especially if you have pre-existing medical conditions, are pregnant, have a pacemaker, or any other implanted electronic device.
- Do not apply electrode pads over open wounds, rashes, swollen, red, infected, or inflamed skin areas.
- Do not apply electrode pads over the carotid sinus nerves (front of the neck), on the head, or directly over the heart.
- Mantene fora di a portata di i zitelli.
- Smette di usà si avete qualchì reazione avversa cum'è irritazione di a pelle, discomfort o vertigini.
- Statements regarding this device have not been evaluated by the FDA and are not intended to diagnose, treat, cure, or prevent any disease or health condition.
2. Produttu Finituview
The DOMAS Touch Screen TENS EMS Unit is a dual-channel muscle stimulator designed for temporary relief of pain associated with sore and aching muscles due to strain from exercise or normal household and work activities. It features a touch screen interface, 24 modes, and adjustable intensity levels.

Figure 2.1: The DOMAS Touch Screen TENS EMS Unit, showing the main device, electrode pads, and charging adapter.
2.1 Funzioni chjave
- Display Touch Screen: Intuitive interface for easy navigation and selection.
- 24 Modi di Massaggio: A variety of pre-programmed modes for different types of stimulation.
- 20 Livelli d'Intensità: Customizable intensity to suit individual comfort and needs.
- Uscita à dui canali: Allows for simultaneous treatment of two different body areas or two people.
- Timer ajustable: Sessions can be set from 10 to 60 minutes.
- USB ricaricabile: Built-in lithium battery for convenient charging.
- Disegnu Portable: Compact and lightweight for use at home or on the go.
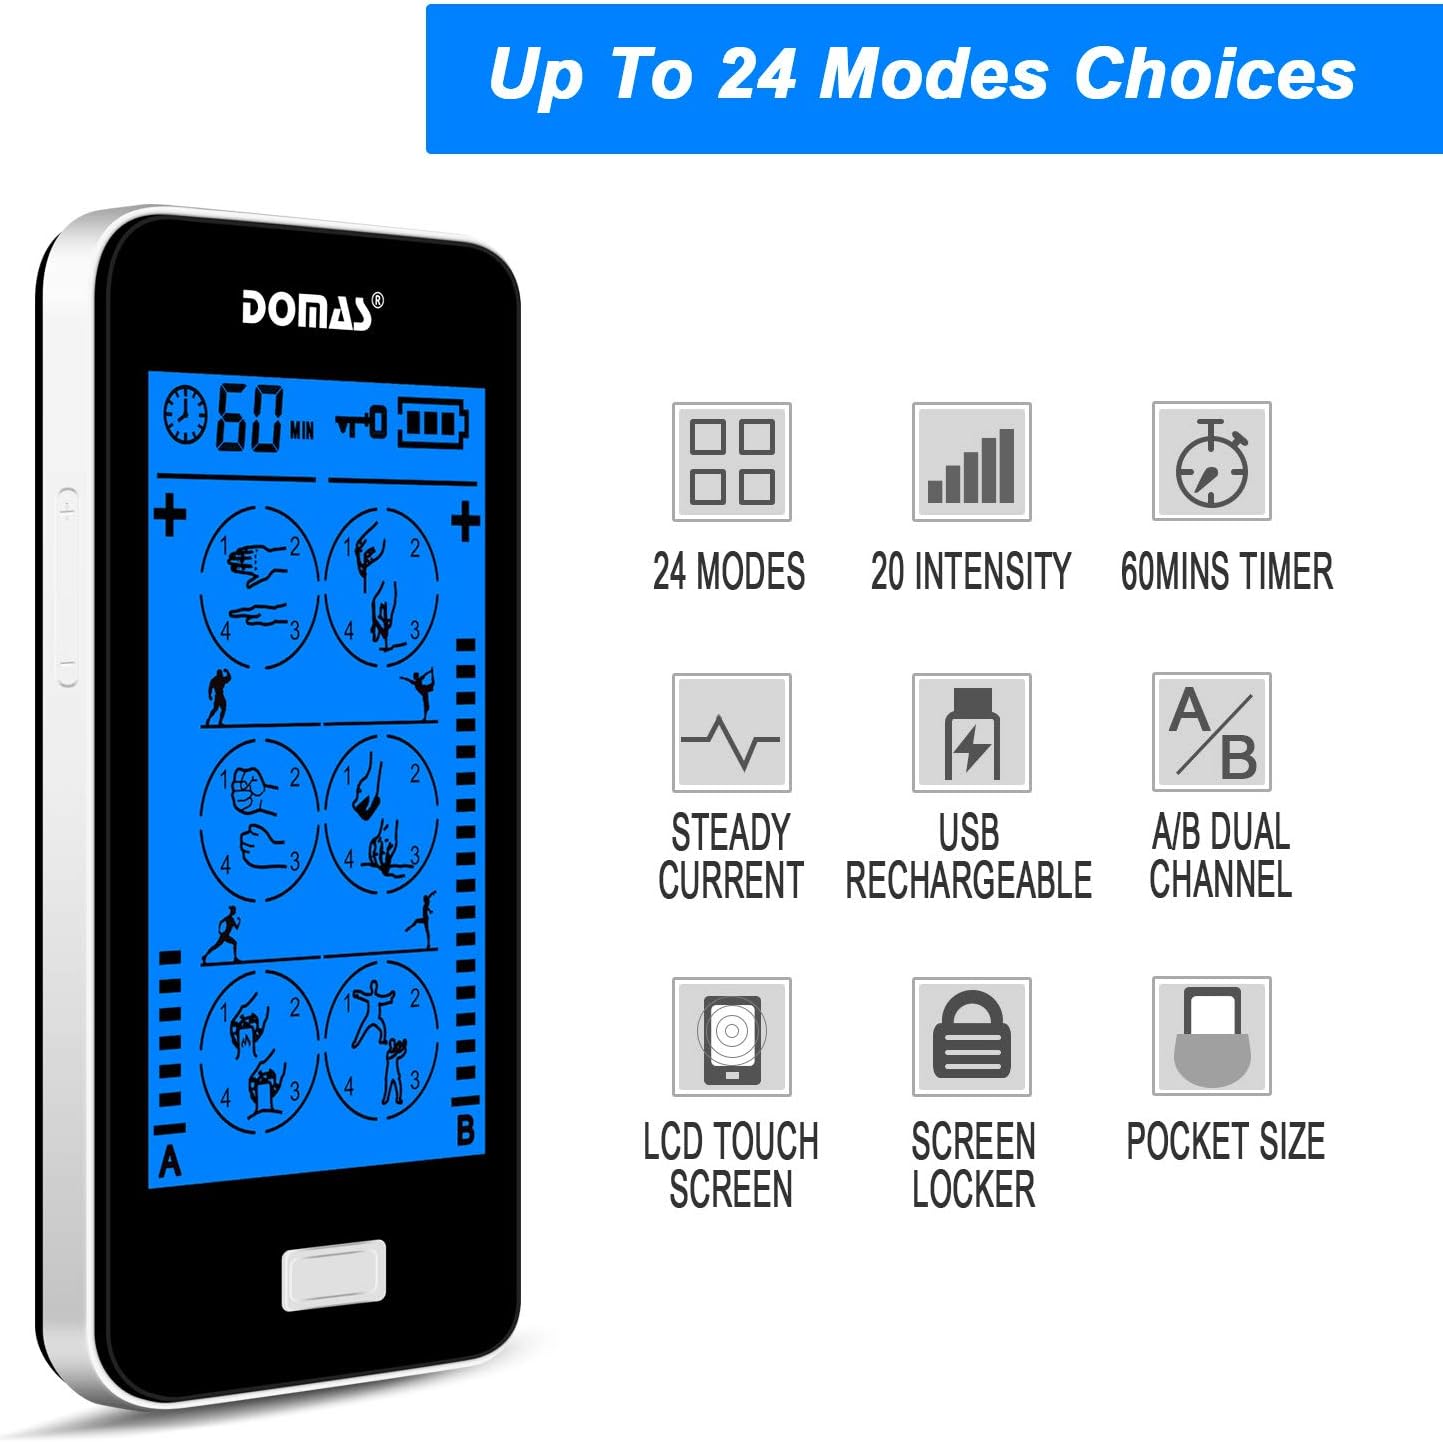
Figure 2.2: Visual representation of the unit's key features, including mode count, intensity levels, and portability.
2.2 Cuntenuti di u pacchettu
Upon opening your DOMAS TENS EMS Unit package, please ensure all the following items are present:
- DOMAS Touch Screen TENS EMS Unit
- Electrode Pads (various sizes)
- Fili di piombu
- Cavu di carica USB
- Adattatore AC
- Pad Holder/Storage Pouch
- Manuale d'istruzzioni

Figure 2.3: All components included in the DOMAS TENS EMS Unit package.
2.3 Cumpunenti di u dispusitivu
Familiarize yourself with the different parts of your TENS EMS unit:

Figure 2.4: Labeled diagram of the DOMAS TENS EMS Unit's external features.
- A & B Dual-output Channel: Ports for connecting lead wires to electrode pads.
- Display timer: Shows remaining treatment time.
- Pulsante Power ON / OFF: Per accende o spegne u dispusitivu.
- Intensity Adjustment Buttons (+/-): To increase or decrease stimulation intensity for each channel.
- Pulsante di serratura: To prevent accidental changes during use.
- Rechargeable USB Port: Per carricà u dispusitivu.
- Touch Screen: Main interface for mode selection and settings.
3. Setup
Follow these steps to prepare your DOMAS TENS EMS Unit for use:
3.1 Caricà u dispusitivu
- Connect the USB charging cable to the device's USB port.
- Inserite l'altra estremità di u cable USB in l'adattatore AC.
- Insert the AC adapter into a standard wall outlet.
- L'indicatore di batteria nant'à u screnu mostrerà u statu di carica. Caricate cumpletamente prima di u primu usu.

Figure 3.1: Connecting the USB charging cable to the device.
3.2 Cunnessione di i cuscinetti d'elettrodi
- Assicuratevi chì u dispusitivu hè spenta.
- Cunnette i fili di cunduttore à i cuscinetti di l'elettrodi agganciandoli à i perni metallichi.
- Plug the lead wires into the A and/or B output ports on the top of the device.

Figure 3.2: Attaching the lead wire to an electrode pad.
3.3 Applying Electrode Pads
- Clean and dry the skin area where you intend to place the pads.
- Carefully peel the transparent protective film from the adhesive side of the electrode pads. Retain the film for storage.
- Place the pads firmly on the desired treatment area. Ensure good skin contact.

Figure 3.3: Visual guide for connecting pads and applying them to the skin.
4. Operating Instructions
Once the device is set up, follow these steps to begin your therapy session:
- Accende: Press and hold the Power ON/OFF button located on the top of the device until the screen illuminates.
- Selezziunà u Modu: The touch screen will display various massage modes. Tap on your desired mode icon to select it. The device offers 24 different modes, each providing a unique stimulation pattern.
- Aghjustate l'intensità: Use the '+' and '-' buttons on the sides of the device to adjust the intensity level for Channel A and Channel B independently. Start with the lowest intensity and gradually increase until you feel a comfortable, yet effective, sensation. Avoid increasinintensità g à un livellu sgradevole.
- Set Timer: The default session time is usually 20 minutes. You can adjust the timer by tapping the timer icon on the screen and selecting your preferred duration (e.g., 10, 20, 30, 40, 50, 60 minutes).
- Lock Screen (Optional): To prevent accidental changes during a session, press the Lock button. The screen will lock, and a lock icon will appear. Press it again to unlock.
- Fine di sessione: The device will automatically turn off once the timer expires. To manually end a session, press and hold the Power ON/OFF button.

Figure 4.1: The touch screen interface showing available massage modes and settings.
4.1 Mode Selection Guide
The unit offers 24 distinct modes. Experiment with different modes to find what works best for your specific needs and comfort. Common mode categories include:
- Massaggio: Gentle, rhythmic pulses for relaxation.
- Impastatura : Deeper, more intense pressure simulation.
- Agopuntura: Sharp, tapping sensations.
- Cupping: Suction-like sensation.
- Scraping: Gliding, scraping sensation.
- Tapping: Quick, light pulses.

Figura 4.2: Esamples of body areas suitable for TENS EMS therapy and the variety of modes available.
5. Mantenimentu
Proper care and maintenance will extend the life of your DOMAS TENS EMS Unit and its accessories.
5.1 Pulizia di u dispusitivu
- Turn off the device and disconnect all wires before cleaning.
- Asciugà u dispusitivu cù un soft, damp tela. Ùn aduprate micca detergenti abrasivi o immerse u dispusitivu in acqua.
- Ensure the device is completely dry before storing or next use.
5.2 Cura di i cuscinetti d'elettrodi
- Dopu ogni usu, cacciate delicatamente i cuscinetti da a vostra pelle.
- Place the adhesive side of the pads back onto the transparent protective film.
- Store the pads in the provided storage pouch to keep them clean and prevent drying out.
- If pads lose their stickiness, gently wipe the adhesive surface with a damp cloth and let air dry. Replace pads when they no longer adhere well to the skin.
5.3 Storage
- Conservate l'apparechju è l'accessori in un locu frescu è asciuttu, luntanu da a luce diretta di u sole è da temperature estreme.
- Keep the device and pads in the provided storage pouch or a clean, dry container.
6. Risoluzione di prublemi
If you encounter issues with your DOMAS TENS EMS Unit, refer to the following common troubleshooting tips:
| Prublemu | Causa Possibile | Soluzione |
|---|---|---|
| U dispositivu ùn accende micca. | Batteria bassa o dispusitivu micca caricatu. | Charge the device fully using the provided USB cable and AC adapter. |
| Nisuna sensazione o sensazione debule. |
|
|
| Pads lose stickiness quickly. | Skin is oily or dirty; pads are drying out. | Clean skin thoroughly before application. After use, place pads back on the protective film and store in the pouch. Gently wipe adhesive with a damp cloth if needed. Replace pads when necessary. |
| U schermu ùn risponde micca o hè bluccatu. | Errore di software tempurale. | Press and hold the Power ON/OFF button for 10-15 seconds to perform a hard reset. If the issue persists, contact customer support. |
| Discomfort or skin irritation. | Intensity too high; allergic reaction to pads; improper pad placement. | Decrease intensity immediately. Discontinue use if irritation persists. Ensure pads are not placed over sensitive or broken skin. Try different pad placement. |
7. Specificazioni
Technical details for the DOMAS Touch Screen TENS EMS Unit:
- Numero di mudellu: 898a53b9-6ac2-4d6b-9e0a-edbe601818f0
- Fonte di energia: Alimentatu da a batteria (ricaricabile USB)
- Materiale: Plastica
- Canali: Dual Output (A & B)
- Modi: 24
- Livelli di Intensità: 20
- Timer: Adjustable (e.g., 10-60 minutes)
- Dimensioni: Circa 6.06 x 3.54 x 3.07 inch
- Pesu: Circa 15.2 ounces
- Produttore: DOMAS
8. Garanzia è Support
DOMAS is committed to providing high-quality products. For specific warranty information, please refer to the warranty card included in your product packaging or contact DOMAS customer support directly.
8.1 Assistenza Clienti
If you have any questions, require assistance, or experience issues not covered in this manual, please contact DOMAS customer support. Contact details can typically be found on the product packaging, the official DOMAS websitu, o per mezu di a vostra piattaforma di compra.
