1. Introduzione
Thank you for choosing the Vacmaster 10 Gallon 4 Peak HP Wet/Dry Vacuum with Detachable Blower, model VBVA1010PF. This manual provides essential information for the safe assembly, operation, maintenance, and troubleshooting of your new appliance. Please read all instructions carefully before use and retain this manual for future reference.
2. Importanti Instructions Safety
ATTENZIONE: Per riduce u risicu d'incendiu, scossa elettrica o ferite, leghjite è capite tutte l'istruzzioni prima di utilizà questu apparecchiu.
- Ùn lasciate micca l'apparechju incustoditu quandu hè cunnessu. Scollegate da a presa quandu ùn hè micca in usu è prima di serviziu.
- Ùn aduprate micca fora o nantu à superfici umide.
- Ùn permettenu micca esse usatu cum'è un ghjoculu. Una attente attente hè necessaria quandu s'utilice da o vicinu à i zitelli.
- Aduprà solu cum'è descrittu in stu manuale. Aduprate solu l'attachementi cunsigliati da u fabricatore.
- Ùn aduprate micca cun cordone o plug dannatu. Se l'apparechju ùn funziona micca cum'è duverebbe, hè statu cascatu, dannatu, lasciatu fora, o cascatu in acqua, rinvià à un centru di serviziu.
- Ùn tirate o portate cù u cordone, aduprate u cordone cum'è manicu, chjude una porta nantu à u cordone, o tirate u cordone intornu à bordi o anguli affilati. Ùn fate micca passà l'apparechju nantu à u cordone. Mantene u cordone luntanu da e superfici riscaldate.
- Ùn scollegate micca tirà u cordone. Per disinserisce, pigliate u plug, micca u cordone.
- Ùn manighjà micca u plug o l'apparechju cù e mani bagnate.
- Ùn mette micca ughjettu in aperture. Ùn aduprate micca cù qualsiasi apertura bluccata; Mantene senza polvera, pelucchi, capelli, è tuttu ciò chì pò riduce u flussu d'aria.
- Mantene i capelli, i vestiti sciolti, i dita è tutte e parti di u corpu luntanu da aperture è parti in muvimentu.
- Ùn pigliate micca qualcosa chì brusgia o fuma, cum'è cigarettes, fiammiferi o cendri caldi.
- Ùn aduprate micca per piglià liquidi infiammabili o combustibili, cum'è a benzina, o aduprate in spazii induve ponu esse prisenti.
- Ùn aduprate micca senza filtri in u locu.
- Spegne tutti i cuntrolli prima di scollega.
- Aduprate cura extra durante a pulizia di e scale.
- Do not use to pick up toxic, carcinogenic, combustible or other hazardous materials like asbestos, arsenic, barium, beryllium, lead, pesticides or other health endangering materials.
- Do not use to pick up soot, cement, plaster or drywall dust without a cartridge filter and filter bag in place. These are very fine particles that may affect the performance of the motor or be exhausted back into the air.
- Per riduce u risicu di scossa elettrica, stu apparecchiu hà una spina polarizzata (una lama hè più larga chè l'altru). Stu plug si mette in una presa polarizzata solu un modu. Se u plug ùn si mette micca cumpletamente in a presa, invertite u plug. S'ellu ùn hè micca adattatu, cuntattate un electricista qualificatu per installà a presa adatta. Ùn cambiate micca u plug in ogni modu.
3. Cuntenutu di u pacchettu
Verificate chì tutti i cumpunenti elencati quì sottu sò inclusi in u vostru imballaggio. Se qualchì parte manca o hè dannighjata, cuntattate l'assistenza clienti.
- Vacmaster Wet/Dry Vacuum Unit (10 Gallon Tank, Motor Head)
- Detachable Blower Unit
- Flexible Hose (7 ft)
- Extension Wands (2 pieces)
- Ugliu di u Pianu
- Strumenta di Crevice
- Ugellu d'utilità
- Cartridge Filter (for dry pickup)
- Foam Filter (for wet pickup)
- Manuale d'uso (stu documentu)
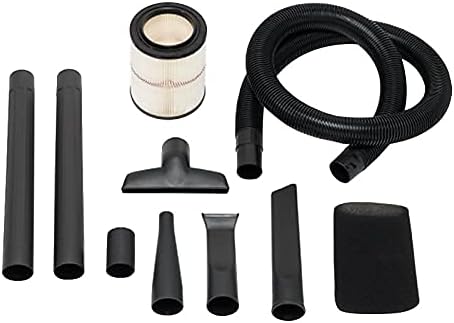
Image: Various accessories for the Vacmaster Wet/Dry Vacuum, including the flexible hose, two extension wands, a floor nozzle, a crevice tool, a utility nozzle, and both cartridge and foam filters.
4. Setup Instructions
4.1 Unpacking
- Eliminate tuttu u cuntenutu da l'imballu.
- Assicuratevi chì tutte e parti sò prisenti è senza danni.
4.2 Attaccà e rote
- Invert the tank.
- Insert the four caster feet into the slots on the bottom of the tank.
- Press firmly until each caster foot clicks securely into place.
4.3 Installazione di filtri
The correct filter must be installed for the type of cleaning you are performing.
For Dry Vacuuming: Cartridge Filter
- Ensure the foam filter is removed.
- Slide the cartridge filter over the filter cage on the motor head.
- Secure the filter with the filter cap by twisting it clockwise until tight.
For Wet Vacuuming: Foam Filter
- Remove the cartridge filter and filter cap.
- Slide the foam filter over the filter cage on the motor head.
- Ensure the foam filter completely covers the filter cage.
4.4 Attaccà u tubu è l'accessori
- Insert the large end of the flexible hose into the vacuum port on the tank and twist to lock.
- Attach desired accessories (extension wands, floor nozzle, crevice tool, utility nozzle) to the other end of the hose.

Image: The Vacmaster Wet/Dry Vacuum fully assembled, showing the main unit, flexible hose, and floor nozzle ready for use.
5. Operating Instructions
5.1 Operazione generale
- Assicuratevi chì l'aspiratore sia assemblatu currettamente cù u filtru currettu per u vostru compitu.
- Plug the power cord into a suitable 120V grounded outlet.
- Turn the power switch located on the motor head to the 'ON' position to start the vacuum.
- To stop operation, turn the power switch to the 'OFF' position.
5.2 Aspiratore seccu
Use the cartridge filter for dry debris pickup.
- Ensure the cartridge filter is securely installed.
- Use appropriate accessories for the type of dry debris (e.g., floor nozzle for large areas, crevice tool for tight spaces).
- Regularly check and clean the cartridge filter to maintain optimal suction.
5.3 Vacuuming Wet
Use the foam filter for liquid pickup.
- Ensure the foam filter is securely installed and the cartridge filter is removed.
- Do not overfill the tank. The vacuum is equipped with an automatic shut-off float mechanism that will stop suction when the tank is full. If suction stops, turn off the vacuum, unplug it, and empty the tank.
- After wet pickup, always empty and clean the tank thoroughly to prevent mold and odors.
5.4 Detachable Blower Function
Your Vacmaster unit features a detachable blower for versatile use.
- Detaching the Blower: Locate the release latches on the motor head. Unlatch them and lift the motor head from the tank. The motor head itself functions as the blower unit.
- Attaching Blower Nozzle: Attach the desired blower nozzle to the air outlet port on the motor head.
- Operazione: Plug the blower unit into a 120V grounded outlet. Turn the power switch to 'ON' to operate the blower.
- Reattaching to Vacuum: To convert back to a vacuum, place the blower unit (motor head) back onto the tank, aligning the latches, and secure them.

Image: A person demonstrating the detachment of the blue blower unit from the main vacuum tank, highlighting the versatility of the product.
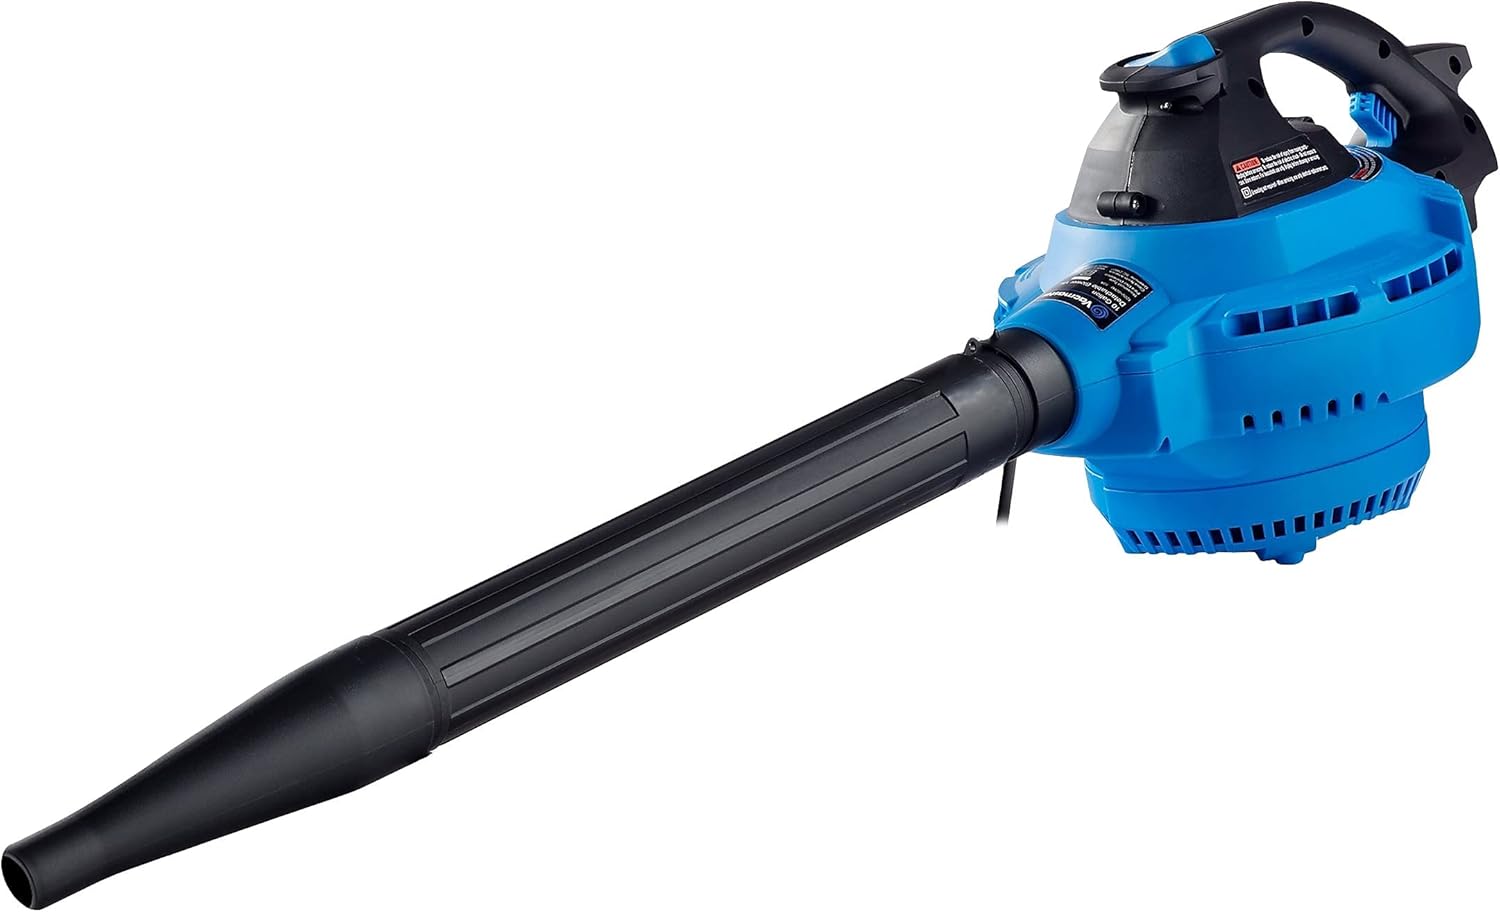
Image: The detached blower unit, a compact blue device with a black handle and a long black nozzle, ready for use as a standalone blower.
6. Mantenimentu
Regular maintenance ensures optimal performance and extends the life of your Vacmaster wet/dry vacuum.
6.1 Pulizia è sustituzione di u filtru
Always unplug the vacuum before performing any maintenance.
Cartridge Filter (Dry Pickup)
- Remove the filter cap and cartridge filter from the filter cage.
- Gently tap the filter against the inside of a trash can to remove loose dirt.
- For thorough cleaning, rinse the filter under running water. Allow it to air dry completely before reinstallation. Do not use the filter if it is still wet.
- Replace the cartridge filter if it is damaged or if suction performance significantly decreases after cleaning.
Foam Filter (Wet Pickup)
- Remove the foam filter from the filter cage.
- Rinse the foam filter under running water to remove debris.
- Squeeze out excess water and allow it to air dry completely before storage or reinstallation.
6.2 Pulizia di u serbatoiu
- After each use, especially wet pickup, empty the tank of all debris and liquids.
- Rinse the inside of the tank with water and mild detergent if necessary.
- Wipe the tank dry or allow it to air dry completely before storing to prevent odors and mildew.
6.3 Cura di i tubi è di l'accessori
- Verificate u tubu è l'accessori per eventuali blocchi o danni prima è dopu ogni usu.
- Clean accessories with water and mild detergent as needed.
- Store the hose and accessories neatly to prevent kinking or damage. The vacuum unit has integrated storage for the hose and some accessories.

Image: The Vacmaster Wet/Dry Vacuum with its hose wrapped around the top and accessories stored in designated slots, demonstrating compact storage.
7. Risoluzione di prublemi
If you encounter issues with your Vacmaster wet/dry vacuum, refer to the following common problems and solutions:
| Prublemu | Causa Possibile | Soluzione |
|---|---|---|
| L'aspiratore ùn si mette micca in funzione. | Nisuna presa di corrente. Cavu d'alimentazione micca incastratu. Interruttore di putenza difettu. | Verificate l'interruttore / fusible. Ensure cord is firmly plugged into a working outlet. Cuntattate l'assistenza clienti. |
| Perdita di aspirazione. | Hose or accessory clogged. U filtru hè sporcu o intasatu. Tank is full (wet pickup). Coperchio micca sigillatu currettamente. | Clear any blockages from hose or accessories. Pulite o rimpiazzà u filtru. Svuotate u tank. Assicuratevi chì i fermi di a testa di u mutore sianu fissati bè. |
| U mutore funziona, ma senza aspirazione. | Hose not connected to inlet. Hose or accessory clogged. Tank is full (wet pickup). | Ensure hose is securely attached to the vacuum port. Clear any blockages. Svuotate u tank. |
| Dust escapes from exhaust. | Filter is missing or damaged. U filtru ùn hè micca stallatu bè. | Install or replace the correct filter. Ensure filter is properly seated and secured. |
8. Specificazioni
| Feature | Detail |
|---|---|
| Marca | Vacmaster |
| Mudellu | VBVA1010PF |
| Capacità | 10 Galloni |
| Motore | 4 Peak HP, 120V |
| Wattage | 270 watts |
| Ampera | 10 Amps |
| Lunghezza di u tubu | 7 Piedi |
| Lunghezza di u cordone | 10 Piedi |
| Dimensioni di u produttu (L x W x H) | 18 x 18 x 24 inch |
| Pesu di l'articulu | 26.2 liri |
| Tipu di filtru | Cartridge (Dry), Foam (Wet) |
| Funzioni spiciali | Wet/Dry Functionality, Detachable Blower |
| Numeru d'Identificazione di u Cummerciu Globale (GTIN) | 00814953015406 |
| Codice Universale di u Produttu (UPC) | 814953015406 |
9. Garanzia infurmazione
This Vacmaster product is covered by a Garanzia di u fabricatore di 1 anni from the date of purchase. This warranty covers defects in materials and workmanship under normal use. It does not cover damage resulting from misuse, abuse, accident, commercial use, or unauthorized repairs. Please retain your proof of purchase for warranty claims.
10. Assistenza Clienti
For technical assistance, replacement parts, or warranty inquiries, please contact Vacmaster customer support. Refer to the official Vacmaster websitu o l'imballu di u vostru pruduttu per l'infurmazioni di cuntattu più recenti.
When contacting support, please have your model number (VBVA1010PF) and proof of purchase readily available.


