1. Introduzione
This manual provides comprehensive instructions for the assembly, operation, and maintenance of your Zipper ZI-CR342 Pet Enclosure. Please read this manual thoroughly before assembly and use to ensure safe and correct operation. Keep this manual for future reference.

Figura 1: The Zipper ZI-CR342 Pet Enclosure. This image shows the complete structure of the enclosure, featuring a galvanized metal frame and PVC-coated wire mesh walls, with a door for access. The peaked roof design provides ample space and protection.
2. Istruzzioni di sicurità
- Ensure all components are securely fastened during assembly to prevent collapse.
- Place the enclosure on a level, stable surface to maintain structural integrity.
- Regularly inspect the enclosure for any damaged parts, sharp edges, or loose connections. Repair or replace as necessary.
- Do not allow children to climb on or play inside the enclosure unsupervised.
- This enclosure is designed for pets; do not use it for purposes other than its intended use.
- Wear appropriate protective gear (gloves) during assembly to avoid cuts from wire mesh or metal edges.
3. Cuntenutu di u pacchettu
Verificate chì tutti i cumpunenti elencati quì sottu sianu presenti è intatti prima di cumincià u montaggio.
- Galvanized steel tubes (Ø25 x 0.65 mm) for frame construction.
- PVC-coated galvanized wire mesh panels.
- UV-resistant sun protection film for the roof.
- Door assembly with zipper closure.
- Fixing materials (connectors, bolts, nuts, cable ties).
4. Setup è Assemblea
The Zipper ZI-CR342 features a simple modular interlocking system for straightforward assembly. Two people are recommended for easier setup.
- Preparate l'area: Choose a flat, clear, and stable outdoor location for the enclosure. Ensure adequate space for the 3m x 4m footprint.
- Assemblà u quadru di basa: Connect the galvanized tubes to form the rectangular base (3m x 4m) using the provided connectors. Ensure all connections are snug.
- Erect Vertical Supports: Attach the vertical tubes to the base frame at designated points.
- Installà a struttura di u tettu: Construct the peaked roof frame by connecting the remaining tubes to the vertical supports.
- Attach Wire Mesh Panels: Secure the PVC-coated galvanized wire mesh panels to the frame using the provided fixing materials (e.g., cable ties, clips). Ensure the mesh is taut and covers all open sides.
- Installà a porta: Integrate the door assembly into the designated opening. Ensure it opens and closes smoothly and the zipper closure functions correctly.
- Apply Sun Protection Film: Drape and secure the UV-resistant sun protection film over the roof section. This provides shade and protection from the elements.
- Ispezione finale: Double-check all connections, ensuring they are tight and secure. Verify there are no gaps or sharp edges that could harm animals.

Figura 2: Detail of a frame joint. This image illustrates how the galvanized tubes connect using the modular system, highlighting the secure fastening points essential for structural stability.

Figura 3: Detail of the wire mesh. The PVC-coated galvanized wire mesh provides durability and protection for the animals within the enclosure.
5. Funziunamentu di l'involucru
- Accessu: Use the zippered door for entry and exit. Always ensure the zipper is fully closed when animals are inside to prevent escape.
- Placement: Position the enclosure in an area that offers additional natural shade or protection from strong winds, if possible, in addition to the provided sun protection film.
- Introduzione di l'animali: Introduce pets to the enclosure gradually, ensuring they have access to food, water, and appropriate shelter within the enclosure (e.g., a small coop for poultry).
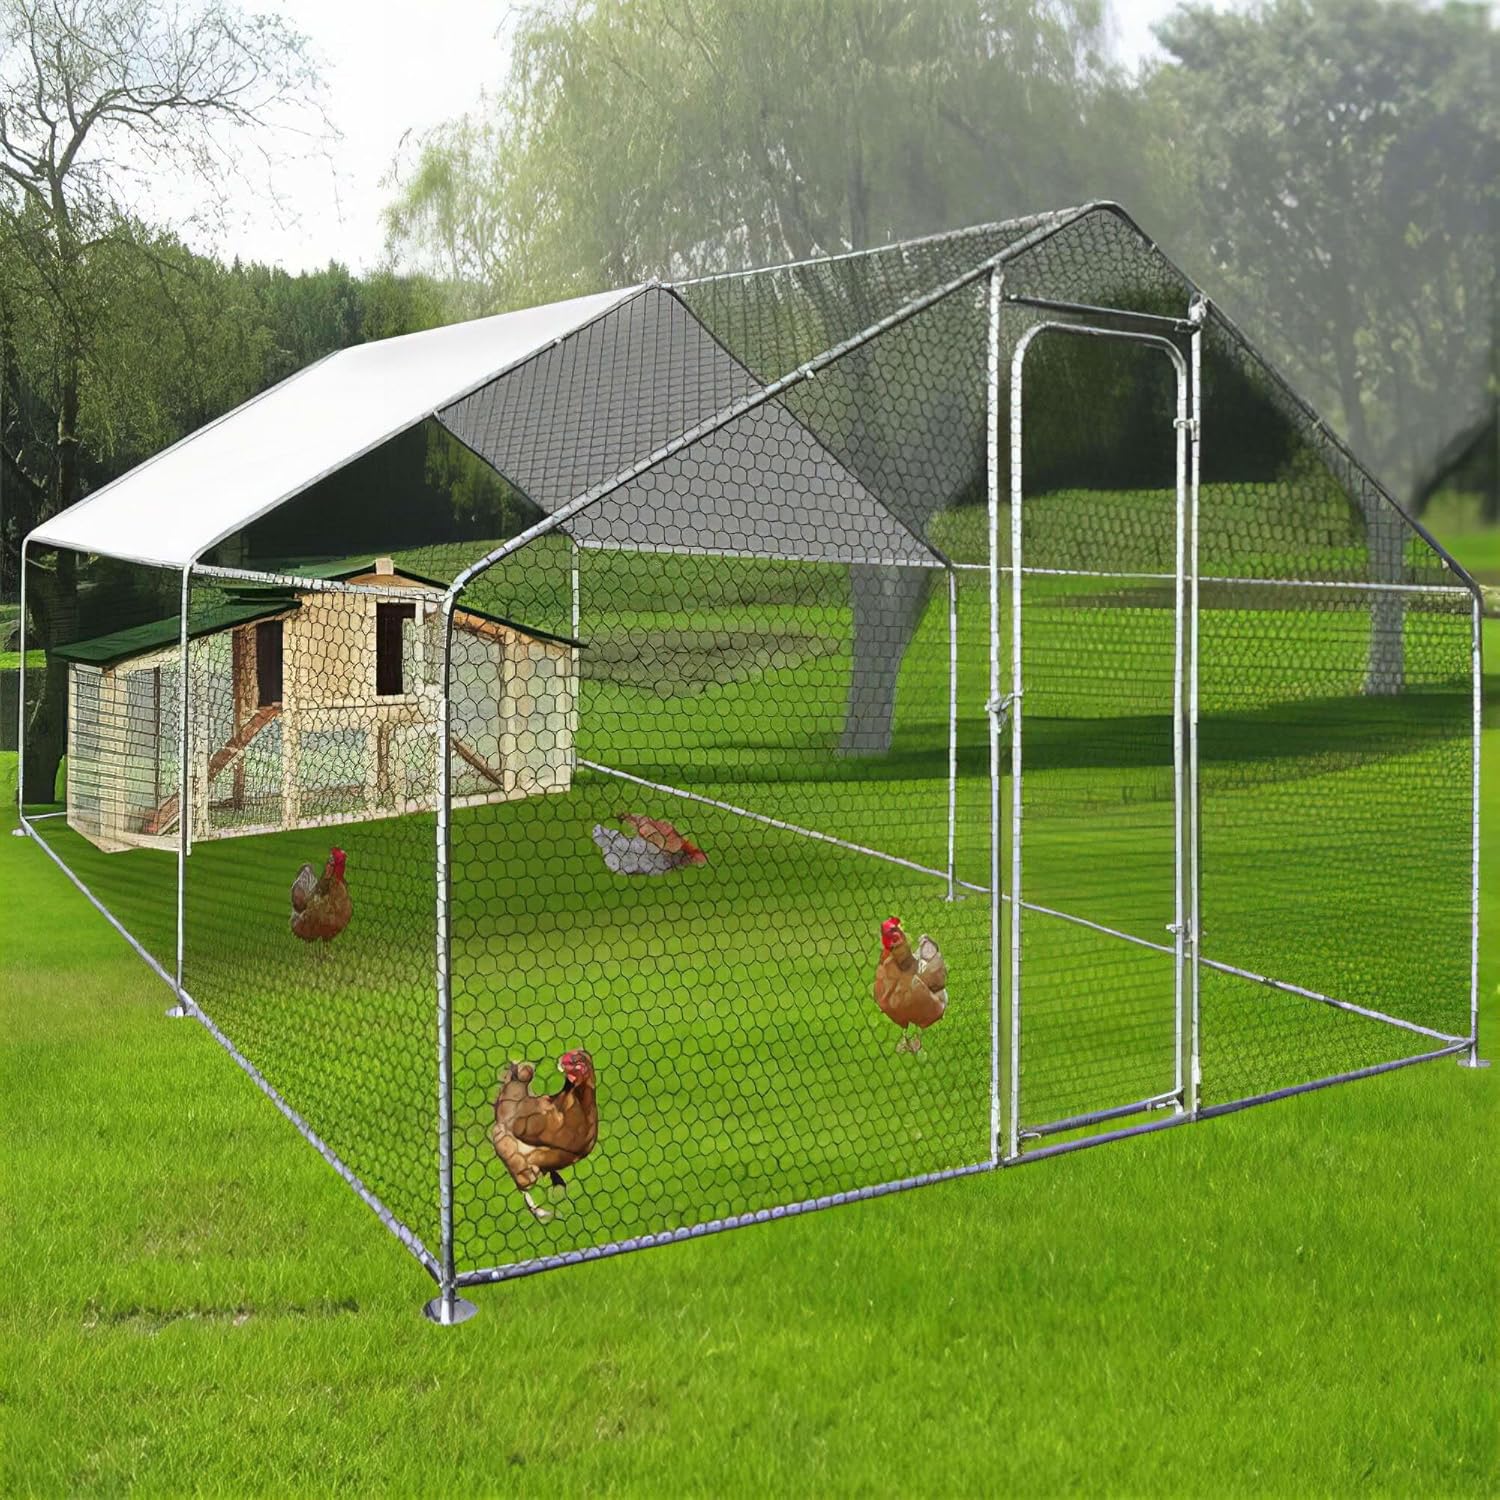
Figura 4: Example of enclosure use. This image demonstrates the Zipper ZI-CR342 Pet Enclosure in a typical setup, providing a secure and spacious environment for poultry, complete with an internal shelter.
6. Mantenimentu
- Pulizia: Regularly clean the enclosure, including the mesh and frame, with mild soap and water. Rinse thoroughly and allow to dry.
- Ispezione: Periodically check all frame connections, mesh integrity, and the door mechanism for wear or damage. Tighten any loose bolts.
- UV Film: Inspect the UV protection film for tears or degradation. Replace if necessary to maintain sun protection.
- Invernamentu: In areas with heavy snow or extreme weather, consider disassembling or reinforcing the enclosure to prevent damage.
7. Risoluzione di prublemi
- Enclosure Instability: Ensure all frame tubes are fully inserted into connectors and all bolts are tightened. Verify the enclosure is on level ground.
- Mesh Damage: Small tears in the PVC-coated mesh can often be repaired with heavy-duty zip ties or specialized mesh repair kits. For large damage, consider replacing the affected panel.
- Malfunzionamentu di a cerniera: Check for obstructions in the zipper teeth. Apply a silicone-based lubricant if the zipper is stiff. If damaged, the door panel may need replacement.
8. Specificazioni
| Feature | Detail |
|---|---|
| Mudellu | ZI-CR342 |
| Dimensioni (L x W x H) | 3 m x 4 m x 2 m (approximately 9.8 ft x 13.1 ft x 6.6 ft) |
| Pesu | 35.9 kg (circa 79.1 libbre) |
| Materiale di quadru | Galvanized Steel Tubes (Ø25 x 0.65 mm) |
| Mesh Material | PVC-coated Galvanized Wire Mesh |
| Materiale di u tettu | UV-resistant Sun Protection Film |
| Tipu di chiusura | Zipper |
| Funzioni spiciali | Modular interlocking system, UV resistant |
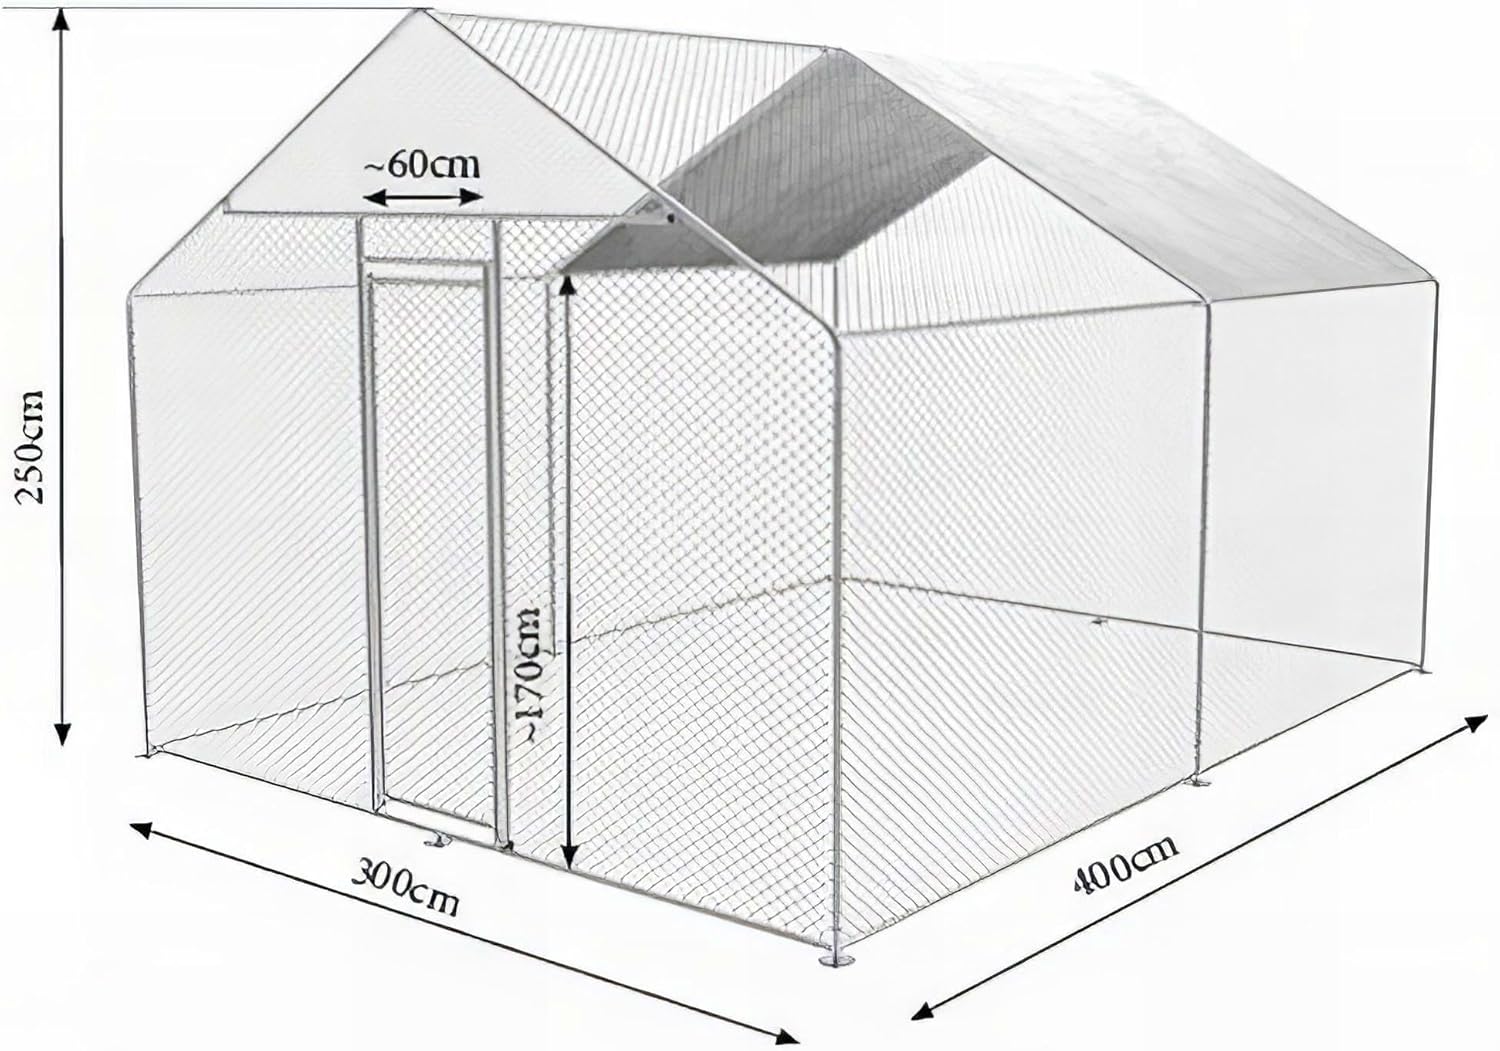
Figura 5: Enclosure dimensions. This diagram provides a clear overview of the enclosure's measurements, including its overall length, width, height, and the dimensions of the access door.
9. Garanzia è Support
The Zipper ZI-CR342 Pet Enclosure comes with a Disponibilità di pezzi di ricambio per 2 anni. For warranty claims, technical support, or to order replacement parts, please contact your retailer or the manufacturer directly. Ensure you have your proof of purchase and model number (ZI-CR342) ready when contacting support.


