1. Introduzione
This manual provides essential information for setting up, operating, and maintaining your Lenovo L24q-30 23.8-inch QHD monitor. The L24q-30 is designed to deliver a superior visual experience with its QHD (2560 x 1440) resolution, IPS panel, and >99% sRGB color gamut. It features AMD FreeSync technology, a 75Hz refresh rate, and a 4ms response time for smooth visuals. The monitor is TüV Eye Comfort certified, reducing blue light and flicker for extended viewing comfort. Connectivity options include HDMI 1.4 and DisplayPort 1.2, along with a 3.5mm audio output.
2. Informazioni di sicurezza
Please read this section carefully before using your monitor to ensure safe and proper operation.
- Pone sempre u monitor nantu à una superficia stabile è piana per impedisce ch'ellu caschi.
- Assicuratevi una ventilazione adatta intornu à u monitor. Ùn bluccate micca l'aperture di ventilazione.
- Aduprate solu l'adattatore di alimentazione è i cavi furniti cù u monitor.
- Ùn espone micca u monitor à a pioggia o à l'umidità per evità scosse elettriche.
- Scollega u monitor da a presa di corrente prima di pulisce.
- Evite di toccu u screnu cù oggetti affilati.
- If any unusual smoke, noise, or odor occurs, immediately unplug the monitor and contact customer support.
3. Cuntenutu di u pacchettu
Verificate chì tutti l'articuli sò presenti in u vostru pacchettu:
- Lenovo L24q-30 Monitor
- Monitor Stand Base
- Collu di supportu per monitor
- Cavu di putenza
- Cavu HDMI
- Quick Setup Guide / Warranty Card
4. Setup
4.1 Assemblaggio di u Supportu di u Monitor
- Carefully remove the monitor from its packaging, placing it face down on a soft, clean cloth to protect the screen.
- Attaccate u collu di u supportu à u pannellu di u monitor allineendu e linguette è spinghjendu finu à chì si mette in pusizione.
- Attaccate a basa di u supportu à u collu di u supportu. Fissatela cù a vite imperdibile situata sottu à a basa.
- Alzate delicatamente u monitor assemblatu è mettitelu in verticale nantu à una superficia stabile.

Figura 4.1: Side view of the monitor with the stand attached, showing its slim profile.
4.2 Cavi di cunnessione
Refer to the image below for port locations on the back of the monitor.
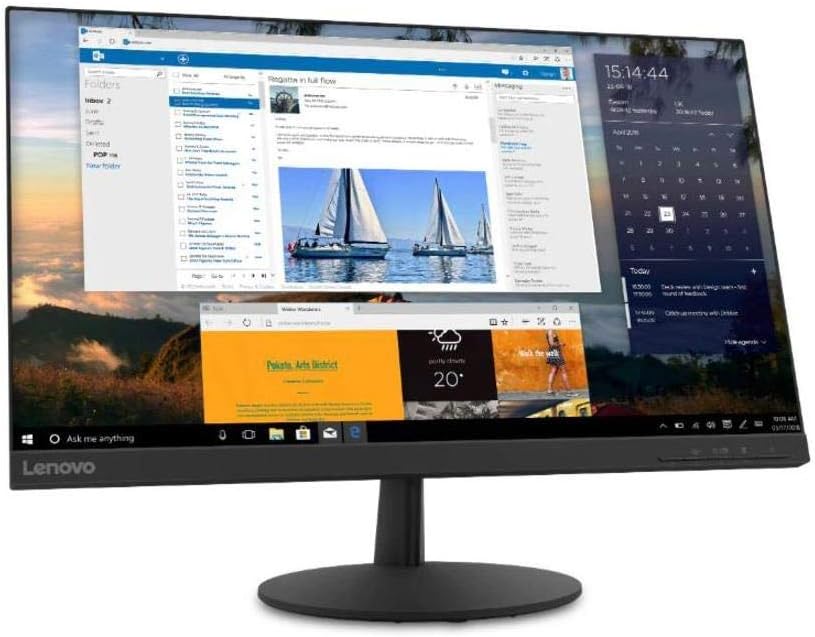
Figura 4.2: Posteriore view of the monitor, highlighting the power input, HDMI, DisplayPort, and audio output ports.
- Cunnessione di putenza: Connect the power cable to the monitor's power input port, then plug the other end into a grounded electrical outlet.
- Cunnessione Video:
- For HDMI: Connect one end of the HDMI cable to the monitor's HDMI port and the other end to the HDMI output port on your computer.
- For DisplayPort: Connect one end of the DisplayPort cable to the monitor's DisplayPort and the other end to the DisplayPort output on your computer.
- Uscita Audio (Opzionale): If you wish to connect external speakers or headphones directly to the monitor, plug them into the 3.5mm audio out port.
4.3 Power-On iniziale
Press the power button located on the front or bottom bezel of the monitor. The power indicator light will illuminate. If no image appears, ensure all cables are securely connected and your computer is powered on.
5. Operazione di u Monitor
5.1 Cuntrolli di visualizazione in schermu (OSD)
The monitor features control buttons, typically located on the bottom right bezel, to access and navigate the On-Screen Display (OSD) menu. These buttons allow you to adjust various monitor settings.
- Pulsante di putenza: Accende o spegne u monitor.
- Pulsante di menu: Apre u menu OSD.
- Buttoni di navigazione (Su/Ghjuù/Sinistra/Destra): Adupratu per navigà trà l'opzioni di u menù è aghjustà i valori.
- Buttone Enter/Selezziunà: Cunfirma una selezzione o accede à un sottumenu.
- Buttone di surtita: Esce da u menu attuale o torna à u livellu precedente.
5.2 Ajusting Settings
To adjust monitor settings:
- Press u Menu buttone per apre l'OSD.
- Use the navigation buttons to select a category (e.g., Picture, Color, Input).
- Press Entre / Selezziunà to enter the category.
- Use navigation buttons to adjust values (e.g., Brightness, Contrast, Color Temperature) or select sub-options.
- Press Entre / Selezziunà per cunfirmà i cambiamenti.
- Press Esci per abbandunà u menu OSD.
5.3 Activating AMD FreeSync
To utilize AMD FreeSync technology, ensure your graphics card supports FreeSync and that it is enabled in your graphics card's control panel. Then, navigate to the OSD menu on your monitor, typically under a 'Gaming' or 'Display' section, and enable the FreeSync option.
5.4 Adjusting Refresh Rate
The monitor supports a 75Hz refresh rate. To set this, you may need to adjust the display settings within your operating system (e.g., Windows Display Settings or macOS System Preferences) after connecting the monitor. Select the highest available refresh rate for optimal performance.
6. Mantenimentu
6.1 Pulizia di u Monitor
- Screen: Asciugate delicatamente u schermu cù un pannu dolce è senza pelu. Per e macchie ostinate, asciugate delicatamente.ampSciacquate u pannu cù acqua o un detergente per schermi senza ammoniaca è senza alcolu. Ùn spruzzate micca u detergente direttamente nantu à u schermu.
- Casing: Aduprate un pannu dolce è asciuttu per asciugà u monitor casing. Evitate i detergenti o i solventi abrasivi.
- Scollegate sempre u monitor prima di pulisce.
6.2 Storage
Sè vo almacenate u monitor per un periodu prolongatu, scollegate tutti i cavi è imballatelu in u so imballaggio originale se pussibule. Conservate in un locu frescu è asciuttu, luntanu da a luce diretta di u sole è da temperature estreme.
7. Risoluzione di prublemi
Sè avete prublemi cù u vostru monitor, riferitevi à i seguenti prublemi cumuni è suluzioni:
| Prublemu | Soluzione Possibile |
|---|---|
| Nisuna alimentazione / LED di alimentazione spento | Ensure the power cable is securely connected to both the monitor and the electrical outlet. Check the power outlet with another device. |
| Nisuna imagine / missaghju "Nisun segnale" | Verify the video cable (HDMI/DisplayPort) is securely connected to both the monitor and the computer. Ensure the correct input source is selected in the OSD menu. Check if the computer is powered on and not in sleep mode. |
| L'imagine hè sfocata o distorta | Ensure the monitor's native resolution (2560x1440) is selected in your computer's display settings. Adjust brightness, contrast, and sharpness settings in the OSD menu. |
| U screnu lampeggia | Check the video cable for damage or loose connections. Ensure the refresh rate is set correctly (75Hz). Disable FreeSync temporarily to see if it resolves the issue. |
| I culori sò sbagliati | Adjust color settings (Color Temperature, Gamma) in the OSD menu. Reset color settings to factory defaults. |
8. Specificazioni
| Feature | Detail |
|---|---|
| Nome di mudellu | Lenovo L24q-30 |
| Size Screen | 23.8 inch |
| Tipu di pannellu | IPS (In-Plane Switching) |
| Risoluzione | QHD (2560 x 1440) |
| Rapportu d'aspettu | 16: 9 |
| Frequenza di rinfrescante | 75 Hz |
| Tempu di risposta | 4 ms |
| Gamma di culori | > 99% sRGB |
| Rapportu di cuntrastu dinamicu | 3 M: 1 |
| Viewing Angulu | 178 ° (H/V) |
| Connettività | 1x HDMI 1.4, 1x DisplayPort 1.2, 1x Audio Out (3.5mm) |
| Compatibilità VESA Mount | 100 mm x 100 mm |
| Eye Comfort Certification | TüV Rheinland Eye Comfort |
| Dimensioni (cù stand) | Approx. 21 x 38 x 49 inches (W x D x H) - Note: These dimensions may refer to packaging. Refer to product documentation for exact monitor dimensions. |
| Pesu (cù stand) | Approx. 1 pound - Note: This weight appears to be incorrect for a monitor. Refer to product documentation for exact weight. |
| Culore | Neru |
9. Garanzia è Support
For detailed warranty information, please refer to the warranty card included in your product package or visit the official Lenovo support website. The warranty covers manufacturing defects under normal use conditions.
For technical support, driver downloads, or service inquiries, please visit the Lenovo Support website or contact their customer service department. Have your monitor's model number (L24q-30) and serial number ready when contacting support.
Supportu Lenovo Websitu: support.lenovo.com


