1. Introduzione
This manual provides detailed instructions for the safe and effective use of your Streamlight TLR-8 X G sub tactical weapon light with an integrated green aiming laser. Designed exclusively for Glock 43X and Glock 48 MOS Rail subcompact handguns, this device enhances target acquisition and visibility in low-light conditions. Please read all instructions carefully before installation and operation.
2. Produttu Finituview
The Streamlight TLR-8 X G sub combines a powerful LED light with a precise green aiming laser, offering versatile illumination and targeting capabilities. Its compact design ensures a seamless fit without adding significant bulk to your firearm.
2.1 Funzioni chjave
- Securely attaches to Glock 43X MOS/48 MOS and Glock 43X RAIL/48 Rail subcompact handguns.
- High mode provides 500 lumens, 5000 Candela, and a 141-meter beam distance.
- Tempu di funziunamentu di 1.5 ore solu cù a luce.
- Three operational modes: LED light only, LED/laser combo, and laser only.
- User-enabled strobe mode.
- Class 3R green laser (510-530nm, <5mW output).
- Next-generation rear paddle switch for ergonomic activation.
- Safe Off feature to prevent accidental activation and conserve battery life.
- Robust rail clamp system for tool-free attachment/detachment.
2.2 Cumponenti inclusi
- TLR-8 X G sub Flashlight
- 1x Batteria CR123A
- High and Low Switches
- Mounting Kit, Key Box, and Tool
- Guida di l'utente (questu manuale)
3. Setup
3.1 Installazione di batterie
The TLR-8 X G sub uses one (1) CR123A lithium battery. Ensure the battery is inserted with the correct polarity as indicated inside the battery compartment.

Image: Streamlight TLR-8 X G sub with included battery and alternative switches.
3.2 Istruzzioni di muntatura
The TLR-8 X G sub features a rail clamp system for quick and secure attachment to your Glock 43X/48 MOS/Rail subcompact handgun without the need for tools. Ensure the firearm is unloaded and safe before proceeding.
- Align the rail clamp with the accessory rail on your Glock.
- Open the rail clamp by loosening the mounting screw.
- Slide the TLR-8 X G sub onto the rail until it clicks into place.
- Tighten the mounting screw securely by hand. Do not overtighten.

Image: Front view of the Streamlight TLR-8 X G sub, showing the light and laser aperture.
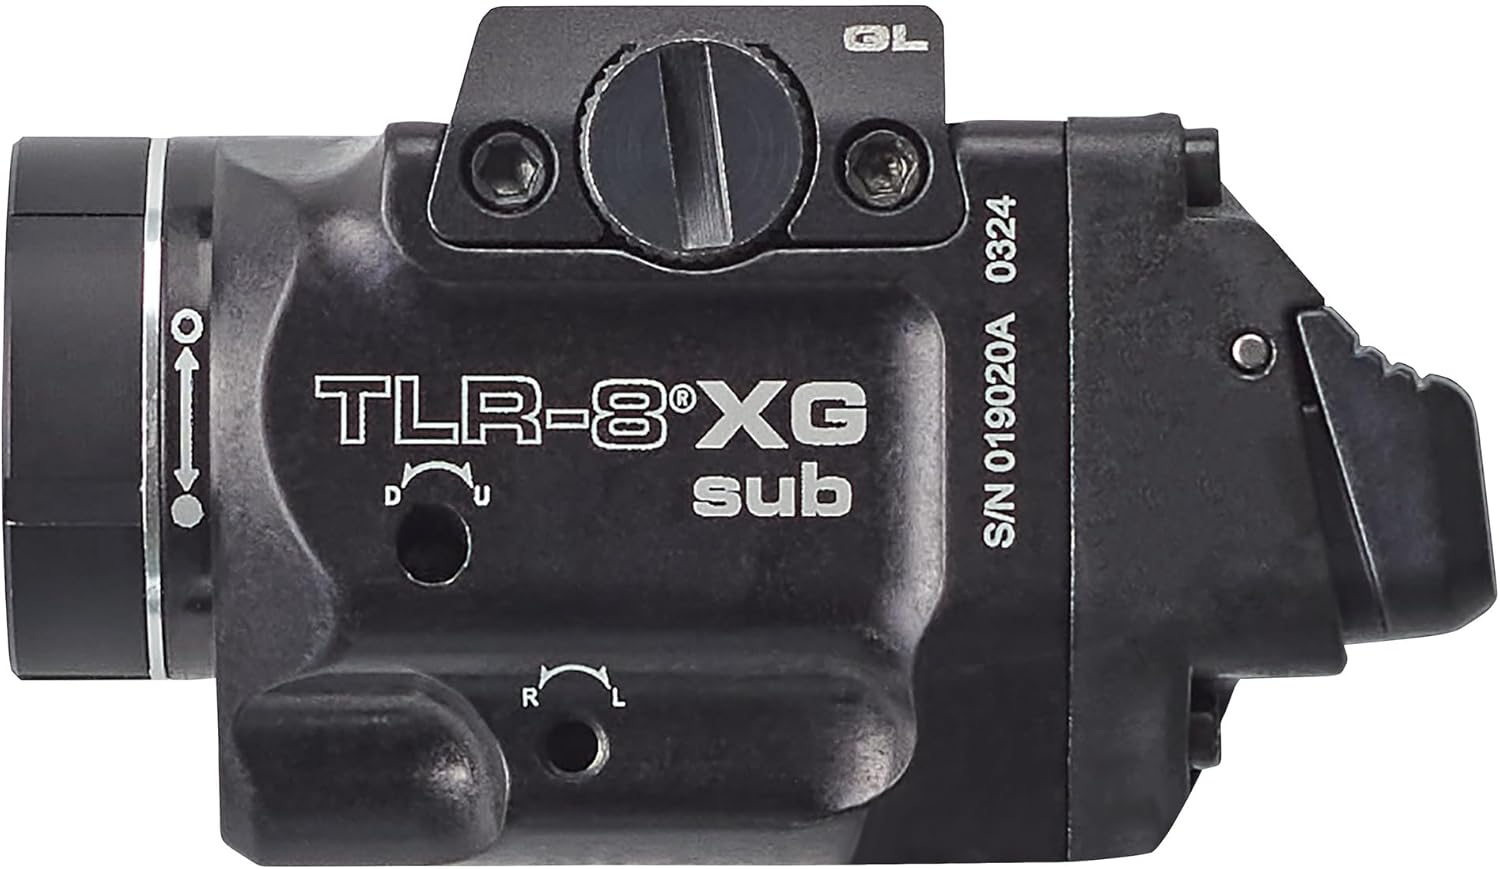
Imagine: Latu view of the Streamlight TLR-8 X G sub, highlighting its compact profile.

Imagine: Daretu view of the Streamlight TLR-8 X G sub, showing the paddle switches.
3.3 Switch Installation (Optional)
The TLR-8 X G sub comes with both high and low profile rear paddle switches. You can choose the switch configuration that best suits your shooting style and ergonomic preference. Refer to the included mounting kit for instructions on changing the switches.

Image: Visual comparison between the high and low profile interruttori à pale posteriori.
4. Operating Instructions
The TLR-8 X G sub offers multiple modes and intuitive controls for various tactical situations.
4.1 Funzionamentu di basa
- Attivazione Momentanea: Appughjà è tene premutu unu di l'interruttori à paletta. Rilasciate per spegne.
- Constant On: Press and quickly release either paddle switch. Press and quickly release again to turn off.
4.2 Selezzione Mode
The TLR-8 X G sub features three primary modes: LED Light Only, LED Light & Laser, and Laser Only. To cycle through modes:
- Ensure the unit is OFF.
- Press and hold one paddle switch, then press the opposite paddle switch.
- Release both switches. The unit will cycle to the next mode. Repeat until the desired mode is selected.

Image: The Streamlight TLR-8 X G sub with its green aiming laser activated.
4.3 Modu Stroboscopicu
To activate the strobe mode (if enabled):
- From the OFF position, quickly double-tap either paddle switch.
- To disable strobe, quickly double-tap again or turn the unit off.
4.4 Safe Off Feature
The Safe Off feature prevents accidental activation during storage or transport, conserving battery life. To engage Safe Off:
- Ensure the unit is OFF.
- Rotate the bezel counter-clockwise until it stops. This disconnects the battery.
To re-enable operation, rotate the bezel clockwise until it is fully tightened.
4.5 Laser Zeroing
The integrated green laser can be adjusted for windage and elevation to align with your firearm's point of impact. Use the included tool to make fine adjustments to the laser's aim.
- Ajustamentu di l'altitudine: Use the vertical adjustment screw (marked 'U' for Up, 'D' for Down).
- Ajustamentu di u vento: Use the horizontal adjustment screw (marked 'L' for Left, 'R' for Right).
WARNING: Always follow safe firearm handling procedures. Perform laser zeroing at a safe range, pointing the firearm in a safe direction.
5. Mantenimentu
5.1 Sustituzione di batterie
When the light output diminishes or the laser becomes dim, it is time to replace the CR123A battery. Always use a fresh, high-quality lithium battery.
- Ensure the unit is in Safe Off mode (bezel rotated counter-clockwise).
- Unscrew the bezel completely to access the battery compartment.
- Eliminate a vechja bateria è sguassate bè.
- Insert a new CR123A battery with the positive (+) end facing towards the bezel.
- Screw the bezel back on tightly to ensure proper contact and water resistance.
5.2 Pulizia
Regular cleaning will ensure optimal performance and longevity of your TLR-8 X G sub.
- Asciugà l'esterno cù l'annunziuamp tela. Ùn aduprate micca detergenti abrasivi.
- Clean the lens with a soft, lint-free cloth. For stubborn dirt, a small amount of lens cleaner designed for optics can be used.
- Keep the rail clamp and contact points free of debris.
5.3 Storage
When storing the unit for extended periods, engage the Safe Off feature by rotating the bezel counter-clockwise to prevent battery drain.
6. Risoluzione di prublemi
| Prublemu | Causa Possibile | Soluzione |
|---|---|---|
| A luce/u laser ùn s'accende micca. | Battery is dead or improperly installed. Safe Off feature engaged. | Replace battery. Ensure bezel is fully tightened. |
| A luce hè fioca o tremola. | Low battery. Loose bezel. Dirty contacts. | Replace battery. Tighten bezel. Clean battery contacts. |
| Laser is not visible or erratic. | Low battery. Dirty laser aperture. | Replace battery. Clean laser aperture. |
| Unit detaches from rail. | Mounting screw is loose. Incorrect key used for rail type. | Tighten mounting screw. Ensure correct key is installed for your Glock model. |
7. Specificazioni
| Feature | Detail |
|---|---|
| Numero di mudellu | 69431 |
| Fonte di luce | LED |
| Luminosità bianca | 500 lumens |
| Intensità di Fasciu Piccu | 5000 Candela |
| Distanza di fasciu | 141 metri |
| Tipu di batterie | 1x CR123A Lithium (included) |
| Runtime (Solu Luce) | 1.5 ore |
| Tipu di laser | Laser di mira verde (Classe 3R, 510-530nm, <5mW) |
| Materiale | Alluminiu |
| Culore | Neru |
| Pesu di l'articulu | 2.72 once |
| Dimensioni di u produttu | 2.51 "D x 1.16" W x 1.5 "H |
| Livellu di resistenza à l'acqua | Resistente à l'acqua (IPX4) |
| Cunfurmità | ANSI FL1, CE |
8. Garanzia è Supportu
8.1 Garanzia infurmazione
Streamlight products are backed by a Limited Lifetime Warranty. For specific details regarding warranty coverage and claims, please refer to the official Streamlight websitu o cuntattate u so serviziu di u cliente.
8.2 Risorse supplementari
For further assistance or to download the official User Guide PDF, please visit the Streamlight websitu o riferitevi à u ligame seguente:


