1. Introduzione
Thank you for choosing the COUGAR MX360 RGB Mid Tower Case. This manual provides essential information for the proper installation, operation, and maintenance of your new PC case. The MX360 RGB combines a sleek design with ARGB LED strips on the front panel, offering excellent cooling performance and support for a wide range of components, including up to a 360mm radiator, 315mm graphics cards, and 170mm CPU coolers. Its compact layout and full-length PSU shroud contribute to a clean and organized build.
2. Informazioni di sicurezza
- Scollegate sempre l'alimentatore da a presa murale prima di installà o rimuovere qualsiasi cumpunente.
- Handle components with care to avoid damage from static electricity. Consider using an anti-static wrist strap.
- Tenite e piccule parti è e viti luntanu da i zitelli.
- Assicuratevi una ventilazione adatta intornu à a carcassa per impedisce u surriscaldamentu.
- Ùn pruvate micca di mudificà a carcassa o i so cumpunenti, postu chì questu puderia annullà a garanzia è presentà risichi per a sicurezza.
3. Cuntenutu di u pacchettu
Verificate chì tutti l'articuli seguenti sò inclusi in u vostru pacchettu:
- Custodia COUGAR MX360 RGB Mid Tower
- Scatola di accessori (chì cuntene viti, distanziatori, fascette per cavi, ecc.)
- Manuale d'uso (stu documentu)
4. Produttu Finituview
The COUGAR MX360 RGB case features a minimalist design with integrated ARGB lighting and a tempered glass side panel for showcasing your build.

Figura 4.1: Parte anteriore view of the COUGAR MX360 RGB case, showing the interior and active RGB lighting.
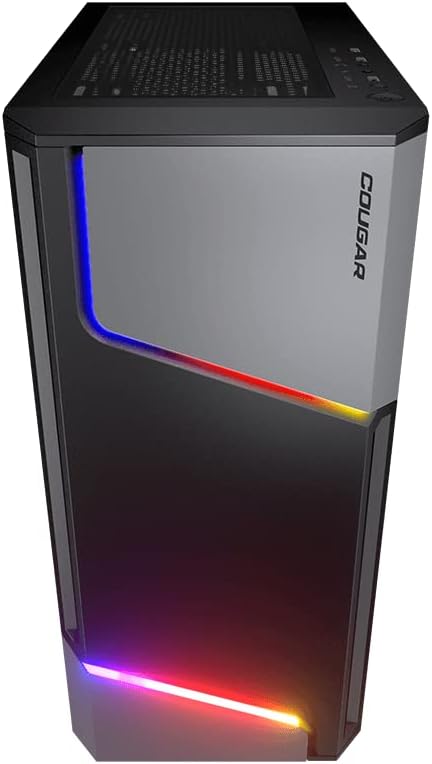
Figura 4.2: Fronte view of the COUGAR MX360 RGB case, highlighting the integrated ARGB LED strips.
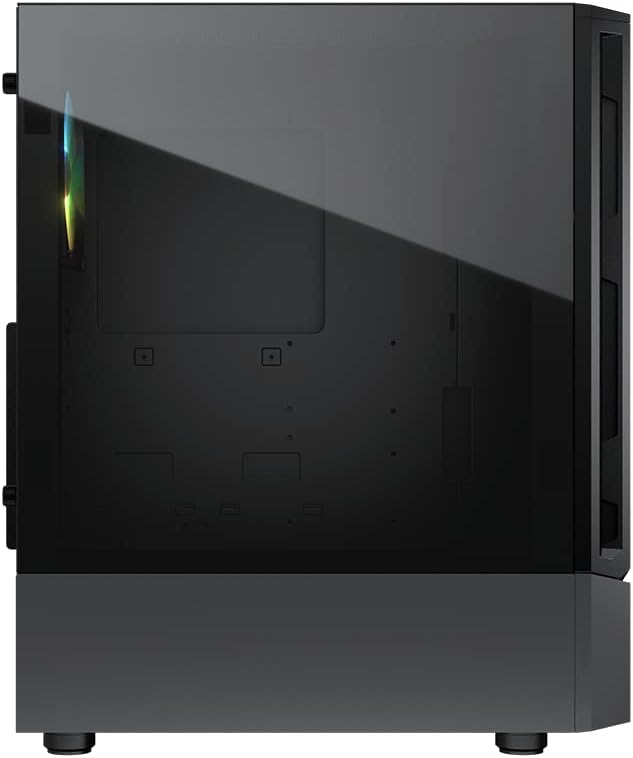
Figura 4.3: Side view of the COUGAR MX360 RGB case, featuring the tempered glass panel.

Figura 4.4: Fronte angulata view of the COUGAR MX360 RGB case, showcasing its design and ARGB elements.
5. Setup è Installazione
Follow these steps to install your components into the COUGAR MX360 RGB case.
5.1 Preparazione di u Casu
- Pone a custodia nantu à una superficia piana è stabile.
- Remove the tempered glass side panel by unscrewing the thumb screws at the rear of the case and carefully sliding the panel off.
- Remove the opposite metal side panel by unscrewing the thumb screws and sliding it off.
5.2 Installazione di a Scheda Madre
- Install the I/O shield (if not pre-installed on your motherboard) into the rear opening of the case.
- Ensure the correct standoffs are installed for your motherboard form factor (ATX, Micro-ATX, Mini-ITX). Adjust or add standoffs as needed.
- Pone cù cura a vostra scheda madre nantu à i distanziatori, allineendu i fori di e viti.
- Assicurate a scheda madre cù e viti furnite.
5.3 Installazione di l'unità di alimentazione (PSU).
- Locate the PSU shroud at the bottom of the case.
- Slide your PSU into the designated compartment from the rear of the case.
- Assicurate l'alimentatore cù viti da u fondu di u chassis.
- Route necessary cables through the cutouts in the PSU shroud for cable management.
5.4 Installazione di l'unità di almacenamiento
The MX360 RGB supports various storage configurations.
- Dischi rigidi di 3.5": Install into the drive cage located under the PSU shroud.
- 2.5" SSDs/HDDs: Mount onto the dedicated trays or mounting points behind the motherboard tray.
5.5 Installazione di a carta grafica (GPU)
- Eliminate i coperchi di slot PCIe necessarii da u fondu di u chassis.
- Insert your graphics card into the appropriate PCIe slot on the motherboard.
- Secure the graphics card with screws. The case supports graphics cards up to 315mm in length.
5.6 Cooling System Installation (Fans/Radiators)
The case supports up to six fans and a 360mm water cooling radiator.
- Fronte: Supports up to 3 x 120mm or 2 x 140mm fans, or a 240/280/360mm radiator.
- Top: Supports up to 2 x 120mm or 2 x 140mm fans, or a 240/280mm radiator.
- daretu: Supports 1 x 120mm fan.
Install fans or radiators using the provided screws, ensuring proper airflow direction.
5.7 Cunnessioni Front Panel
Connect the front panel cables (USB, Audio, Power, Reset, LED) to their corresponding headers on your motherboard. Refer to your motherboard manual for exact header locations.
5.8 ARGB Lighting Connection
The integrated ARGB LED strips on the front panel connect via a 5V/3Pin ARGB connector. Connect this cable to a compatible 5V/3Pin ARGB header on your motherboard to synchronize lighting effects with your system.
6. Funziunamentu di u Casu
Once all components are installed and connected, replace the side panels. Power on your system using the power button on the top I/O panel. The ARGB lighting will illuminate, controlled by your motherboard's software or a dedicated ARGB controller if you have one installed.
7. Mantenimentu
Una manutenzione regulare aiuta à assicurà prestazioni ottimali è longevità di i cumpunenti di u vostru PC.
- Filtri di polvere: The MX360 RGB includes removable dust filters (e.g., top, bottom). Periodically remove and clean these filters with compressed air or water (ensure they are completely dry before reinstallation).
- Pulizia interna: Use compressed air to remove dust from internal components like fans, heatsinks, and the motherboard.
- Pulizia esterna: Asciugà e superfici esterne cun un soffiu, damp tela. Evita i detergenti abrasivi.
8. Risoluzione di prublemi
Sè avete prublemi, riferitevi à i seguenti passi cumuni di risoluzione di i prublemi:
- Nisun putere: Ensure all power cables (24-pin ATX, 8-pin CPU, GPU power) are securely connected. Check the PSU switch is in the 'ON' position. Verify front panel power button connection to the motherboard.
- L'illuminazione ARGB ùn funziona micca: Confirm the 5V/3Pin ARGB connector is correctly plugged into a compatible motherboard header. Check your motherboard's RGB software for control settings.
- Surriscaldamentu: Ensure all case fans are spinning and oriented correctly for optimal airflow. Check for dust buildup on filters and components. Verify CPU cooler and GPU cooler are properly installed.
- Cunnessioni loose: Re-seat all components (RAM, GPU, storage drives) and check all power and data cables.
9. Specificazioni
| Feature | Specificazione |
|---|---|
| Marca | COUGAR |
| Nome di mudellu | MX360 RGB |
| Numeru di mudellu di l'articulu | CGR-5CC6G-RGB |
| Tipu di casu | Mid Tower |
| Dimensioni (LxPxH) | 14.88 x 8.27 x 18.11 inch (378 x 210 x 460 mm) |
| Pesu di l'articulu | 10.56 liri (4.8 chilògrammi) |
| Materiale | Tempered Glass, Fine Metal |
| Culore | Neru |
| Supportu di a scheda madre | Mini ITX / Micro ATX / ATX |
| Max. Lunghezza di a carta grafica | 315 mm |
| Max. CPU Cooler Altezza | 170 mm |
| Supportu PSU | Standard ATX PS2 |
| Metudu di rinfrescante | Aria / Acqua |
| Supportu di radiatori | Front: 360mm / 280mm / 240mm / 140mm / 120mm Top: 280mm / 240mm / 140mm / 120mm Posteriore: 120 mm |
| Supportu di i fan | Frontale: 3 x 120 mm / 2 x 140 mm Top: 2 x 120 mm / 2 x 140 mm Posteriore: 1 x 120mm |
| Drive Bays | 3.5" HDD: 2 2.5" SSD: 2+2 (converted from 3.5" drive bays) |
| Panel I/O | USB 3.0 x 2, USB 2.0 x 1, Mic x 1, Audio x 1, RGB Button |
| Funzione speciale | ARGB LED Strips, Full-length PSU Cover for Cable Hiding and Improved Airflow |
10. Garanzia è Support
COUGAR products are designed and manufactured to the highest quality standards. For warranty information, please refer to the warranty card included with your product or visit the official COUGAR websitu. Conservate a vostra prova d'acquistu per e richieste di garanzia.
For technical support or further assistance, please visit the official COUGAR website or contact their customer service department. You can find more information and resources on the COUGAR Store on Amazon.


