1. Introduzione
Thank you for choosing the FLYLINKTECH BD10 6000A 12V Car Jump Starter and Power Bank. This device is designed to provide emergency jump-starting for vehicles and serve as a portable power bank for various electronic devices. Please read this manual thoroughly before use to ensure safe and optimal operation.

Image 1.1: The FLYLINKTECH BD10 Jump Starter unit with its smart battery clamps.
2. Informazioni di sicurezza
Osservate sempre e seguenti precauzioni di sicurezza per prevene ferite o danni à u dispusitivu o à u veiculu:
- Ùn pruvate micca di accende una batteria congelata.
- Assicuratevi di cunnessione di polarità curretta (clavu rossu)amp à pusitivu, neru clamp to negative). Reverse polarity can cause damage.
- Do not allow the smart clamps to touch each other when connected to the jump starter.
- Mantene u dispusitivu luntanu da i zitelli.
- Do not expose the device to extreme temperatures (above 60°C / 140°F or below -20°C / -4°F) or direct sunlight for extended periods.
- Ùn disassemble o mudificà u dispusitivu.
- Aduprate solu u cl intelligente furnitu.amps and charging cables.
- If the device becomes excessively hot during use, disconnect it immediately.

Image 2.1: The jump starter incorporates multiple safety features such as spark-proof, reverse polarity, overvoltage, short circuit, overload, and high-temperature protection.
3. Cuntenutu di u pacchettu
Verificate chì tutti l'articuli sò presenti in u pacchettu:
- FLYLINKTECH BD10 Jump Starter Unit
- Batteria intelligente Clamps
- Cavu USB-C à USB-C
- Cavu USB-A à USB-C
- 12V DC Car Charger Adapter
- Manuale d'usu
- Casu di almacenamentu

Image 3.1: The complete package includes the jump starter, smart clamps, various cables, user manual, and a protective storage case.
4. Setup è Charging
4.1 Carica iniziale
Before first use, fully charge the jump starter. The device features a 26800mAh battery capacity.
- Connect the provided USB-C cable to the jump starter's USB-C input port.
- Connect the other end of the cable to a compatible USB wall charger (not included). For fastest charging, use a PD 45W charger.
- The LED screen will display the charging status and battery percentage.
4.2 Tempi di carica
| Valutazione di u caricatore | Tempu di carica apprussimativu |
|---|---|
| 5W | 18 Ore |
| 18 W | 7 Ore |
| 45 W | 2 Ore |
Note: A 45W wall charger is not included in the package.

Image 4.1: The device supports PD 45W fast charging, significantly reducing recharge time when using a compatible charger.
5. Operating Instructions
5.1 Salta Starting a Vehicle
The FLYLINKTECH BD10 is capable of jump-starting all gas engines and diesel engines up to 12.0L.
- Assicurà una carica sufficiente: Check the jump starter's LED screen to ensure it has at least 50% charge.
- Cunnette Smart Clamps: Insert the blue plug of the smart clamps into the jump starter's 12V output port. Ensure a firm connection.
- Cunnette à a batteria di a vittura:
- Attaccà u rossu (+) clamp to the vehicle's positive battery terminal.
- Attaccà u neru (-) clamp to the vehicle's negative battery terminal.
- Indicatore di cuntrollu: U smart clamp indicator light should turn solid green, indicating a correct connection. If it flashes or shows red, check connections and battery status.
- Press BOOST (if needed): If the vehicle battery is extremely low or completely dead, press the 'BOOST' button on the jump starter. Wait for the indicator light on the smart clamps to turn solid green.
- Principià u veiculu: Attempt to start your vehicle. If it doesn't start on the first try, wait 30 seconds before trying again. Do not attempt more than 3 consecutive starts.
- Eliminate Clamps: Una volta chì u veiculu principia, caccià subitu u cl intelligente.amps da a batteria di a vittura, poi scollegali da u starter di avviamentu.

Image 5.1: The jump starter connected to a car battery, ready for operation. It supports 6000A peak current, 12V output, and is suitable for a wide range of engines.

Image 5.2: Visual guide illustrating the four steps to jump-start a vehicle: connect the plug, attach clamps, press boost, and start the engine.
5.2 Funzione di a batteria esterna
The BD10 can charge multiple electronic devices via its USB-A and USB-C ports.
- Uscita USB1: Up to 18W (max)
- Uscita USB2: Up to 18W (max)
- Uscita USB-C: Finu à 45 W (PD)
Connect your device using the appropriate USB cable to the desired output port. The LED screen will show 'OUT' and the wattage being drawn.

Image 5.3: The jump starter functioning as a power bank, simultaneously charging a smartphone and a tablet via its USB ports.
5.3 linterna LED
The built-in LED flashlight offers three modes: constant light, SOS signal, and strobe light.
- Press and hold the flashlight button to turn on the constant light.
- Press the button again to cycle through SOS and strobe modes.
- Mantene premutu novu per spegne.

Image 5.4: The integrated LED flashlight provides illumination, an SOS signal, and a strobe function for emergency situations.
5.4 Informative LED Screen
The 6.0-inch LED screen provides real-time information about the device's status:
- Livellu di batteria: Mostra u percentualità di a bateria restantetage.
- IN/OUT Indicator: Indica s'ellu u dispusitivu hè in carica (IN) o in scarica (OUT).
- Wattage Display: Indicates the power (W) being drawn or supplied.
- Avvisi d'errore: Displays specific error codes or symbols if an issue occurs.
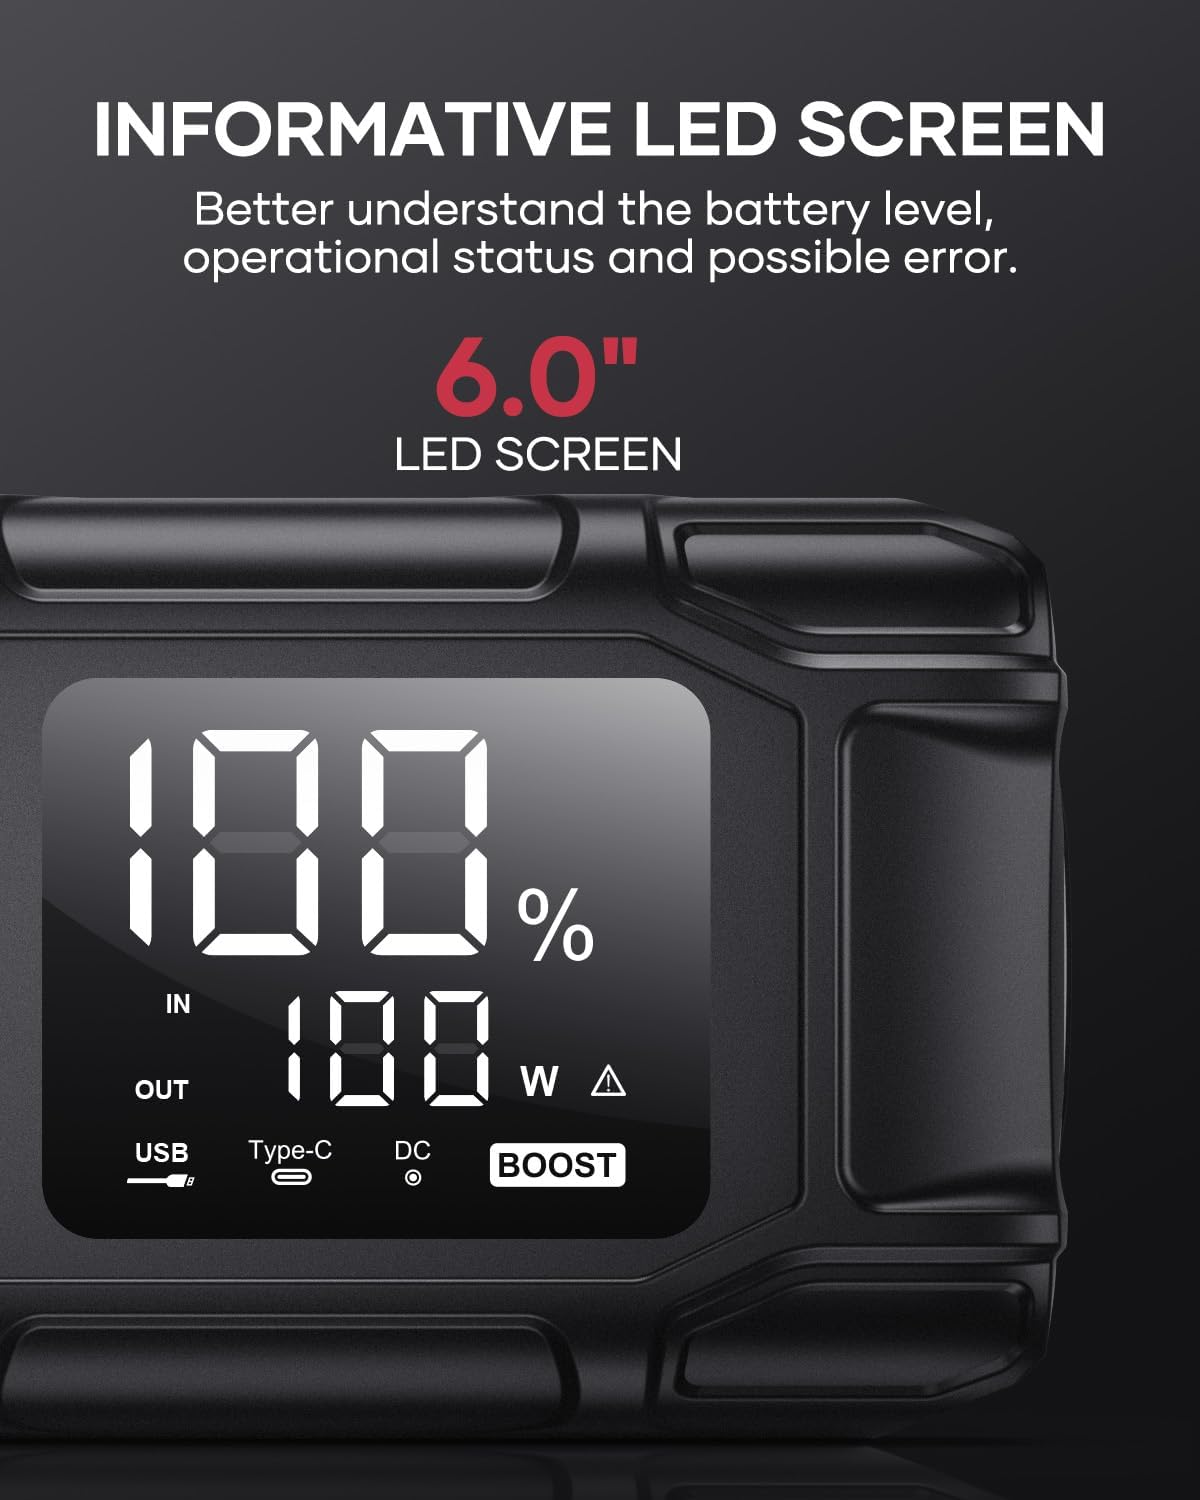
Image 5.5: The 6.0-inch LED screen provides clear information on battery percentage, input/output status, and power consumption.
6. Mantenimentu
- Ricarica regularmente: To prolong battery life, recharge the jump starter every 3-6 months, even if not in use.
- Conservazione: Store the device in its protective case in a cool, dry place, away from direct sunlight and moisture.
- Pulizia: Asciugate l'apparechju cù un pannu dolce è asciuttu. Ùn aduprate micca prudutti chimichi aggressivi o materiali abrasivi.
- Clamp Cura: Assicuratevi u cl intelligenteamps are clean and free of corrosion before and after each use.
7. Risoluzione di prublemi
The device features multiple alarm situations indicated by audible signals and screen displays:
- Low Voltage Prutezzione: Audible signal "3". Recharge the device.
- Vol Esternutage Exceeds Vehicle Voltage: Audible signal "4". Check vehicle battery voltage.
- Prutezzione di Cortu Circuitu: Audible signal "5". Check clamp connections for short circuits.
- Safety Mode Activated: Audible signal "6". Device has entered safety mode due to an issue.
- Prutezzione di sovracorrente: Audible signal "7". Reduce load or check connections.
- Alarma di alta / bassa temperatura: Audible signal "8". Allow device to return to operating temperature range (-20°C to 60°C).
- Reverse Connection: Audible signal "9". Correct the clamp polarità.

Image 7.1: Overview of the device's multi-alarm system, indicating various protection states with unique audible signals.
Sè i prublemi persistenu dopu avè seguitu sti passi, cuntattate l'assistenza clienti.
8. Specificazioni
| Feature | Specificazione |
|---|---|
| Marca | FLYLINKTECH |
| Mudellu | BD10 |
| Peak Output Current | 6000 Ampere |
| Capacità batterie | 26800 mAh |
| Uscita Voltage | 12V |
| Input / Output USB-C | PD 45 W |
| Uscita USB-A | 18 W (max) |
| Applicable Engine Types | All Gas, up to 12.0L Diesel |
| Temperature di funziunamentu | -20 °C à 60 °C (-4 °F à 140 °F) |
| Dimensioni di u produttu | 23.95 x 10 x 5.69 cm |
| Pesu di l'articulu | 920 g |

Image 8.1: The device is designed to operate reliably in extreme climates, from -20°C (-4°F) to 60°C (140°F).
9. Garanzia è Support
FLYLINKTECH is committed to providing high-quality products. For any questions, technical assistance, or warranty claims, please refer to the contact information provided with your purchase or visit the official FLYLINKTECH websitu. Per piacè cunservate a vostra prova d'acquistu per scopi di garanzia.


