Product Overview
The Thermalright Royal Knight 120 SE is a high-performance CPU air cooler designed for efficient heat dissipation. It features a dual-tower radiator, six copper heat pipes, and dual 120mm PWM fans. The cooler is engineered for broad compatibility with both AMD and Intel platforms, including AM4/AM5 and Intel LGA1851/1700/115X/1200 sockets, while ensuring clearance for RAM modules.
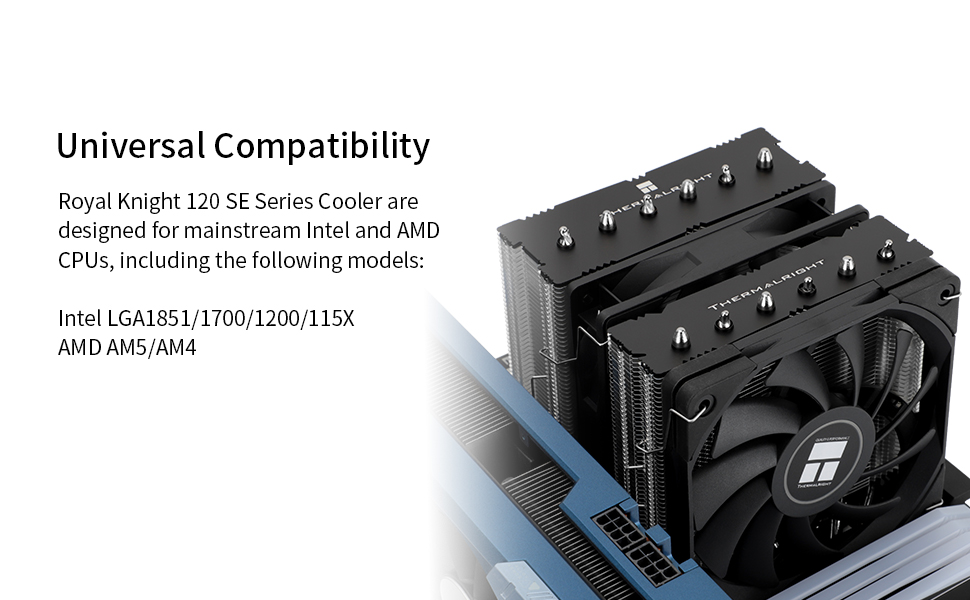
Image: The Royal Knight 120 SE CPU cooler from Thermalright, showcasing its dual-tower design and fans.
E caratteristiche chjave includenu:
- Twin Tower Radiator: Dimensions of 122mm (L) x 114mm (W) x 155mm (H), constructed from aluminum and copper for maximum heat dissipation. Features S-FDB bearings for fan longevity.
- Crooked Neck Design: Specifically designed to avoid interference with graphics cards and RAM modules, ensuring broad compatibility.
- Liquidazione RAM: The cooler's design and fan configuration (one standard 12cm fan, one thinner 12cm fan) prevent obstruction of RAM slots.
- 6 Heat Pipe Technology: Utilizes 6x6mm pure copper heat pipes with AGHP 5.0 technology to efficiently manage heat transfer in any orientation.
- Optimized Thermal Details: Soft silicone corner pads on fans reduce vibration and noise. Includes a Y-adapter cable for dual fan connection to a single motherboard header.
- Ampia cumpatibilità: Supports AMD AM4/AM5 and Intel LGA1851/1700/1150/1151/1155/1156/1200 platforms.
Chì ci hè in u Box
The Thermalright Royal Knight 120 SE CPU Air Cooler package includes all necessary components for installation on supported platforms:
- Thermalright Royal Knight 120 SE Heatsink with pre-installed fans
- Intel Mounting Brackets (x2)
- AMD Mounting Brackets (x2)
- Thermal Compound (x1)
- LGA115X/1200 Plastic Standoffs (Black, x4)
- LGA1851/1700 Plastic Standoffs (Blue, x4)
- AMD Plastic Standoffs (Red, x4)
- Intel Mounting Screws (x4)
- AM4/AM5 Mounting Screws (x4)
- Fan Y-cable (x1)
- Intel 115X/1700 Backplate (x1)
- Slim Fan Clips (x2)
- Standard Fan Clips (x2)
Video: An installation guide for the Thermalright RK120 series CPU cooler, showing all included components and installation steps for both AMD and Intel platforms.
Specificazioni
| Feature | Detail |
|---|---|
| Dimensioni di u produttu | 122 mm (L) x 114 mm (L) x 155 mm (H) |
| Marca | Dirittu termale |
| Tipu di Connettore di Alimentazione | 4-Pin PWM |
| Voltage | 12 Volts |
| Metudu di rinfrescante | Raffreddamentu d'aria |
| Dispositivi compatibles | Desktop CPUs (AMD AM4/AM5; Intel LGA1851/1700/115X/1200) |
| Livellu di rumore | 26.1 Decibel (Massimu) |
| Materiale | Alette in alluminio, tubi di calore in rame |
| Velocità di rotazione massima | 1800 RPM |
| Capacità di Flussu d'Aria | 66.17 Piedi Cubi Per Minute (CFM) |
| Pesu di l'articulu | 3.08 liri |
Guida d'installazione
This section provides detailed instructions for installing your Thermalright Royal Knight 120 SE CPU Air Cooler. Please refer to the included video for visual guidance.
Preparazione generale
- Assicuratevi chì u vostru urdinatore sia spento è scollegatu da a presa murale.
- Open your computer case to access the motherboard and CPU socket.
- Remove any existing CPU cooler and clean off old thermal paste from the CPU's Integrated Heat Spreader (IHS) using isopropyl alcohol.
- Identify your CPU socket type (AMD AM4/AM5 or Intel LGA1851/1700/115X/1200) to select the correct mounting hardware.
Installazione AMD AM4/AM5
- Eliminate i supporti di stock: For AMD AM5 and AM4 motherboards, remove the motherboard's pre-installed plastic CPU cooler retention brackets. Keep the original backplate on the motherboard.

Image: A hand unscrewing and removing the plastic retention brackets from an AMD motherboard, revealing the CPU socket.
- Installa Standoffs: Place the four red plastic standoffs onto the screw holes around the CPU socket.

Image: Red plastic standoffs being placed onto the four mounting holes around an AMD CPU socket.
- Attach AMD Brackets: Install the two metal AMD mounting brackets onto the red standoffs, securing them with the provided AM4/AM5 screws. Tighten them evenly with a screwdriver.
Installazione Intel LGA1700
- Preparà a piastra posteriore: Adjust the mounting hole position on the universal backplate to "1700" for LGA1700 sockets.
- Installà a piastra posteriore: From the back side of the motherboard, install the adjusted backplate, aligning its holes with the motherboard's CPU cooler mounting holes.
- Installa Standoffs: From the front side of the motherboard, install the four blue Intel 1700 plastic standoffs onto the backplate's posts.

Image: Blue plastic standoffs being installed on an Intel LGA1700 motherboard around the CPU socket.
- Attach Intel Brackets: Install the metal Intel mounting brackets onto the blue standoffs. Use the Intel screws, passing them through the LGA1700 holes on the brackets, and secure them to the standoffs. Tighten evenly.
Heatsink and Fan Installation (Common Steps)
- Applicà u cumpostu termicu: Apply a small amount of the provided thermal compound (pea-sized dot or thin line) to the center of your CPU's IHS.
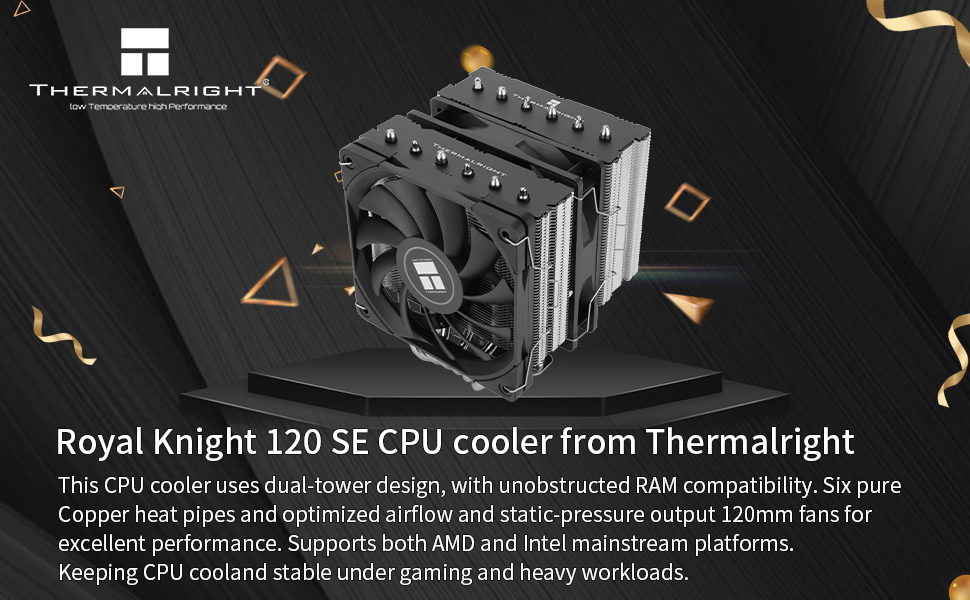
Image: Thermal compound being applied to the Integrated Heat Spreader (IHS) of a CPU.
- Eliminate l'adesivu protettivu: Peel off the protective sticker from the heatsink's coldplate before mounting.
- Dissipatore di calore di muntatura: Carefully place the heatsink onto the CPU, aligning the heatsink's mounting nuts with the screws on the installed metal brackets.
- Dissipatore di calore sicuru: Using a screwdriver, alternately tighten the nuts on the heatsink bracket to apply even mounting pressure. Do not overtighten.
- Installate i clip di u ventilatore: Attach the short fan clips to the slim 120mm fan and the standard fan clips to the regular 120mm fan.

Image: The two included 120mm fans, a standard TL-C12B V2 and a slim TL-C12015B, ready for clip installation.
- Attach Fans: Clip the fans onto the heatsink using the installed fan clips. Ensure the airflow direction is correct (typically blowing towards the rear of the case). The slim fan is usually placed on the RAM side for clearance.
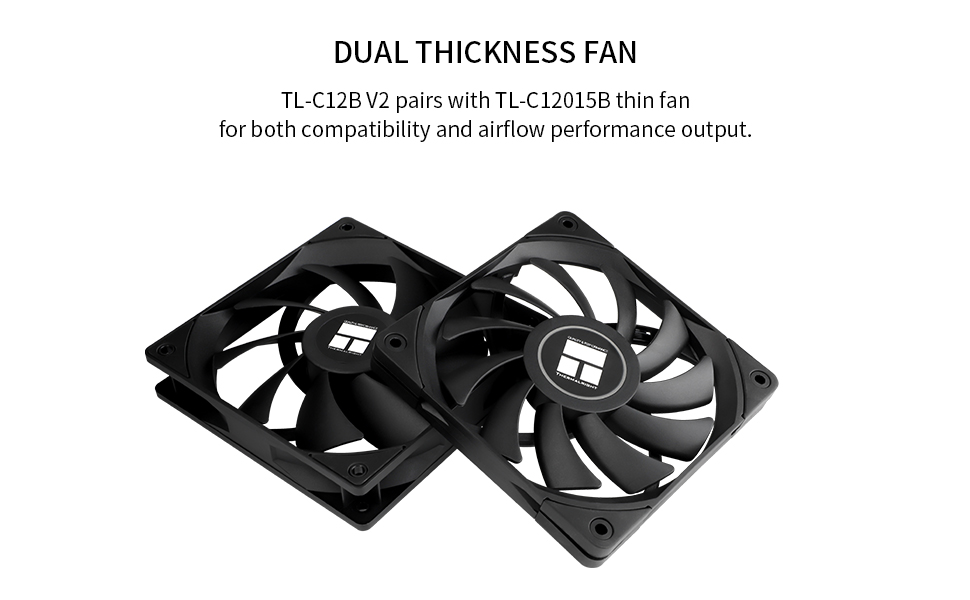
Image: The Royal Knight 120 SE cooler installed on a motherboard, demonstrating full RAM compatibility due to its offset design and slim fan.
- Cunnette i cavi di u ventilatore: Connect both 4-pin fan connectors to the provided Y-cable. Then, connect the Y-cable to the CPU_FAN header on your motherboard. This ensures both fans operate in sync.
Istruzzioni di funziunamentu
Once installed, the Thermalright Royal Knight 120 SE CPU Air Cooler operates automatically based on your motherboard's fan control settings. The PWM (Pulse Width Modulation) fans adjust their speed according to CPU temperature, providing optimal cooling performance while minimizing noise.
- Impostazioni BIOS/UEFI: You can typically adjust fan curves and monitoring settings in your motherboard's BIOS/UEFI. Ensure the CPU_FAN header is set to PWM mode for proper fan speed control.
- Monitoring Software: Use third-party software (e.g., HWMonitor, MSI Afterburner, or motherboard-specific utilities) to monitor CPU temperatures and fan speeds to ensure optimal performance.
- Avvio iniziale: After installation, perform an initial boot to BIOS/UEFI to confirm the cooler is recognized and fans are spinning.
Mantenimentu
Regular maintenance helps ensure the longevity and optimal performance of your CPU cooler:
- Rimozione di polvere: Periodically clean dust from the heatsink fins and fan blades using compressed air or a soft brush. Dust accumulation can significantly reduce cooling efficiency.
- Ispezione di u ventilatore: Check fan blades for any obstructions or damage. Ensure fans spin freely and quietly. If a fan becomes excessively noisy or stops spinning, it may need replacement.
- Riapplicazione di pasta termica: While not frequently required, reapplying thermal paste every 2-3 years (or if the cooler is removed) can help maintain optimal thermal transfer.
- Gestione di Cable: Ensure fan cables are neatly routed and not interfering with fan blades or other components.
Risoluzione di prublemi
If you encounter issues with your CPU cooler, consider the following troubleshooting steps:
- Temperature elevate di a CPU:
- Verify the heatsink is securely mounted and making full contact with the CPU.
- Check if thermal paste was applied correctly and evenly. Reapply if necessary.
- Ensure fans are spinning and oriented correctly for optimal airflow (blowing air through the heatsink and out of the case).
- Clean any dust buildup from the heatsink fins and fans.
- Check case airflow; ensure adequate intake and exhaust fans.
- Fans Not Spinning or Excessive Noise:
- Confirm fan cables are securely connected to the Y-cable and the Y-cable to the motherboard's CPU_FAN header.
- Check BIOS/UEFI settings to ensure fan control is enabled and set to PWM mode.
- Inspect fans for any physical obstructions or damaged blades.
- If a fan is making unusual noises (e.g., grinding, rattling), the bearings may be failing, and the fan might need replacement.
- Difficultà d'installazione:
- Refer to the installation video and step-by-step instructions carefully.
- Ensure you are using the correct mounting hardware for your specific CPU socket (AMD or Intel).
- Do not force components; if something doesn't fit, re-check the instructions and component selection.
Garanzia è Supportu
Per infurmazioni nantu à a garanzia è l'assistenza tecnica, vi pregu di cunsultà u situ ufficiale di Thermalright. websitu o cuntattate direttamente u so serviziu clienti. Conservate a vostra prova d'acquistu per qualsiasi reclamu di garanzia.
This product typically includes a return policy of 30 days from the date of purchase. Specific warranty terms may vary by region and retailer.


