1. Introduzione
This manual provides essential instructions for setting up, operating, and maintaining your CONSUMER CELLULAR Iris Connect smartphone. The Iris Connect is designed for reliable performance, featuring a 6.5-inch display, 32GB of storage, and running on Android 13. Please read this manual thoroughly to ensure proper use and to maximize your device's capabilities.
2. Ciò chì hè in a scatula
Upon unboxing your CONSUMER CELLULAR Iris Connect, verify that all the following items are included:
- CONSUMER CELLULAR Iris Connect Smartphone
- Cavu USB
- Guida Quick Start
3. Dispositivu Finituview
Familiarize yourself with the physical components of your Iris Connect smartphone.

Figura 3.1: Fronte è daretu view of the Iris Connect smartphone, highlighting its sleek design and camera placement.

Figura 3.2: Fronte view of the Iris Connect, showcasing the 6.5-inch display and front-facing camera.
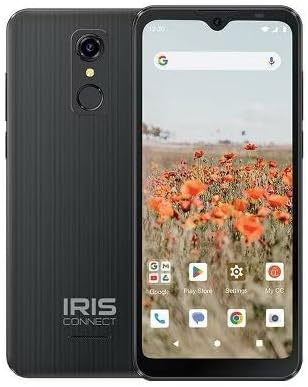
Figura 3.3: Torna view of the Iris Connect, showing the main camera, flash, and fingerprint sensor.
Cumpunenti chjave:
- Display 6.5-inch: High Definition+ screen for clear visuals.
- Camera frontale (8MP): Located at the top of the display for selfies and video calls.
- Fotocamera principale (13MP): Located on the rear, for high-resolution photos and videos.
- Scanner di Impronte Digitali: Integrated on the rear for secure unlocking.
- Pulsante di putenza: Typically on the right side, used to turn the device on/off or wake/sleep the screen.
- Pulsanti di volume: Accantu à u buttone di accensione, per aghjustà i livelli audio.
- Portu USB-C: In fondu, per a carica è u trasferimentu di dati.
- Jack audio da 3.5 mm: Per cunnessione di cuffie.
4. Setup
4.1. Inserimentu di a carta SIM è di a carta MicroSD
- Truvate u cassettu SIM à u latu di u vostru dispositivu.
- Insert the SIM ejector tool (not included, use a thin paperclip) into the small hole next to the tray and press gently until the tray pops out.
- Place your Nano-SIM card(s) into the designated slots with the gold contacts facing down.
- If desired, insert a microSD card (up to 256GB) into its dedicated slot for expanded storage.
- Riinserite cù cura u vassoio in u dispusitivu finu à chì si sente un clic in u so postu.
4.2. Accensione iniziale è assistente di cunfigurazione
- Appughjà è tene premutu Pulsante di putenza finu à chì u schermu s'illumina.
- Segui l'istruzzioni nantu à u screnu per selezziunà a vostra lingua, cunnette vi à una rete Wi-Fi è cunfigurà u vostru contu Google.
- You may be prompted to transfer data from an old device or set up security features like the fingerprint scanner.
4.3. Charging u dispusitivu
Before first use, it is recommended to fully charge your device. The Iris Connect features a 3500 mAh battery with an approximate charging time of 2.5 hours.
- Cunnette u cavu USB à u portu USB-C in fondu à u vostru telefunu.
- Connect the other end of the USB cable to a compatible power adapter (not included) and plug it into a wall outlet.
- L'indicatore di carica apparirà nantu à u screnu.
5. Operating Instructions
5.1. Navigazione basica
- Touch: Toccate una icona per apre una applicazione o selezziunà un articulu.
- Swipe: Trascinate u ditu nantu à u screnu per scorrere o navigà trà e schermate.
- Pizzicà: Aduprate dui dite per zoomà in o in zoomà e foto è web pagine.
- Pantalla di casa: U centru cintrali per e vostre app è widget.
- App Drawer: Scorri in sù da u screnu principale per accede à tutte l'applicazioni installate.
5.2. Fà Chjama
- Toccate u telefonu icon on your home screen or app drawer.
- Inserite u numeru di telefonu cù u tastieru numericu o selezziunate un cuntattu da u vostru libru d'indirizzi.
- Toccate u Chjama buttone per inizià a chjama.
5.3. Mandatu missaghji
- Aprite u Missaghji app.
- Toccate u Cumincià a chat or Novu missaghju icona.
- Inserite u numeru di u destinatariu o selezziunate da i cuntatti, dopu scrivite u vostru messagiu.
- Toccate u Mandate buttone.
5.4. Connecting à Wi-Fi
- Andà à Settings > Rete è Internet > Internet.
- Attivà/disattivà u Wi-Fi On.
- Selezziunate a rete Wi-Fi desiderata da a lista è inserite a password se richiesta.
5.5. Abbinamentu Bluetooth
- Andà à Settings > Dispositivi cunnessi > Preferenze di cunnessione > Bluetooth.
- Toggle Bluetooth On.
- Selezziunà Coppia un novu dispositivu and choose your desired device from the list. Follow any on-screen prompts to complete pairing.
5.6. Camera Usage
The Iris Connect features a 13MP main camera and an 8MP front-facing camera.
- Aprite u Camera app.
- Toccate u Otturatore buttone per piglià una foto.
- Switch between photo and video modes, or front and rear cameras, using the on-screen icons.
5.7. Scanner di impronte digitali
To set up the fingerprint scanner for secure unlocking:
- Andà à Settings > Sicurezza è privacy > Sbloccare u dispusitivu > impronta digitale.
- Segui l'istruzzioni nantu à u screnu per registrà a vostra (e) impronta (e) digitale (i).
6. Mantenimentu
6.1. Pulizia di u Dispositivu
To keep your device clean and functional:
- Aduprate un pannu dolce è senza pelu per asciugà u schermu è u corpu.
- Evitate l'usu di prudutti chimichi aggressivi, detergenti abrasivi o spray aerosol.
- Assicuratevi chì i porti sianu liberi da polvere è detriti.
6.2. Cura di batterie
To optimize your battery life (up to 26 hours of use):
- Evite temperature estreme.
- Do not leave the device charging for extended periods after it's full.
- Adjust screen brightness and close unused apps to conserve power.
6.3. Updates Software
Regularly check for software updates to ensure your device has the latest features and security patches:
- Andà à Settings > Sistema > Actualizazione di u sistema.
- Segui l'istruzzioni nantu à u screnu per scaricà è installà qualsiasi aghjurnamenti dispunibili.
7. Risoluzione di prublemi
This section addresses common issues you might encounter with your Iris Connect smartphone.
- U dispositivu ùn si accende micca: Assicuratevi chì a batteria sia carica. Cunnette u caricatore è aspettate uni pochi di minuti prima di pruvà à accende di novu.
- Nisun signale di rete: Check if your SIM card is correctly inserted. Verify that Airplane Mode is off (swipe down from the top of the screen to check quick settings). Contact your service provider if the issue persists.
- L'applicazioni si bloccanu o si bloccanu: Try restarting the app. If the issue continues, restart the phone. You may also clear the app's cache or data via Settings > Apps > [Nome di l'applicazione] > Archiviazione è cache.
- Prestazione lenta: Close unused apps, clear cache, or consider uninstalling rarely used applications to free up storage.
- Unable to connect to Wi-Fi/Bluetooth: Ensure Wi-Fi/Bluetooth is enabled in settings. Try forgetting the network/device and reconnecting. Restart your phone and the router/Bluetooth device.
- Forgot screen lock password/pattern: Sè vo avete un contu Google ligatu, pudete esse capace di resettallu. Altrimenti, un reset di fabbrica pò esse necessariu (questu cancellerà tutti i dati).
For more complex issues, please refer to the official CONSUMER CELLULAR support resources or contact their customer service.
8. Specificazioni
Detailed technical specifications for the CONSUMER CELLULAR Iris Connect smartphone (Model: SH4650).
| Feature | Specificazione |
|---|---|
| Nome di mudellu | Iris Connect |
| Numero di mudellu | SH4650 |
| Sistema upirativu | Android 13.0 |
| Size Display | 6.5 inch |
| Risoluzione di visualizazione | 1440 x 810 |
| U mudellu CPU | Snapdragon 710 |
| A velocità di CPU | 2 GHz |
| Dimensione installata di a memoria RAM | 3 GB |
| Storage internu | 32 GB |
| Storage espansibile | Finu à 256GB via microSD |
| Camera principale | 13 MP |
| Camera frontale | 8 MP |
| Capacità batterie | 3500 XNUMX Milliamp Ore |
| Valutazione di a putenza di a batteria | 3600 (likely Wh or similar unit, as mAh is 3500) |
| Tempu di carica | 2.5 Ore |
| Connettività | 4G LTE, Bluetooth, Wi-Fi |
| Funzioni spiciali | Dual Camera, Expandable Storage, Fingerprint Scanner, Long Battery Life |
| Jack Audio | 3.5 millimetri |
| Dimensioni | 8 x 6 x 3 inch |
| Pesu di l'articulu | 6.5 once |
9. Garanzia è Support
For information regarding your product's warranty, please refer to the warranty card included with your purchase or visit the official CONSUMER CELLULAR website. For technical assistance, troubleshooting beyond this manual, or customer service inquiries, please contact CONSUMER CELLULAR support directly.
CONSUMER CELLULAR Official Websitu: www.consumercellular.com


