Introduzione
This manual provides comprehensive instructions for the assembly, operation, and maintenance of your Perlegear Dual Monitor Stand with Integrated Power Strip, model PGTVS41B. This freestanding monitor stand is designed to support two monitors, enhancing your workspace ergonomics and organization. Please read this manual thoroughly before installation and use to ensure proper setup and safe operation.
Informazioni di sicurezza
- Assicuratevi chì tutti i cumpunenti sianu presenti è intatti prima di u montaggio. Ùn aduprate micca se qualchì parte manca o hè difettosa.
- Verify that your monitors' weight and VESA patterns are within the specified limits (up to 22 lbs per arm, VESA 75x75mm or 100x100mm).
- Do not overtighten screws during assembly to prevent damage to components.
- Tenite luntanu i zitelli è l'animali domestici durante u montaggio. E piccule parti ponu presentà un periculu di suffocazione.
- Pone u supportu nantu à una superficia stabile è piana per impedisce u ribaltamentu.
- Do not exceed the electrical ratings of the integrated power strip.
Cuntenutu di u pacchettu
Verificate chì tutti i cumpunenti seguenti sò inclusi in u vostru pacchettu:
- Base di vetru
- Main Support Pole with Integrated Power Strip
- Braccia dual monitor
- VESA Plates (x2)
- Hardware Kit (screws, washers, spacers, Allen wrenches)
- Power Cable (6.5ft)
- Clips di Gestione di Cavi
Istruzzioni di stallazione
Follow these steps to assemble your Perlegear Dual Monitor Stand:
- Step 1: Assemble the Base and Pole
Attach the main support pole to the glass base using the provided screws and Allen wrench. Ensure it is securely fastened and stable.

Image: Fully assembled Perlegear Dual Monitor Stand, showing the main pole, monitor arms, and glass base.
- Step 2: Attach Monitor Arms
Slide the dual monitor arms onto the main support pole. Adjust their height to your preference and secure them with the locking mechanism.
- Passu 3: Attach Plates VESA à Monitors
Carefully attach the VESA plates to the back of your monitors using the appropriate screws, washers, and spacers from the hardware kit. Ensure the VESA pattern (75x75mm or 100x100mm) matches your monitor.

Image: Diagram illustrating VESA compatibility (75x75mm, 100x100mm) and supported monitor sizes (13-32 inches) and weight (22 lbs per arm).
- Step 4: Mount Monitors
With assistance if needed, carefully slide the monitors (with attached VESA plates) onto the monitor arms. Ensure they click into place securely.
- Step 5: Connect Power Strip
Plug the provided 6.5ft power cable into the integrated power strip on the main pole, then connect it to a wall outlet. The power strip includes 1 USB-A port (5V/2.1A), 1 USB-C port (5V/2.1A), and 3 AC outlets (120V/12A).
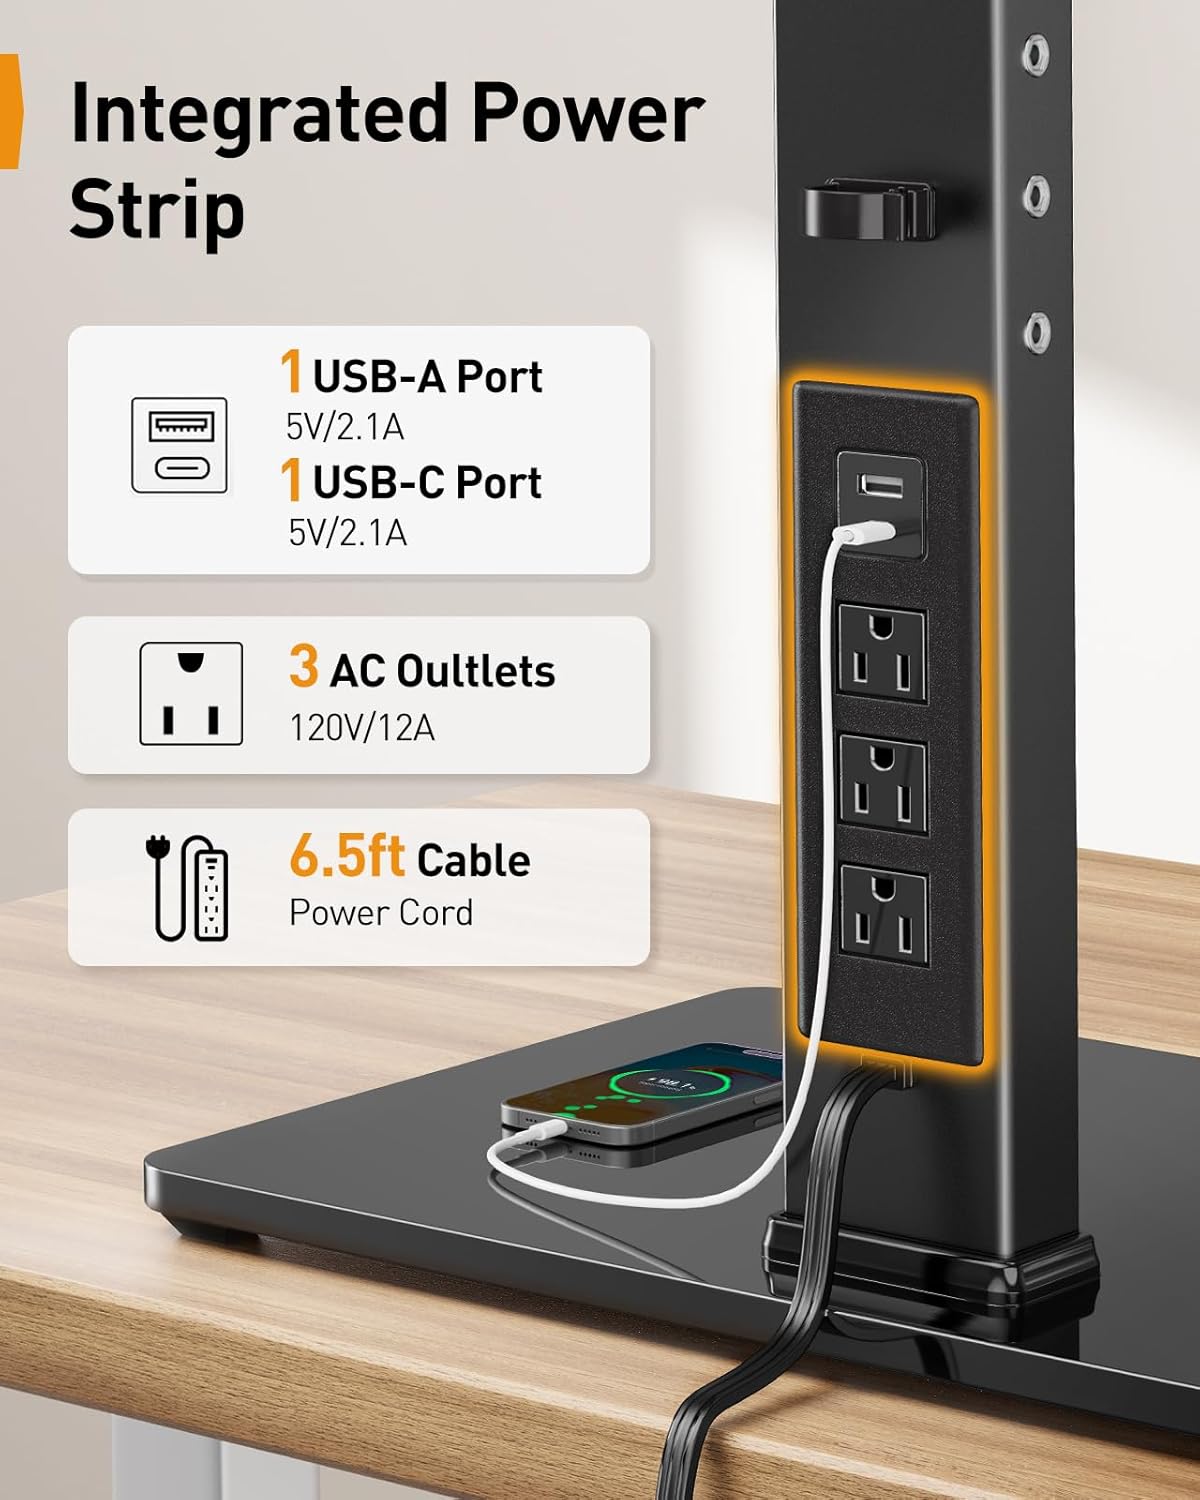
Imagine: Primu pianu view of the integrated power strip, detailing the USB-A, USB-C, and three AC outlets, along with the 6.5ft power cable.
- Passu 6: Management Cable
Route monitor cables and power cords through the integrated cable management clips on the pole and arms to maintain a tidy workspace.

Imagine: Un example of a streamlined workspace utilizing the monitor stand's cable management features, showing monitors, keyboard, and other peripherals.
Istruzzioni di funziunamentu
The Perlegear Dual Monitor Stand offers various adjustments for optimal viewing cunfortu.
- Ajustamentu di l'altezza: The monitor stand has four height settings, allowing you to adjust the screen height from 10.79 inches to 14.92 inches. This helps achieve an ergonomic viewing angle, reducing neck and eye strain.
- Ajustamentu di l'inclinazione: Each monitor can be tilted ±45° to reduce glare and find your preferred viewing angulu.
- Ajustamentu di rotazione: Monitors can swivel ±90° horizontally, allowing for easy screen sharing or multi-user setups.
- Ajuste di rotazione: Rotate your monitors 360° to switch between landscape and portrait orientation effortlessly.
- Posizionamentu Flessibile di u Bracciu: The monitor arms feature multiple joints that allow for flexible positioning, including ±105° articulation at the main arm joints and ±90° swivel at the monitor attachment point.
- Usendu a presa multipla: Plug your devices into the USB-A, USB-C, or AC outlets on the integrated power strip for convenient desktop power access.
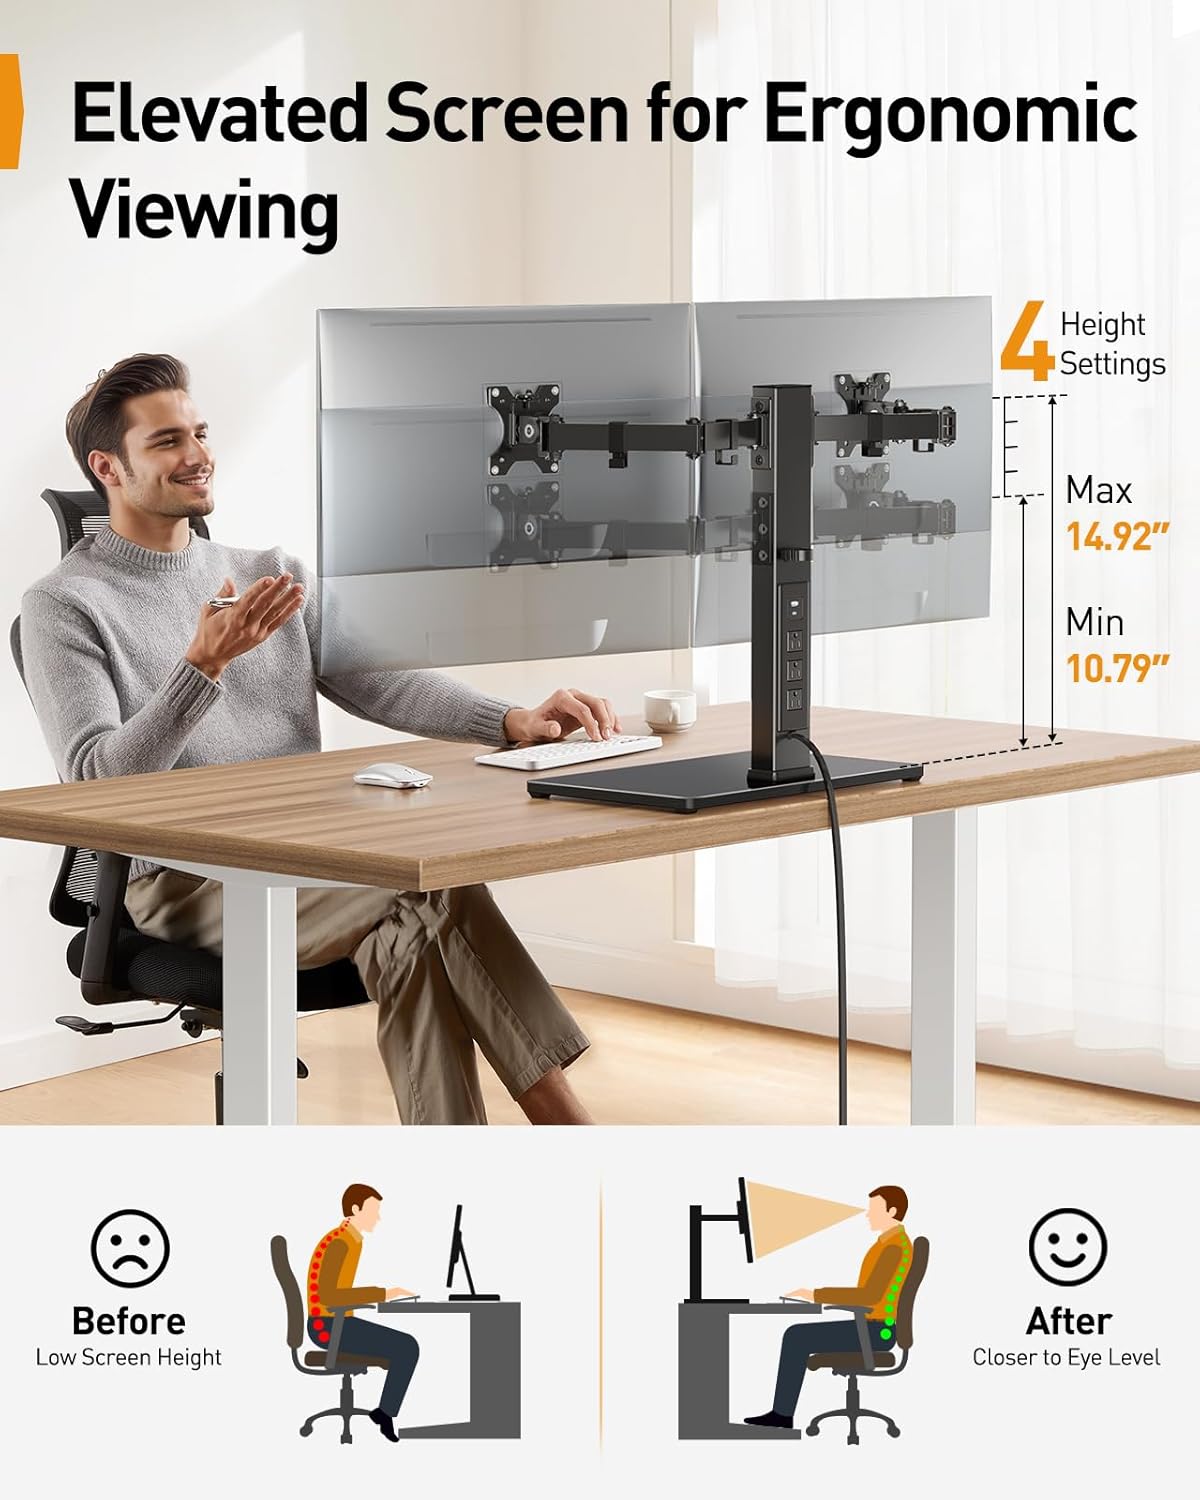
Image: Illustration demonstrating the ergonomic benefits of adjustable screen height, showing a user with correct posture and the stand's height range (10.79" to 14.92").

Image: Diagrams illustrating the ±45° tilt, ±90° swivel, and 360° rotation capabilities of the monitor mounts.

Imagine: Sopra view demonstrating the flexible articulation of the monitor arms, showing ±105° movement at various joints and ±90° swivel for screen positioning.
Mantenimentu
To ensure the longevity and proper function of your monitor stand:
- Pulizia: Wipe the stand and base with a soft, dry cloth. For stubborn marks, a slightly damp Si pò aduprà un pannu, dopu l'asciugatura. Evitate detergenti abrasivi o solventi.
- Cuntrolli periodici: Verificate periodicamente tutte e viti è e cunnessione per assicurassi ch'elle restinu strette è sicure. Stringhjite di novu se necessariu.
- Gestione di Cable: Ensure cables are not pinched or excessively strained. Adjust cable routing as needed.
Risoluzione di prublemi
Sè avete prublemi cù u vostru supportu di monitor, riferitevi à e seguenti suluzioni cumuni:
- U stand hè traballante: Ensure the base is on a flat, stable surface. Check all assembly screws, especially those connecting the pole to the base and the arms to the pole, are securely tightened.
- I monitori ùn sò micca livellati: Adjust the tilt and height of individual monitor arms to align them. Ensure VESA plates are securely attached to monitors.
- A presa multipla ùn funziona micca: Verify the main power cable is securely plugged into both the stand and a functional wall outlet. Check if the wall outlet is receiving power. Ensure devices are properly plugged into the power strip.
- Difficultà à aghjustà a pusizione di u monitor: Loosen the adjustment screws slightly, make the adjustment, then retighten to secure the position. Do not force adjustments.
Specificazioni
| Mudellu | PGTVS41B |
| Monitor Compatibilità | 13" - 32" Flat or Curved Screens |
| Capacità di pesu | Finu à 22 lbs (10 kg) per bracciu |
| VESA Patterns | 75x75mm, 100x100mm |
| Gamma di regulazione di l'altezza | 10.79" - 14.92" (27.4 cm - 37.9 cm) |
| Angle d'inclinaison | ± 45 ° |
| Angulu di rotazione | ± 90 ° |
| Rotazione | 360° |
| Ciabatta integrata | 1x USB-A (5V/2.1A), 1x USB-C (5V/2.1A), 3x AC Outlets (120V/12A) |
| Lunghezza di u cable d'alimentazione | 6.5 ft (2 metri) |
| Materiale | Carbon Steel, Tempered Glass |
| Culore | Neru |
Garanzia è Supportu
Perlegear products are designed for durability and performance. For warranty information or technical support, please refer to the contact details provided with your purchase or visit the official Perlegear website. Our customer service team is available to assist you with any questions or concerns regarding your product.


